Dell Vostro 330 User Manual - Page 2
Quick Setup, Set up the rear stand.
 |
View all Dell Vostro 330 manuals
Add to My Manuals
Save this manual to your list of manuals |
Page 2 highlights
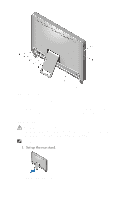
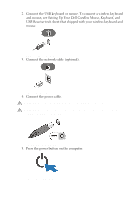
Figure 2. Back View 1. USB 2.0 connectors (4) 2. line-out connector 3. network connector 4. power connector 5. rear stand Quick Setup 6. cooling vents 7. security cable slot 8. optical-drive eject button 9. optical drive WARNING: Before you begin any of the procedures in this section, read the safety information that shipped with your computer. For additional best practices information, see www.dell.com/regulatory_compliance. NOTE: Some devices may not be included if you did not order them. 1. Set up the rear stand. Figure 3. Rear Stand setup 2
-
 1
1 -
 2
2 -
 3
3 -
 4
4 -
 5
5 -
 6
6 -
 7
7
 |
 |
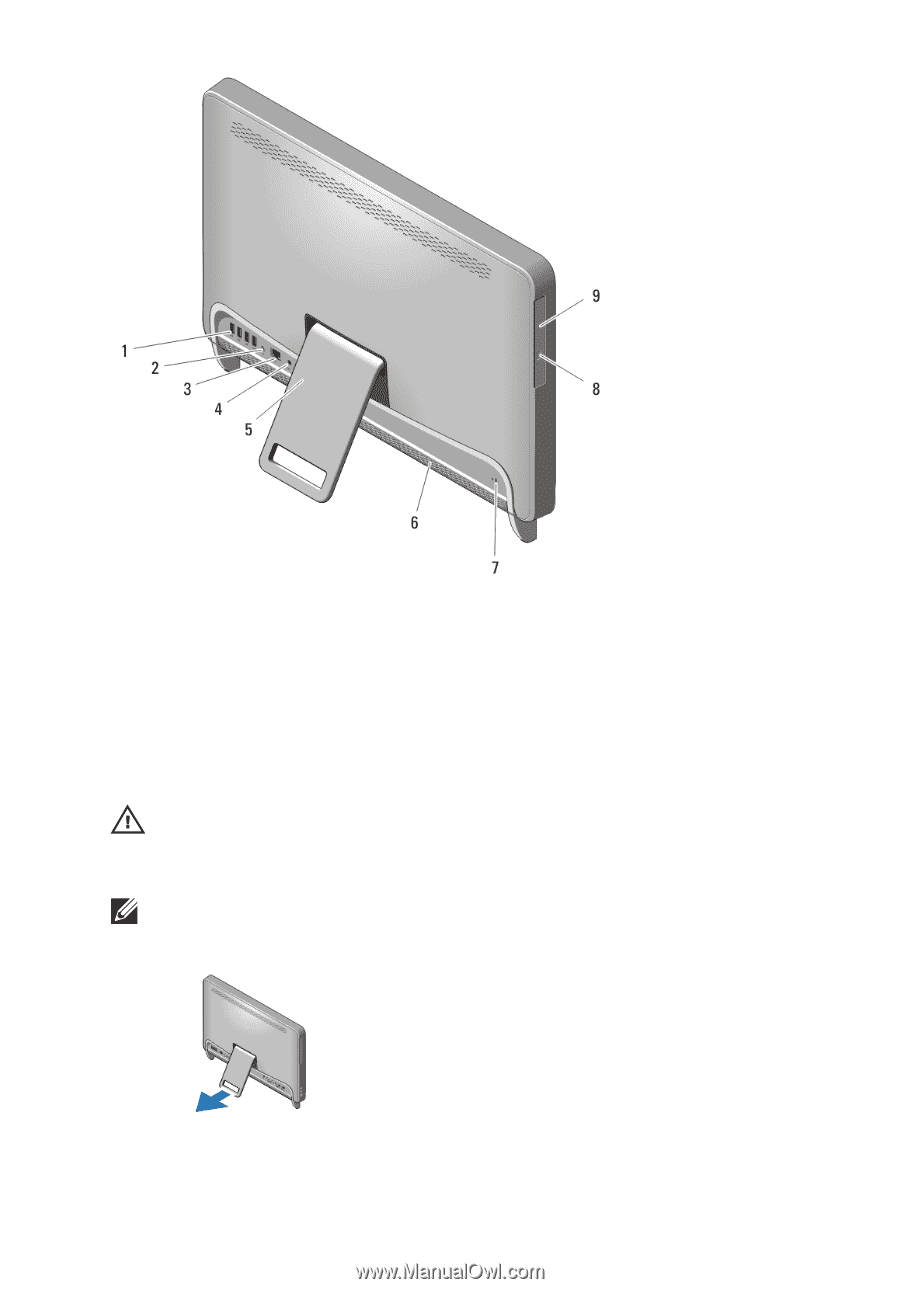
Figure 2. Back View
1.
USB 2.0 connectors (4)
2.
line-out connector
3.
network connector
4.
power connector
5.
rear stand
6.
cooling vents
7.
security cable slot
8.
optical-drive eject button
9.
optical drive
Quick Setup
WARNING: Before you begin any of the procedures in this section, read the safety
information that shipped with your computer. For additional best practices
information, see www.dell.com/regulatory_compliance.
NOTE:
Some devices may not be included if you did not order them.
1.
Set up the rear stand.
Figure 3. Rear Stand setup
2