Dell W-Series 205H AP-205H-MNTR Desk Mount Kit Installation Guide - Page 1
Dell W-Series 205H Manual
 |
View all Dell W-Series 205H manuals
Add to My Manuals
Save this manual to your list of manuals |
Page 1 highlights
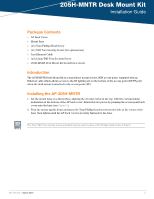
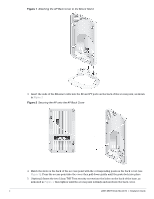
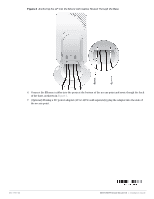
205H-MNTR Desk Mount Kit Installation Guide Package Contents AP Back Cover Mount Base (x1) 7mm Phillips Head Screw (x1) T8H Torx Security Screw (for optional use) 5cm Ethernet Cable (x2) 12mm T8H Torx Security Screw 205H-MNTR Desk Mount Kit Installation Guide Introduction The 205H-MNTR Desk Mount Kit is a stand-alone mount for the 205H access point, equipped with an Ethernet cable which allows access to the E0 uplink port on the bottom of the access point (E0/PT port) when the desk mount is attached to the access point (AP). Installing the AP-205H-MNTR 1. Set the mount base on a flat surface, aligning the circular cutout at the top, with the corresponding indentation at the bottom of the AP back cover. Attach the two pieces by pressing the access point back cover onto the base (see Figure 1). 2. Turn the mount upside down and insert the 7mm Phillips head screw into the hole at the center of the base, then tighten until the AP back cover is securely fastened to the base. The 7mm T8H Torx security screw provided may be used in place of the Phillips head screw in Step 2. 0511761-03 | March 2015 1
-
 1
1 -
 2
2 -
 3
3
 |
 |