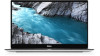
Dell XPS 13 9380 XPS 9380 Service Manual
Dell XPS 13 9380 Manual
 |
View all Dell XPS 13 9380 manuals
Add to My Manuals
Save this manual to your list of manuals |
Dell XPS 13 9380 manual content summary:
- Dell XPS 13 9380 | XPS 9380 Service Manual - Page 1
XPS 9380 Service Manual Computer Model: XPS 9380 Regulatory Model: P82G Regulatory Type: P82G002 - Dell XPS 13 9380 | XPS 9380 Service Manual - Page 2
data and tells you how to avoid the problem. WARNING: A WARNING indicates a potential for property damage, personal injury, or death. © 2018-2019 Dell Inc. or its subsidiaries. All rights reserved. Dell, EMC, and other trademarks are trademarks of Dell Inc. or its subsidiaries. Other trademarks may - Dell XPS 13 9380 | XPS 9380 Service Manual - Page 3
of an ESD field service kit...10 ESD protection summary ...10 Transporting sensitive components...11 Lifting equipment ...11 4 Recommended tools...12 5 Screw list...13 6 Removing the base cover...15 Procedure...15 7 Replacing the base cover...17 Procedure...17 8 Removing the battery...19 Lithium-ion - Dell XPS 13 9380 | XPS 9380 Service Manual - Page 4
13 Replacing the speakers...28 Procedure...28 Post-requisites...28 14 Removing the coin-cell battery...29 Prerequisites...29 Procedure...29 15 Replacing the coin-cell battery 36 20 Removing the headset port...37 Prerequisites...37 Procedure...37 21 Replacing the headset port...39 Procedure...39 Post- - Dell XPS 13 9380 | XPS 9380 Service Manual - Page 5
...47 Post-requisites...48 Entering the Service Tag in the BIOS setup program drivers...55 Intel Chipset Software Installation Utility...55 Video drivers...55 Intel Serial IO driver...55 Intel Trusted Execution Engine Interface...55 Intel Virtual Button driver...55 Wireless and Bluetooth drivers - Dell XPS 13 9380 | XPS 9380 Service Manual - Page 6
34 Troubleshooting...63 Enhanced Pre-Boot System Assessment (ePSA) diagnostics 63 Running the ePSA diagnostics...63 System diagnostic lights...63 Recovering the operating system...64 Flashing BIOS (USB key)...65 Flashing the BIOS...65 Flea power release...65 Wi-Fi power cycle...65 35 Getting help - Dell XPS 13 9380 | XPS 9380 Service Manual - Page 7
> Shut down. NOTE: If you are using a different operating system, see the documentation of your operating system for shut-down instructions. 3 Disconnect your computer and all attached devices from their electrical outlets. 4 Disconnect all attached network devices and peripherals, such as keyboard - Dell XPS 13 9380 | XPS 9380 Service Manual - Page 8
2 After working inside your computer CAUTION: Leaving stray or loose screws inside your computer may severely damage your computer. 1 Replace all screws and ensure that no stray screws remain inside your computer. 2 Connect any external devices, peripherals, or cables you removed before working on - Dell XPS 13 9380 | XPS 9380 Service Manual - Page 9
troubleshooting and repairs as authorized or directed by the Dell technical assistance team. Damage due to servicing that is not authorized by Dell is not covered by your warranty. See the safety instructions that the ports and connectors as intermittent problems or a shortened product life span. As - Dell XPS 13 9380 | XPS 9380 Service Manual - Page 10
and protective anti-static mat at all times when servicing Dell products. In addition, it is critical that technicians keep sensitive parts separate from all insulator parts while performing service and that they use anti-static bags for transporting sensitive components. 10 Safety instructions - Dell XPS 13 9380 | XPS 9380 Service Manual - Page 11
as replacement parts or parts to be returned to Dell, it is critical to place these parts in anti for a stable base, and point your toes out. 2 Tighten stomach muscles. Abdominal muscles support your spine when you lift, offsetting the force of the load. 3 Lift with your legs Safety instructions 11 - Dell XPS 13 9380 | XPS 9380 Service Manual - Page 12
The procedures in this document may require the following tools: • Phillips screwdriver #0 • Phillips screwdriver #1 • Torx #5 (T5) screwdriver • Plastic scribe 4 Recommended tools 12 Recommended tools - Dell XPS 13 9380 | XPS 9380 Service Manual - Page 13
board Palm-rest assembly Fans System board Speakers Heat sink Palm-rest assembly System board Headset port Palm-rest assembly Display assembly Palm-rest assembly Screw type M1.6x1.5 M1.6x1.5 M1. .6x3L 1 camera cable bracket Display cable bracket System board M1.6x2.5 2 Screw list 13 - Dell XPS 13 9380 | XPS 9380 Service Manual - Page 14
Component Solid-state drive shield and solid-state drive Secured to System board Battery Palm-rest assembly Battery Palm-rest assembly Base cover Palm-rest assembly Screw type M2x3L M2x2 M1.6x4 M2x3, Torx Quantity 1 4 1 8 Screw image 14 Screw list - Dell XPS 13 9380 | XPS 9380 Service Manual - Page 15
working inside your computer. After working inside your computer, follow the instructions in After working inside your computer. For more safety best practices, see the Regulatory Compliance home page at www.dell.com/ regulatory_compliance. Procedure CAUTION: To avoid causing damage to the computer - Dell XPS 13 9380 | XPS 9380 Service Manual - Page 16
4 Moving the base cover from left to right, release the clips securing the base cover to the palm-rest assembly. 5 Lift the base cover from the palm-rest assembly. 16 Removing the base cover - Dell XPS 13 9380 | XPS 9380 Service Manual - Page 17
Before working inside your computer. After working inside your computer, follow the instructions in After working inside your computer. For more safety best practices, see the Regulatory Compliance home page at www.dell.com/ regulatory_compliance. Procedure 1 Align the screw holes on the base cover - Dell XPS 13 9380 | XPS 9380 Service Manual - Page 18
18 Replacing the base cover - Dell XPS 13 9380 | XPS 9380 Service Manual - Page 19
of the battery. • Do not bend the battery. • Do not use tools of any kind to pry on or against the battery. • Ensure any screws during the servicing of this .dell.com/support for assistance and further instructions. • Always purchase genuine batteries from https://www.dell.com or authorized Dell - Dell XPS 13 9380 | XPS 9380 Service Manual - Page 20
2 Remove the four screws (M2x2) that secure the battery to the palm-rest assembly. 3 Remove the screw (M1.6x4) that secures the battery to the palm-rest assembly. 4 Lift the battery off the palm-rest assembly. 5 Turn the computer over, open the display, and press the power button for about 5 seconds - Dell XPS 13 9380 | XPS 9380 Service Manual - Page 21
the battery. • Do not bend the battery. • Do not use tools of any kind to pry on or against the battery. • Ensure any screws during the servicing of .dell.com/support for assistance and further instructions. • Always purchase genuine batteries from https://www.dell.com or authorized Dell partners - Dell XPS 13 9380 | XPS 9380 Service Manual - Page 22
Post-requisites Replace the base cover. 22 Replacing the battery - Dell XPS 13 9380 | XPS 9380 Service Manual - Page 23
working inside your computer. After working inside your computer, follow the instructions in After working inside your computer. For more safety best practices, see the Regulatory Compliance home page at www.dell.com/ regulatory_compliance. CAUTION: Solid-state drives are fragile. Exercise care when - Dell XPS 13 9380 | XPS 9380 Service Manual - Page 24
Procedure to remove M.2 2230 solid-state drive 1 Remove the screw (M2x3) that secures the solid-state drive shield and the solid-state drive to the system board. 2 Slide and remove the solid-state drive shield from the solid state drive slot. 3 Lift the solid-state drive at an angle, then slide and - Dell XPS 13 9380 | XPS 9380 Service Manual - Page 25
working inside your computer. After working inside your computer, follow the instructions in After working inside your computer. For more safety best practices, see the Regulatory Compliance home page at www.dell.com/ regulatory_compliance. CAUTION: Solid-state drives are fragile. Exercise care when - Dell XPS 13 9380 | XPS 9380 Service Manual - Page 26
Post-requisites 1 Replace the battery. 2 Replace the base cover. 26 Replacing the solid-state drive - Dell XPS 13 9380 | XPS 9380 Service Manual - Page 27
inside your computer, follow the instructions in After working inside your computer. For more safety best practices, see the Regulatory Compliance home page at www.dell.com/ regulatory_compliance. Prerequisites 1 Remove the base cover. 2 Remove the battery. Procedure 1 Disconnect the speaker cable - Dell XPS 13 9380 | XPS 9380 Service Manual - Page 28
computer, follow the instructions in After working inside your computer. For more safety best practices, see the Regulatory Compliance home page at www.dell.com/ regulatory_compliance. to the system board. Post-requisites 1 Replace the battery. 2 Replace the base cover. 28 Replacing the speakers - Dell XPS 13 9380 | XPS 9380 Service Manual - Page 29
. After working inside your computer, follow the instructions in After working inside your computer. For more safety best practices, see the Regulatory Compliance home page at www.dell.com/ regulatory_compliance. CAUTION: Removing the coin-cell battery resets the BIOS setup program's settings to - Dell XPS 13 9380 | XPS 9380 Service Manual - Page 30
. After working inside your computer, follow the instructions in After working inside your computer. For more safety best practices, see the Regulatory Compliance home page at www.dell.com/ regulatory_compliance. Procedure 1 Adhere the coin-cell battery to the system board. 2 Connect the coin - Dell XPS 13 9380 | XPS 9380 Service Manual - Page 31
instructions in After working inside your computer. For more safety best practices, see the Regulatory Compliance home page at www.dell of the thermal grease. Prerequisites 1 Remove the base cover. 2 Remove the battery. Procedure 1 In reverse sequential order (as indicated on the heat sink), remove - Dell XPS 13 9380 | XPS 9380 Service Manual - Page 32
computer, follow the instructions in After working inside your computer. For more safety best practices, see the Regulatory Compliance home page at www.dell.com/ regulatory_compliance. on the heat sink). Post-requisites 1 Replace the battery. 2 Replace the base cover. 32 Replacing the heat sink - Dell XPS 13 9380 | XPS 9380 Service Manual - Page 33
working inside your computer, follow the instructions in After working inside your computer. For more safety best practices, see the Regulatory Compliance home page at www.dell.com/ regulatory_compliance. Prerequisites 1 Remove the base cover. 2 Remove the battery. Procedure 1 Remove the screw (M1 - Dell XPS 13 9380 | XPS 9380 Service Manual - Page 34
9 Place the top surface of the computer on a flat and clean surface, then open the computer at a 90 degree angle. 10 Gently slide and lift the display assembly from the palm-rest assembly. 34 Removing the display assembly - Dell XPS 13 9380 | XPS 9380 Service Manual - Page 35
the instructions in After working inside your computer. For more safety best practices, see the Regulatory Compliance home page at www.dell. following table provides the antenna cable color schemes for the wireless card supported by your computer. Table 2. Antenna-cable color scheme Connectors on - Dell XPS 13 9380 | XPS 9380 Service Manual - Page 36
screw holes on the system board. 9 Replace the two screws (M1.6x2.5) that secure the display-cable bracket to system board. Post-requisites 1 Replace the battery. 2 Replace the base cover. 36 Replacing the display assembly - Dell XPS 13 9380 | XPS 9380 Service Manual - Page 37
working inside your computer, follow the instructions in After working inside your computer. For more safety best practices, see the Regulatory Compliance home page at www.dell.com/ regulatory_compliance. Prerequisites 1 Remove the base cover. 2 Remove the battery. Procedure 1 Remove the two screws - Dell XPS 13 9380 | XPS 9380 Service Manual - Page 38
3 Disconnect the headset-port cable from the system board. 4 Remove the screw (M1.6x3) that secures the headset port to the palm-rest assembly. 5 Lift the headset port from the system board. 38 Removing the headset port - Dell XPS 13 9380 | XPS 9380 Service Manual - Page 39
your computer. After working inside your computer, follow the instructions in After working inside your computer. For more safety best practices, see the Regulatory Compliance home page at www.dell.com/ regulatory_compliance. Procedure 1 Place the headset port in its slot on the palm-rest assembly - Dell XPS 13 9380 | XPS 9380 Service Manual - Page 40
Post-requisites 1 Replace the battery. 2 Replace the base cover. 40 Replacing the headset port - Dell XPS 13 9380 | XPS 9380 Service Manual - Page 41
working inside your computer, follow the instructions in After working inside your computer. For more safety best practices, see the Regulatory Compliance home page at www.dell.com/ regulatory_compliance. Prerequisites 1 Remove the base cover. 2 Remove the battery. Procedure 1 Remove the screw (M1 - Dell XPS 13 9380 | XPS 9380 Service Manual - Page 42
42 Removing the fans - Dell XPS 13 9380 | XPS 9380 Service Manual - Page 43
in Before working inside your computer. After working inside your computer, follow the instructions in After working inside your computer. For more safety best practices, see the Regulatory Compliance home page at www.dell.com/ regulatory_compliance. Procedure 1 Align the screw holes on the left and - Dell XPS 13 9380 | XPS 9380 Service Manual - Page 44
Post-requisites 1 Replace the battery. 2 Replace the base cover. 44 Replacing the fans - Dell XPS 13 9380 | XPS 9380 Service Manual - Page 45
instructions in After working inside your computer. For more safety best practices, see the Regulatory Compliance home page at www.dell.com/ regulatory_compliance. NOTE: Your computer's Service cover. 2 Remove the battery. 3 Remove the solid-state 2 Disconnect the headset-port cable from the system - Dell XPS 13 9380 | XPS 9380 Service Manual - Page 46
10 Remove the 10 screws (M1.6x2.5) securing the system board to the palm-rest assembly. 11 Lift the system board from the palm-rest assembly. 46 Removing the system board - Dell XPS 13 9380 | XPS 9380 Service Manual - Page 47
instructions in After working inside your computer. For more safety best practices, see the Regulatory Compliance home page at www.dell.com/ regulatory_compliance. NOTE: Your computer's Service the system board. 10 Connect the headset-port cable to the system board. Replacing the system board 47 - Dell XPS 13 9380 | XPS 9380 Service Manual - Page 48
provides the antenna cable color schemes for the wireless card supported by your computer. Table 3. Antenna-cable color scheme Replace the battery. 5 Replace the base cover. Entering the Service Tag in the BIOS setup program 1 Turn on or restart your computer. 2 Press F2 when the Dell logo is - Dell XPS 13 9380 | XPS 9380 Service Manual - Page 49
working inside your computer, follow the instructions in After working inside your computer. For more safety best practices, see the Regulatory Compliance home page at www.dell.com/ regulatory_compliance. Prerequisites 1 Remove the base cover. 2 Remove the battery. 3 Remove the solid-state drive - Dell XPS 13 9380 | XPS 9380 Service Manual - Page 50
follow the instructions in After working inside your computer. For more safety best practices, see the Regulatory Compliance home page at www.dell.com/ 3 Replace the solid-state drive. 4 Replace the battery. 5 Replace the base cover. 50 Replacing the power button with optional fingerprint reader - Dell XPS 13 9380 | XPS 9380 Service Manual - Page 51
working inside your computer, follow the instructions in After working inside your computer. For more safety best practices, see the Regulatory Compliance home page at www.dell.com/ regulatory_compliance. Prerequisites 1 Remove the base cover. 2 Remove the battery. 3 Remove the solid-state drive - Dell XPS 13 9380 | XPS 9380 Service Manual - Page 52
, follow the instructions in After working inside your computer. For more safety best practices, see the Regulatory Compliance home page at www.dell.com/ regulatory_compliance Replace the fans. 4 Replace the solid-state drive. 5 Replace the battery. 6 Replace the base cover. 52 Replacing the keyboard - Dell XPS 13 9380 | XPS 9380 Service Manual - Page 53
inside your computer, follow the instructions in After working inside your computer. For more safety best practices, see the Regulatory Compliance home page at www.dell.com/ regulatory_compliance. Prerequisites 1 Remove the base cover. 2 Remove the battery. 3 Remove the speakers. 4 Remove the - Dell XPS 13 9380 | XPS 9380 Service Manual - Page 54
the instructions in After working inside your computer. For more safety best practices, see the Regulatory Compliance home page at www.dell. Replace the fans. 5 Replace the headset port. 6 Replace the display assembly. 7 Replace the speakers. 8 Replace the battery. 9 Replace the base cover. 54 - Dell XPS 13 9380 | XPS 9380 Service Manual - Page 55
, check if the Intel Virtual Button driver is installed. Install the driver updates from www.dell.com/support. Wireless and Bluetooth drivers In the Device Manager, check if the network card driver is installed. Install the driver updates from www.dell.com/support. In the Device Manager, check if - Dell XPS 13 9380 | XPS 9380 Service Manual - Page 56
information about the hardware installed in your computer, such as the amount of RAM and the size of the hard drive. • Change the system configuration information 1 Turn on (or restart) your computer. 2 During POST, when the DELL logo is displayed, watch for the F2 prompt to appear, and then press - Dell XPS 13 9380 | XPS 9380 Service Manual - Page 57
Tag Displays the ownership tag of the computer. Manufacture Date Displays the manufacture date of the computer. Ownership Date Displays the ownership date of the computer. Express Service Code Displays the express service code of the computer. Memory Information Memory Installed Displays - Dell XPS 13 9380 | XPS 9380 Service Manual - Page 58
computer. Displays the battery health information. Displays the F12 boot menu. Displays the current date in MM/DD/YY format and current time Configuration Enable USB Boot Support Enable or disable booting Port Enable or disable booting from USB mass storage devices connected to external USB port - Dell XPS 13 9380 | XPS 9380 Service Manual - Page 59
Set the panel brightness independently for Battery and AC power. Table 7. System the BIOS module interface of the optional Computrace(R) Service from Absolute Software. Enable or disable the Admin Password is set. Disables the master password support. Hard Disk passwords need to be cleared before - Dell XPS 13 9380 | XPS 9380 Service Manual - Page 60
to turn on automatically every day or on a preselected date and time. This option can be configured only if the Auto On Time is set to Everyday, Weekdays or Selected Days. Default: Disabled. USB Wake Support Peak Shift Primary Battery Charge Configuration Enable the USB devices to wake the - Dell XPS 13 9380 | XPS 9380 Service Manual - Page 61
Service Tag. Asset Tag Create a system Asset Tag. BIOS Downgrade Control flashing of the system firmware to previous revisions. BIOS Recovery Enable the user to recover from certain corrupted BIOS conditions from a recovery file on the user primary hard drive or an external USB key. Table 13 - Dell XPS 13 9380 | XPS 9380 Service Manual - Page 62
minute. 5 Replace the coin-cell battery. 6 Connect the battery cable to the system board. 7 Replace the base cover. Clearing BIOS (System Setup) and System passwords To clear the system or BIOS passwords, contact Dell technical support as described at www.dell.com/contactdell. NOTE: For information - Dell XPS 13 9380 | XPS 9380 Service Manual - Page 63
problems Dell logo battery-charge status. Solid white - Power adapter is connected and the battery has more than 5 percent charge. Amber - Computer is running on battery and the battery has less than 5 percent charge. Off • Power adapter is connected and the battery is fully charged. Troubleshooting - Dell XPS 13 9380 | XPS 9380 Service Manual - Page 64
RAM is detected. The following table shows different power and battery-status light patterns and associated problems. Table 15. LED codes Diagnostic light codes 2,1 2,2 2,3 2,4 2,5 2,6 2,7 3,1 3,2 3,3 3,4 3,5 3,6 3,7 Problem it from the Dell Support site to troubleshoot and fix your computer - Dell XPS 13 9380 | XPS 9380 Service Manual - Page 65
Turn on your computer. 2 Go to www.dell.com/support. 3 Click Product support, enter the Service Tag of your computer, and then click Submit. NOTE: If you do not have the Service Tag, use the auto-detect feature or manually browse for your computer model. 4 Click Drivers & downloads > Find it myself - Dell XPS 13 9380 | XPS 9380 Service Manual - Page 66
3 Turn off the wireless router. 4 Wait for 30 seconds. 5 Turn on the wireless router. 6 Turn on the modem. 7 Turn on your computer. 66 Troubleshooting - Dell XPS 13 9380 | XPS 9380 Service Manual - Page 67
-help resources Information about Dell products and services My Dell Resource location www.dell.com Tips Contact Support Online help for operating system Troubleshooting information, user manuals, setup instructions, product specifications, technical help blogs, drivers, software updates, and so
-
 1
1 -
 2
2 -
 3
3 -
 4
4 -
 5
5 -
 6
6 -
 7
7 -
8
-
9
-
10
-
11
-
12
-
13
-
14
-
15
-
16
-
17
-
18
-
19
-
20
-
21
-
22
-
23
-
24
-
25
-
26
-
27
-
28
-
29
-
30
-
31
-
32
-
33
-
34
-
35
-
36
-
37
-
38
-
39
-
40
-
41
-
42
-
43
-
44
-
45
-
46
-
47
-
48
-
49
-
50
-
51
-
52
-
53
-
54
-
55
-
56
-
57
-
58
-
59
-
60
-
61
-
62
-
63
-
64
-
65
-
66
-
67
 |
 |

XPS 9380
Service Manual
Computer Model: XPS 9380
Regulatory Model: P82G
Regulatory Type: P82G002