Dell XPS 630i Service Manual - Page 91
Power Supply, Removing the Power Supply
 |
View all Dell XPS 630i manuals
Add to My Manuals
Save this manual to your list of manuals |
Page 91 highlights
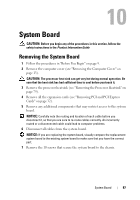
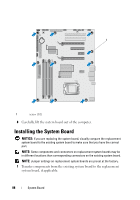
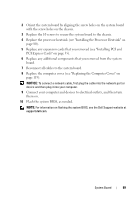
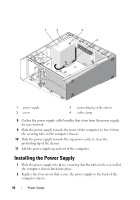
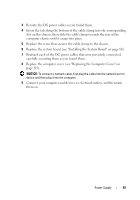
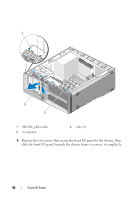
Power Supply CAUTION: Before you begin any of the procedures in this section, follow the safety instructions in the Product Information Guide. Removing the Power Supply 1 Follow the procedures in "Before You Begin" on page 9. 2 Remove the computer cover (see "Removing the Computer Cover" on page 13). NOTICE: Note the location and ID of each power connector before disconnecting the power supply cables. 3 Follow the DC power cables that stem from the power supply and disconnect each connected power cable. NOTE: Note the routing of the power cable bundles as you disconnect them. You must route these cables properly when you replace them to prevent them from being pinched or crimped. 4 Remove the system board (see "Removing the System Board" on page 87). 5 Remove the four screws that secure the power supply to the back of the chassis. 6 Remove the screw that secures the power supply cable clamp to the chassis. 7 Slide the cable clamp towards the front of the computer to free it from the securing tabs on the computer chassis, then lift the cable clamp up and away from the computer. Power Supply 91
-
 1
1 -
2
-
3
-
4
-
5
-
6
-
7
-
8
-
9
-
10
-
11
-
12
-
13
-
14
-
15
-
16
-
17
-
18
-
19
-
20
-
21
-
22
-
23
-
24
-
25
-
26
-
27
-
28
-
29
-
30
-
31
-
32
-
33
-
34
-
35
-
36
-
37
-
38
-
39
-
40
-
41
-
42
-
43
-
44
-
45
-
46
-
47
-
48
-
49
-
50
-
51
-
52
-
53
-
54
-
55
-
56
-
57
-
58
-
59
-
60
-
61
-
62
-
63
-
64
-
65
-
66
-
67
-
68
-
69
-
70
-
71
-
72
-
73
-
74
-
75
-
76
-
77
-
78
-
79
-
80
-
81
-
82
-
83
-
84
-
85
-
 86
86 -
 87
87 -
 88
88 -
 89
89 -
 90
90 -
 91
91 -
 92
92 -
 93
93 -
 94
94 -
 95
95 -
 96
96 -
97
-
98
-
99
-
100
-
101
-
102
-
103
-
104
-
105
-
106
-
107
-
108
-
109
-
110
-
111
-
112
-
113
-
114
-
115
-
116
-
117
-
118
-
119
-
120
 |
 |