Dell XPS 720 H2C Owner's Manual - Page 107
About Serial ATA Drives, General Drive Installation Guidelines
 |
View all Dell XPS 720 H2C manuals
Add to My Manuals
Save this manual to your list of manuals |
Page 107 highlights
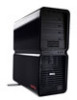
3 2 1 1 optical drive bays (4) 2 floppy drive/media card reader 3 hard-drive bays (4) About Serial ATA Drives Your computer supports up to four serial ATA hard drives and two serial ATA optical drives. Serial ATA drives provide the following benefits by transferring data using serial technology and flexible cables that are thinner and longer than IDE cables: • Improved cable routing facilitates more efficient airflow inside the chassis. • Compact cable connectors save space on the system board and on the hard drive, allowing for more efficient utilization of space inside the chassis. General Drive Installation Guidelines SATA hard drives should be connected to connectors labeled "HDD" on the system board. Non-hard drive SATA devices should be attached to the connectors labeled SATA, with the exception of a 5th SATA hard drive installed in a 5.25-inch drive bay, which much be connected to the SATA0 connector. IDE optical drives should be connected to the connectors labeled "IDE." When connecting a SATA cable, hold the cable by the connector at each end and press firmly into the connector. When disconnecting a SATA cable, hold the cable by the connector at each end and pull until the connector detaches. Removing and Installing Parts 107
-
 1
1 -
2
-
3
-
4
-
5
-
6
-
7
-
8
-
9
-
10
-
11
-
12
-
13
-
14
-
15
-
16
-
17
-
18
-
19
-
20
-
21
-
22
-
23
-
24
-
25
-
26
-
27
-
28
-
29
-
30
-
31
-
32
-
33
-
34
-
35
-
36
-
37
-
38
-
39
-
40
-
41
-
42
-
43
-
44
-
45
-
46
-
47
-
48
-
49
-
50
-
51
-
52
-
53
-
54
-
55
-
56
-
57
-
58
-
59
-
60
-
61
-
62
-
63
-
64
-
65
-
66
-
67
-
68
-
69
-
70
-
71
-
72
-
73
-
74
-
75
-
76
-
77
-
78
-
79
-
80
-
81
-
82
-
83
-
84
-
85
-
86
-
87
-
88
-
89
-
90
-
91
-
92
-
93
-
94
-
95
-
96
-
97
-
98
-
99
-
100
-
101
-
 102
102 -
 103
103 -
 104
104 -
 105
105 -
 106
106 -
 107
107 -
 108
108 -
 109
109 -
 110
110 -
 111
111 -
 112
112 -
113
-
114
-
115
-
116
-
117
-
118
-
119
-
120
-
121
-
122
-
123
-
124
-
125
-
126
-
127
-
128
-
129
-
130
-
131
-
132
-
133
-
134
-
135
-
136
-
137
-
138
-
139
-
140
-
141
-
142
-
143
-
144
-
145
-
146
-
147
-
148
-
149
-
150
-
151
-
152
-
153
-
154
-
155
-
156
-
157
-
158
-
159
-
160
-
161
-
162
-
163
-
164
-
165
-
166
-
167
-
168
-
169
-
170
-
171
-
172
-
173
-
174
-
175
-
176
-
177
-
178
-
179
-
180
-
181
-
182
-
183
-
184
-
185
-
186
-
187
-
188
-
189
-
190
-
191
-
192
-
193
-
194
-
195
-
196
-
197
-
198
-
199
-
200
-
201
-
202
-
203
-
204
-
205
-
206
-
207
-
208
-
209
-
210
-
211
-
212
-
213
-
214
-
215
-
216
-
217
-
218
-
219
-
220
 |
 |
