Denon DHT FS3 Owners Manual - English - Page 14
Settings - remote
 |
UPC - 081757507547
View all Denon DHT FS3 manuals
Add to My Manuals
Save this manual to your list of manuals |
Page 14 highlights
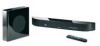
Operating the Getting Started Installation Connections Settings Operation Other functions remote control unit Troubleshooting Specifications ENGLISH Settings [ON / STANDBY] [ENTER] [SETUP] [ui] [QUICK SETUP] [ENTER] [ui] About the button names in these explanations < > : Buttons on the main unit [ ] : Buttons on the remote control unit Button name only: Buttons on the main unit and remote control unit • First make the settings for the listening room using the procedure described at "Simple Setup". • As necessary, set the details of the listening room, the tone and various modes using the procedure described at "Detailed Settings" (vpage 11). Turning the power on Press . • The input function is displayed for about 5 seconds on the display. The input signal and surround mode indicators light (vpage 14). b When [ON / STANDBY] is pressed, the standby mode is set. The "4" indicator lights on the display, and the input signal and surround mode indicators turn off. n To turn the power off: Press again. n To turn the power on from the standby mode: Press [ON / STANDBY]. Simple Setup In the listening room, press [QUICK SETUP]. TYPE-1 TYPE-2 TYPE-3 • The current setting mode is displayed for about 5 seconds. • Upon purchase, the mode is set to "TYPE-3". B: Offset from the center (OFFSET) A: Distance to listening position (DIST) NOTE: • A small amount of power is consumed when in the standby mode. • If the power is turned off by pressing while in the standby mode, the "4" indicator on the display may turn on for a while. If you wish to turn the power back on, wait at least 10 seconds before doing so. A B Movies/Music Reverberations in the room Room size TYPE-1 4.9 feet / 1.5 m CENTER MUSIC TYPE-2 6.9 feet / 2.1 m CENTER MOVIE TYPE-3 8.9 feet / 2.7 m CENTER MOVIE MEDIUM MEDIUM SOFT Approx. 107.6 feet² / 10 m² Approx. 172.2 feet² / 16 m² Approx. 215.3 feet² / 20 m² 10 ENGLISH
-
 1
1 -
2
-
3
-
4
-
5
-
6
-
7
-
8
-
 9
9 -
 10
10 -
 11
11 -
 12
12 -
 13
13 -
 14
14 -
 15
15 -
 16
16 -
 17
17 -
 18
18 -
 19
19 -
20
-
21
-
22
-
23
-
24
-
25
 |
 |
