Denon SC-CX303 Owners Manual - English - Page 7
Specifications, About the Ventilation Holes, Removing the Speaker Net
 |
UPC - 081757507448
View all Denon SC-CX303 manuals
Add to My Manuals
Save this manual to your list of manuals |
Page 7 highlights
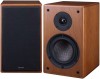
ENGLISH Removing the Speaker Net About the Ventilation Holes Specifications The net on the front of the speaker systems can be removed. To remove, grasp both sides of the net and pull forward. To mount, line up the projecting pieces in the four corners of the speaker net with the holes in the four corners of the cabinet and press in. Two ventilation holes are provided in the tweeter dome and edge to prevent warping of the diaphragm due to thermal expansion of the air in the tweeter dome. The holes are normal and do not indicate damage. Ventilation holes Type: 2-way · 2-speakers Reflex box, Low-leakage-flux Speakers: 13 cm cone bass-mid x 1 2.5 cm soft dome high range x 1 Input impedance: 6 Ω/ohms Max. input: 100 W (IEC) 200 W (PEAK) Crossover frequency: 3 kHz Frequency range: 35 Hz ~ 60 kHz Sensitivity: 86 dB (1W · 1m) Dimensions: 182 (W) x 296 (H) x 293 (D) mm (Including protruding parts) Mass: 8.7 kg * For improvement purposes, specifications and design are subject to change without notice. Tweeter dome 4 ENGLISH
-
 1
1 -
 2
2 -
 3
3 -
 4
4 -
 5
5 -
 6
6 -
 7
7 -
 8
8
 |
 |
