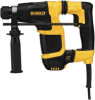
Dewalt D25052K Instruction Manual - Page 11
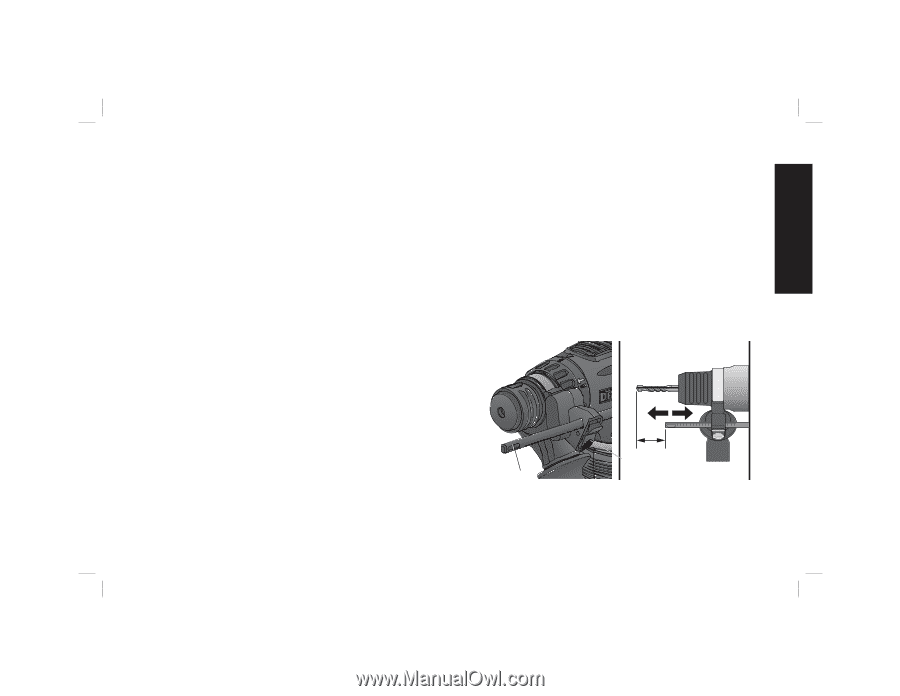
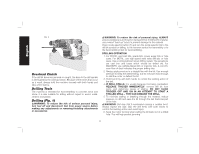
Depth Rod Fig. 6
 |
View all Dewalt D25052K manuals
Add to My Manuals
Save this manual to your list of manuals |
Page 11 highlights
English 7. With variable speed drills there is no need to center punch the point to be drilled. Use a slow speed to start the hole and accelerate by squeezing the trigger harder when the hole is deep enough to drill without the bit skipping out. DRILLING IN METAL An SDS Plus® to round shank adaptor chuck is required. Ensure that tool is in drill-only mode. Start drilling with slow speed and increase to full power while applying firm pressure on the tool. A smooth even flow of metal chips indicates the proper drilling rate. Use a cutting lubricant when drilling metals. The exceptions are cast iron and brass which should be drilled dry. NOTE: Large [5/16" to 1/2" (7.9 mm to 12.7 mm)] holes in steel can be made easier if a pilot hole [5/32" to 3/16" (4 mm to 4.8 mm)] is drilled first. DRILLING IN WOOD An SDS Plus® to round shank adaptor chuck is required. Ensure that tool is in drill-only mode. Start drilling with slow speed and increase to full power while applying firm pressure on the tool. Holes in wood can be made with the same twist drills used for metal. These bits may overheat unless pulled out frequently to clear chips from the flutes. For larger holes, use spade bits, power auger bits, or hole saws. Work that is apt to splinter should be backed up with a block of wood. HAMMERDRILL OPERATION 1. When drilling, use just enough force on the hammer to keep it from bouncing excessively or "rising" off the bit. Too much force will cause slower drilling speeds, overheating, and a lower drilling rate. 2. Drill straight, keeping the bit at a right angle to the work. Do not exert side pressure on the bit when drilling as this will cause clogging of the bit flutes and a slower drilling speed. 3. When drilling deep holes, if the hammer speed starts to drop off, pull the bit partially out of the hole with the tool still running to help clear debris from the hole. 4. For masonry, use carbide-tipped bits or masonry bits. A smooth even flow of dust indicates the proper drilling rate. Depth Rod (Fig. 6) TO ADJUST THE DEPTH ROD 1. Push in and hold the depth rod release button (J) on the side handle. 2. Move the depth rod (D) so the distance between the end of the rod and the end of the bit equals the desired drilling depth. 3. Release the button to lock rod into position. When drilling with the depth rod, stop when end of rod reaches surface of material. FIG. 6 J D 9
-
 1
1 -
2
-
3
-
4
-
5
-
 6
6 -
 7
7 -
 8
8 -
 9
9 -
 10
10 -
 11
11 -
 12
12 -
 13
13 -
 14
14 -
 15
15 -
 16
16 -
17
-
18
-
19
-
20
-
21
-
22
-
23
-
24
-
25
-
26
-
27
-
28
-
29
-
30
-
31
-
32
-
33
-
34
-
35
-
36
-
37
-
38
-
39
-
40
-
41
-
42
 |
 |