Dewalt DCF880L2 Instruction Manual - Page 14
MAINTENANCE, Cleaning, Usage
 |
View all Dewalt DCF880L2 manuals
Add to My Manuals
Save this manual to your list of manuals |
Page 14 highlights
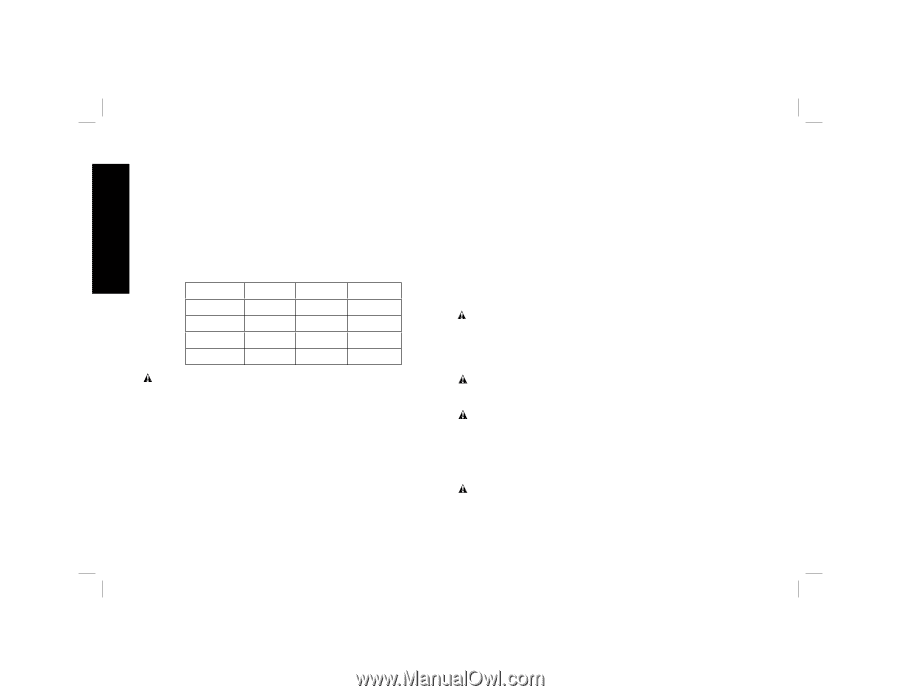
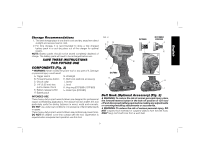
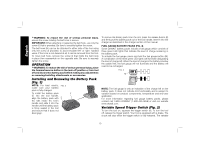
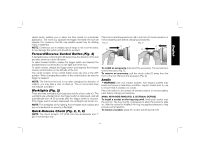
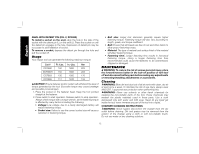
English ANVIL WITH DETENT PIN (FIG. 2, DCF880) To install a socket on the anvil, align the hole in the side of the socket with the detent pin (L) on the anvil (J). Press the socket on until the detent pin engages in the hole. Depression of detent pin may be necessary to aid installation of socket. To remove a socket, depress the detent pin through the hole and pull the socket off. Usage Your impact tool can generate the following maximum torque: Cat # Ft.-Lbs. In.-Lbs. Nm DCF880 150 1800 203 DCF880H 150 1800 203 DCF883 130 1560 176 DCF885 117 1400 155 CAUTION: Ensure fastener and/or system will withstand the level of torque generated by the tool. Excessive torque may cause breakage and possible personal injury. 1. Place the socket on the fastener head. Keep the tool pointed straight at the fastener. 2. Press switch to start operation. Release switch to stop operation. Always check torque with a torque wrench, as the fastening torque is affected by many factors including the following: • Voltage: Low voltage, due to a nearly discharged battery, will reduce fastening torque. • Socket size: Failure to use the correct socket size will cause a reduction in fastening torque. • Bolt size: Larger bolt diameters generally require higher fastening torque. Fastening torque will also vary according to length, grade, and torque coefficient. • Bolt: Ensure that all threads are free of rust and other debris to allow proper fastening torque. • Material: The type of material and surface finish of the material will affect fastening torque. • Fastening time: Longer fastening time results in increased fastening torque. Using a longer fastening time than recommended could cause the fasteners to be overstressed, stripped or damaged. MAINTENANCE WARNING: To reduce the risk of serious personal injury, place the forward/reverse button in the lock-off position or turn tool off and disconnect battery pack before making any adjustments or removing/installing attachments or accessories. Cleaning WARNING: Blow dirt and dust out of all air vents with clean, dry air at least once a week. To minimize the risk of eye injury, always wear ANSI Z87.1 approved eye protection when performing this. WARNING: Never use solvents or other harsh chemicals for cleaning the non-metallic parts of the tool. These chemicals may weaken the plastic materials used in these parts. Use a cloth dampened only with water and mild soap. Never let any liquid get inside the tool; never immerse any part of the tool into a liquid. CHARGER CLEANING INSTRUCTIONS WARNING: Shock hazard. Disconnect the charger from the AC outlet before cleaning. Dirt and grease may be removed from the exterior of the charger using a cloth or soft non-metallic brush. Do not use water or any cleaning solutions. 12
-
 1
1 -
2
-
3
-
4
-
5
-
6
-
7
-
8
-
 9
9 -
 10
10 -
 11
11 -
 12
12 -
 13
13 -
 14
14 -
 15
15 -
 16
16 -
 17
17 -
 18
18 -
 19
19 -
20
-
21
-
22
-
23
-
24
-
25
-
26
-
27
-
28
-
29
-
30
-
31
-
32
-
33
-
34
-
35
-
36
-
37
-
38
-
39
-
40
-
41
-
42
-
43
-
44
-
45
-
46
-
47
-
48
-
49
-
50
-
51
-
52
 |
 |