Dewalt DW716 Instruction Manual - Page 3
Laser, Information, Installation of Miter Saw Laser, System
 |
View all Dewalt DW716 manuals
Add to My Manuals
Save this manual to your list of manuals |
Page 3 highlights
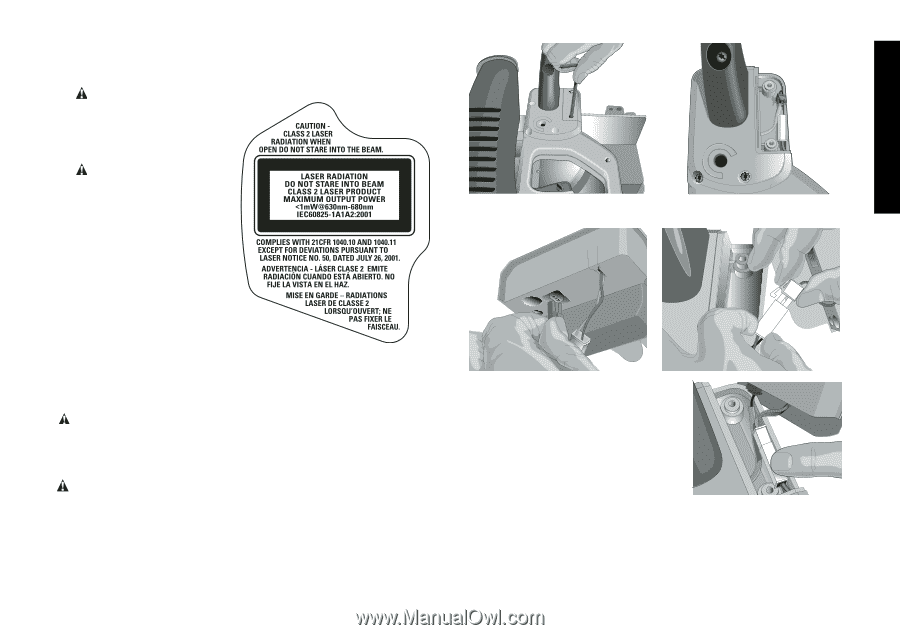
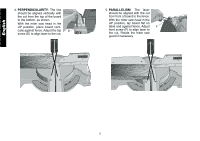
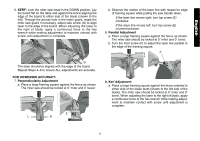
English WARNING LABELS For your convenience and safety, the following label is on your laser (Fig. 1). CAUTION: LASER FIG. 1 RADIATION - DO NOT STARE INTO BEAM. CLASS 2 LASER PRODUCT. CAUTION: CLASS 2 LASER RADIATION WHEN OPEN DO NOT STARE INTO THE BEAM. Laser Information The DW7187 Miter Saw Laser System is a Class 2 laser product and complies with 21CFR 1040.10 and 1040.11 except for deviations pursuant to laser notice No. 50, dated July 26, 2001. Installation of Miter Saw Laser System WARNING: Read all instructions for the Installation of Laser Power Supply and the Installation of Laser before proceeding with the Installation of the Miter Saw Laser System. INSTALLATION OF LASER POWER SUPPLY (LPS) WARNING: Disconnect the saw from the power source. 1. Remove the two screws from the miter saw handle with supplied T20 Torx wrench. Save the screws for the assembly of the Laser Power Supply (LPS) in Step 4. Retain the handle cover for future use if LPS is removed. 2. Attach the connections to the LPS. 3. Arrange the wire connection such that the wide portion of the connector is placed against the bottom of the miter saw handle and fit the LPS to the handle. 2
-
 1
1 -
 2
2 -
 3
3 -
 4
4 -
 5
5 -
 6
6 -
 7
7 -
 8
8 -
 9
9 -
10
-
11
-
12
-
13
-
14
-
15
-
16
-
17
-
18
-
19
-
20
-
21
-
22
-
23
-
24
-
25
-
26
-
27
-
28
 |
 |