Dirt Devil UD40230 Revision 2 (5/2006) - Page 3
Features, How To Assemble, How To Operate - filter
 |
View all Dirt Devil UD40230 manuals
Add to My Manuals
Save this manual to your list of manuals |
Page 3 highlights
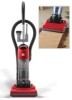
FRONT VIEW 1 FEATURES BACK VIEW 2 3 12 4 5 6 7 8 9 10 11 FRONT VIEW 1. Handle Grip/Carry Handle 2. Stretch Hose 3. Crevice Tool 4. Tool Caddy 5. On/Off switch 6. Dirt Container Release Button 7. Filter 8. Screen 9. Dirt Container 10. Nozzle 11. Bumper 12. Dust Brush 13 19 14 15 18 17 16 17 BACK VIEW 13. Hose Clip 14. Upper Cord Wrap with Quick Cord Release 15. Long power cord 16. Lower Hose/Clog Clean-out 17. Wheels 18. Lower cord wrap 19. Cord Clip 5 HOW TO ASSEMBLE TOOL REQUIRED: PHILLIPS OR FLAT HEAD SCREWDRIVER ATTACH HANDLE 1. 2. 3. 3a. Remove dirt container from body of cleaner. SECURE BACK HOSE 4. 4a. Slide handle into hole on top of cleaner. FRONT Insert screw through hole (located under tool caddy) on back of cleaner (Diagram 3). Place bolt onto end of screw coming through back panel and tighten to secure handle (Diagram 3a). TOOL STORAGE INSTALL DIRT CONTAINER 5. 6. BACK Wrap hose around back of hose caddy (Diagram 4). Push hose wand down into the right side of cleaner (Diagram 4a). Attach crevice tool and dust brush to tool caddy. Replace dirt container by tilting back until it snaps into place. CORD RELEASE 1. HOW TO OPERATE ON/OFF SWITCH 1. OFF ON HANDLE RELEASE 1. Turn the Quick Cord Release for easy cord removal. Store cord in cord guide (see "Features", Page 5 for location) to keep out of the way while vacuuming. Plug cord into electrical outlet. Turn cleaner on by pressing the on/off switch located on the top of unit. 6 Pull back handle to tilt back. Press on the front of nozzle if needed.
-
 1
1 -
 2
2 -
 3
3 -
 4
4 -
 5
5 -
 6
6 -
 7
7 -
 8
8 -
 9
9 -
10
-
11
-
12
-
13
-
14
-
15
 |
 |
