Dymo 67255 Software User Guide - Page 33
Using the Tape Editor, The Tape Editor
 |
View all Dymo 67255 manuals
Add to My Manuals
Save this manual to your list of manuals |
Page 33 highlights
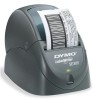
Chapter 7 Using the Tape Editor The DYMO Label Software Tape Editor is used to design and print labels on DYMO tape printers, such as the LabelWriter Duo or the LabelManager PCII printers. Using the Tape Editor, you can print text on your D1 tape labels in a variety of fonts, sizes, and styles. You can add borders, graphics, special characters, and barcodes. You can also add a date and time stamp to your labels. This chapter gives you an overview of creating and printing labels using the Tape Editor. For more information on any of these features, refer to the online Help. The Tape Editor The Tape Editor is only available when you have a DYMO tape printer installed on your system, such as the LabelWriter Duo, LabelManager PCII, LabelManager 450, or LabelPoint 350 printers. The basic functionality of DYMO Label Software is the same in both the Label Editor and the Tape Editor, such as opening and saving files, using Smart Paste to print multiple labels, and so on. So when the Tape Editor is active, the only differences you will see are those specfic to designing and printing D1 tape labels. Become familiar with all the features of the software by reading through the other sections in this User Guide. To use the Tape Editor 1 Open DYMO Label Software. 2 Click on the left side of the main window. The Tape Editor appears with a new blank label. New Open Save Print Paste Designer Formatting Tape Settings Toolbar Toolbar Toolbar Buttons for Label and Tape Editor modes (if both a tape and a label printer are installed) Address Book Label Workspace Status Bar Rulers 29
-
 1
1 -
2
-
3
-
4
-
5
-
6
-
7
-
8
-
9
-
10
-
11
-
12
-
13
-
14
-
15
-
16
-
17
-
18
-
19
-
20
-
21
-
22
-
23
-
24
-
25
-
26
-
27
-
 28
28 -
 29
29 -
 30
30 -
 31
31 -
 32
32 -
 33
33 -
 34
34 -
 35
35 -
 36
36 -
 37
37 -
 38
38 -
39
-
40
-
41
-
42
-
43
-
44
-
45
-
46
-
47
-
48
-
49
-
50
-
51
-
52
-
53
-
54
-
55
-
56
-
57
-
58
-
59
-
60
-
61
-
62
-
63
-
64
 |
 |
