Dynex DX-D9PDVD Quick Setup Guide (English) - Page 1
Dynex DX-D9PDVD Manual
 |
View all Dynex DX-D9PDVD manuals
Add to My Manuals
Save this manual to your list of manuals |
Page 1 highlights
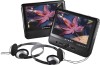
Quick Setup Guide I DX-D7PDVD/D9PDVD 7" and 9" Dual Screen Portable DVD Player Congratulations on your purchase of this high-quality Dynex product. Your DX-D7PDVD or DX-D9PDVD represents the state of the art in personal DVD player design and is designed for reliable and trouble-free performance. Features DVD player (both 7" and 9") Package contents • 7" or 9" main DVD player • 7" or 9" LCD monitor • AV cable (for TV) • AC/DC adapter • Cigarette lighter adapter (for car) • AV/DC cable (for connection between the 2 screens) • Headphone (2) • Mounting plate with straps (2) • Carry bag • Quick Setup Guide Player navigation controls CONTROL / / OK DESCRIPTION In Menu mode, press to move up in a list or menu. In playback mode, press to go to the previous title, chapter, or track. In Menu mode, press to move down in a list or menu. In playback mode, press to go to the next title, chapter, or track. In Menu mode, press to move left. In playback mode, press to fast reverse the playback. In Menu mode, press to move right. In playback mode, press to fast forward the playback. In menu mode, press to confirm a selection. SETUP FUNC. # COMPONENT 1 OPEN 2 On/Off 3 SETUP button 4 FUNC. 5 Navigation controls 6 button 7 button 8 Power indicator 9 DC IN jack 10 DC OUT jack 11 AV OUT jack 12 Headphone jack 13 VOL control 14 Stand 15 Strap slots DESCRIPTION Slide to open the disc tray. Slide to turn your DVD player on or off. Press to open or close the setup menu. Press to enter or exit the virtual remote control. See "Player navigation controls". Press to pause or resume the playback. Press to stop disc playback. Lights when your player is turned on. Connect to an AC/DC adapter or cigarette lighter adapter. Connect the LCD monitor to this jack using the AV/DC cable. Connect the LCD monitor to this jack using the AV/DC cable. Or connect a remote monitor, TV, or amplifier to this jack using the AV cable and an RCA cable (not supplied). Plug headphones into this jack. Note: When headphones are plugged in, the internal speakers are muted. Rotate this dial to adjust the volume. Pull out to set your player on a desk or table. Slide mounting straps through the slot when installing player in a vehicle. 7" monitor 9" monitor # COMPONENT 1 On/Off 2 VOL control 3 Headphone jack 4 AV IN jack 5 DC IN jack 6 BRIGHTNESS +/- 7 Stand 8 Strap slots DESCRIPTION Slide to turn your DVD player on or off. Rotate this dial to adjust the volume. Plug headphones into this jack. Note: When headphones are plugged in, the internal speakers are muted. Connect the AV OUT jack on your DVD player to this jack using the AV/DC cable. Connect the DC OUT jack on your DVD player to this jack using the AV/DC cable. Rotate this dial to adjust the brightness of the display. Pull out to set your player on a desk or table. Slide mounting straps through the slot when installing player in a vehicle.
-
 1
1 -
 2
2
 |
 |
