Edimax PS-1206U Quick Install Guide - Page 6
Hardware Installation - print server
 |
View all Edimax PS-1206U manuals
Add to My Manuals
Save this manual to your list of manuals |
Page 6 highlights
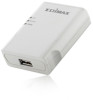
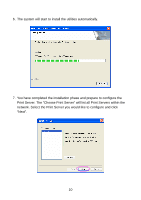
3. Hardware Installation 1. Unpack the print server package and verify that all the items listed in the previous section are provided. 2. Connect the print server to the printer you want to share on the network. 3. Connect the print server to your network by attached the network cable to the UTP port of the print server. 4. Connect the power adapter to the print server. The print server will perform the Power-On-Self-Test (POST) after it is powered on. During the POST, the Status LED will be blinking. When the Status LED is unlighted, the print server is ready. Note: You must use the power adapter shipped along with the print server, do NOT use any other power adapter from other sources. 5
-
 1
1 -
 2
2 -
 3
3 -
 4
4 -
 5
5 -
 6
6 -
 7
7 -
 8
8 -
 9
9 -
 10
10 -
 11
11 -
 12
12 -
13
-
14
-
15
-
16
-
17
-
18
-
19
-
20
-
21
-
22
-
23
-
24
-
25
-
26
-
27
 |
 |

5
3. Hardware Installation
1. Unpack the print server package and verify that all the items listed in the
previous section are provided.
2. Connect the print server to the printer you want to share on the network.
3. Connect the print server to your network by attached the network cable to
the UTP port of the print server.
4. Connect the power adapter to the print server. The print server will
perform the Power-On-Self-Test (POST) after it is powered on. During the
POST, the Status LED will be blinking. When the Status LED is unlighted,
the print server is ready.
Note: You must use the power adapter shipped along with the print
server, do NOT use any other power adapter from other sources.