Electrolux 442B Owners Guide - Page 10
FIG. 4, FIG. 5, FIG. 6, FIG. 7
 |
UPC - 023169123588
View all Electrolux 442B manuals
Add to My Manuals
Save this manual to your list of manuals |
Page 10 highlights
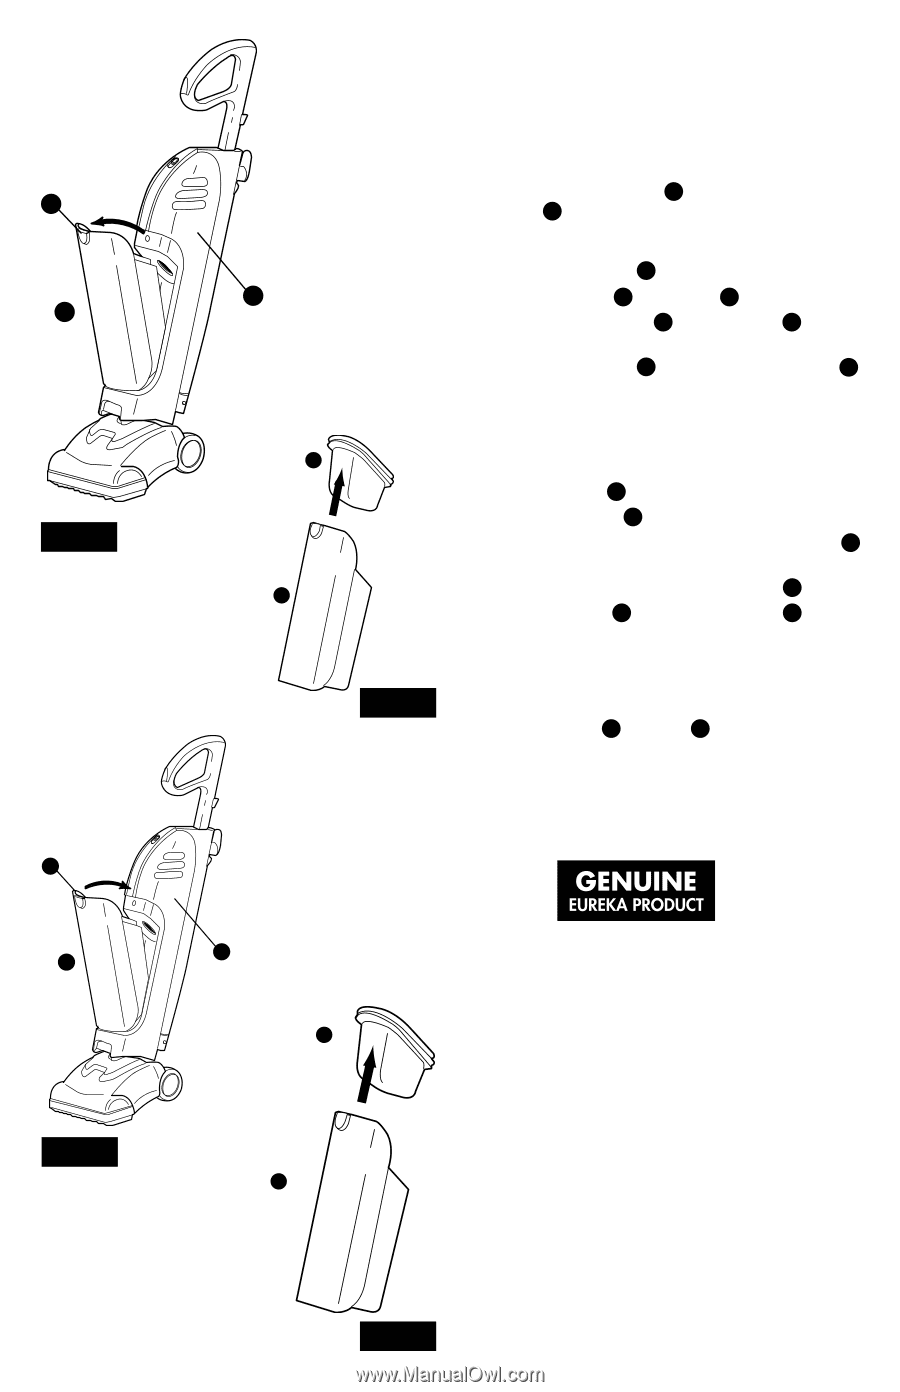
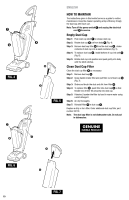
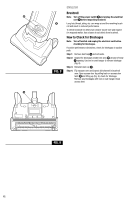
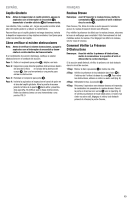
F G FIG. 4 F G FIG. 6 A H G ENGLISH HOW TO MAINTAIN The instructions given in this booklet serve as a guide to routine maintenance. Keep the cleaner operating at top efficiency. Empty the dust cup after each use. Note: Turn off the power switch E and unplug the electrical cord K to service. Empty Dust Cup Step 1: Push dust cup latch F to release dust cup. Step 2: Rotate dust cup G out from body A (Fig. 4). Step 3: Remove dust cup filter H from the dust cup G , shake contents of dust cup into a waste container (Fig. 5). Step 4: To replace dust cup G , install bottom of cup into unit A (Fig. 6). Step 5: Rotate dust cup into position and push gently into body until the latch catches. Clean Dust Cup Filter Clean the dust cup filter H as necessary. Step 1: Remove dust cup G . Step 2: Grasp handle inside filter and pull filter out of dust cup G (Fig. 7). Step 3: Shake and brush the dust and dirt from filter H . Step 4: To replace filter H , push filter into dust cup G so that flexible rim of filter fits securely into dust cup. FIG. 5 Step 5: If desired, launder the filter by hand in warm water using a mild detergent. Step 6: Air dry thoroughly. Step 7: Reinstall filter H in dust cup G . FIG. 5 Replace a dirty or torn filter. Order additional dust cup filter, part number 63170. Note: The dust cup filter is not dishwasher safe. Do not put in dishwasher. A H FIG. G FIG. 7 10
-
 1
1 -
2
-
3
-
4
-
 5
5 -
 6
6 -
 7
7 -
 8
8 -
 9
9 -
 10
10 -
 11
11 -
 12
12 -
 13
13 -
 14
14 -
 15
15 -
16
-
17
-
18
-
19
 |
 |