Electrolux E24CM75GSS Use and Care Manual - Page 15
Machine Ready
 |
View all Electrolux E24CM75GSS manuals
Add to My Manuals
Save this manual to your list of manuals |
Page 15 highlights
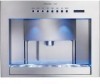
Getting Started 15 2. Gently move the coffee dispenser up or down until it is at the desired height. 3. Turn on the power switch according to page 17, wait for the message "Machine Ready" to appear on the display. 4. Flush the coffee maker according to the Flushing Out the Coffee Maker section on page 39. Warning • To avoid sickness, flush the coffee maker out before operating it for the first time according to the Flushing Out the Coffee Maker section on page 39. Doing so will remove any bacteria left in the unit during shipping and storage. • Make sure the hardness of the water supplied to, or poured into your coffee maker does not exceed the maximum stated above. Using water harder than that specified will eventually damage the internal parts and void your warranty.
-
 1
1 -
2
-
3
-
4
-
5
-
6
-
7
-
8
-
9
-
 10
10 -
 11
11 -
 12
12 -
 13
13 -
 14
14 -
 15
15 -
 16
16 -
 17
17 -
 18
18 -
 19
19 -
 20
20 -
21
-
22
-
23
-
24
-
25
-
26
-
27
-
28
-
29
-
30
-
31
-
32
-
33
-
34
-
35
-
36
-
37
-
38
-
39
-
40
-
41
-
42
-
43
-
44
 |
 |
