Electrolux EI26SS55G Complete Owner's Guide (English) - Page 21
Important, Caution
 |
View all Electrolux EI26SS55G manuals
Add to My Manuals
Save this manual to your list of manuals |
Page 21 highlights
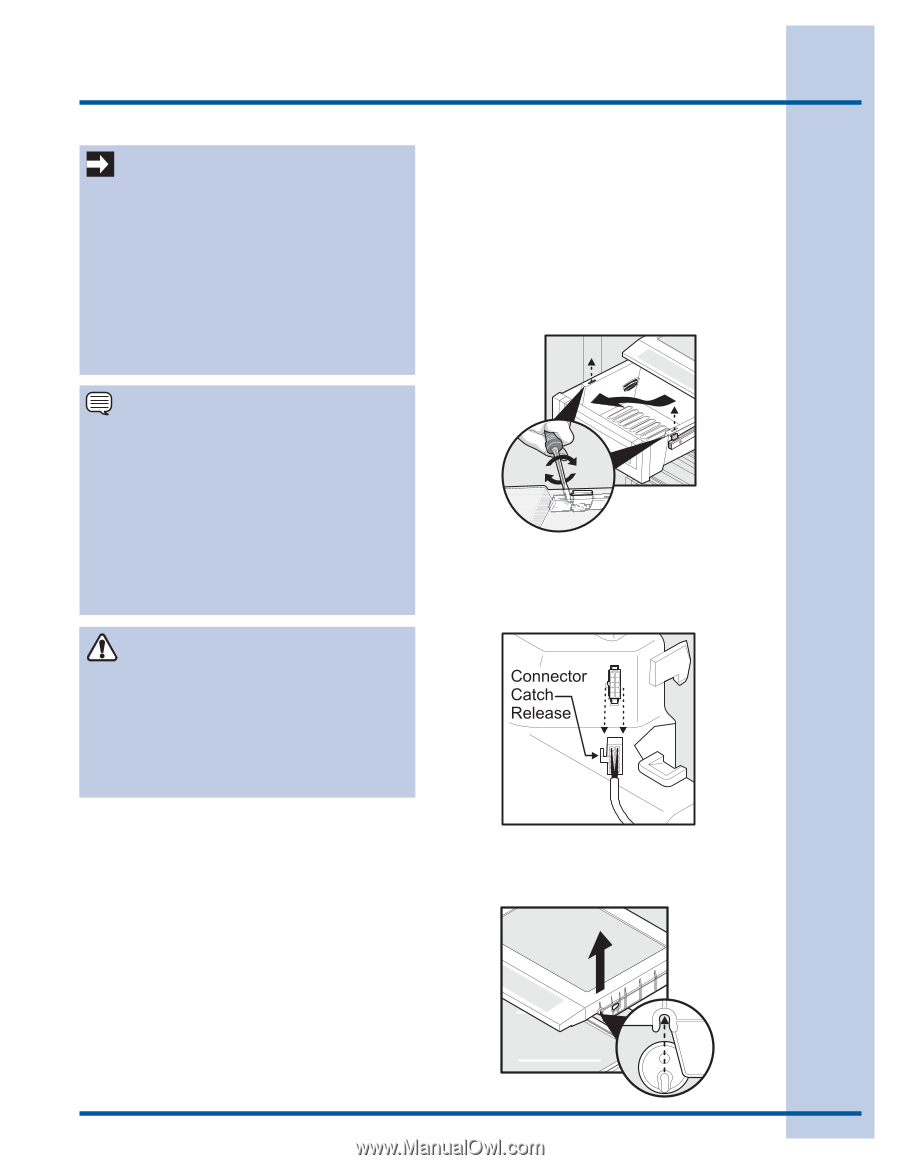
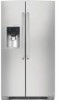
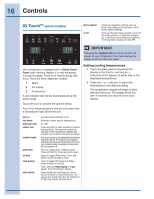
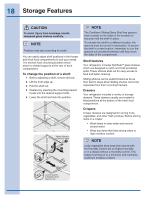
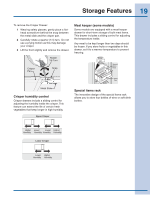
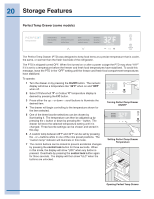
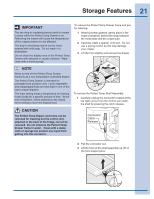
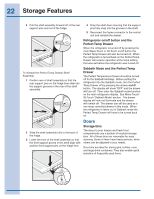
Storage Features 21 IMPORTANT The two drop in insulating inserts need to remain in place while the Perfect Temp Drawer is on. Removing the inserts will cause the temperature of the crispers below it to be affected. The drop in insulating inserts can be hand washed with mild soap. Do not wash in a dishwasher. Do not clean the display area of the Perfect Temp Drawer with abrasive or caustic cleaners. Wipe clean with a moist sponge. To remove the Perfect Temp Drawer frame and pan for cleaning: 1 Wearing safety glasses, gently place a flathead screwdriver behind the snap between the metal slide and the crisper pan. 2 Carefully rotate a quarter (1/4) turn. Do not use a prying motion as this may damage your crisper. 3 Lift the front slightly and remove the drawer. NOTE When turned off the Perfect Temp Drawer functions as a non temperature controlled drawer. The Perfect Temp Drawer is intended for packaged food products only. Leafy vegetables and unpackaged fruits are best kept in one of the lower crisper drawers. The thaw setting holds a temperature for thawing frozen foods for a specific amount of time. At the end of that time, it then switches to the mixed items setting to store the thawed food. To remove the Perfect Temp Shelf Assembly: 1 Carefully unplug the connector located at the top right corner from the control unit under the shelf by pressing the catch release. CAUTION The Perfect Temp Drawer and frame can be removed for cleaning but the control unit, attached to the back of the fridge, cannot be removed. Do not immerse the Perfect Temp Drawer frame in water. Clean with a damp cloth or sponge but prevent any liquid from getting into the connector. 2 Pull the connector out. 3 Lift the front of the shelf assembly up off of the front support pins.
-
 1
1 -
2
-
3
-
4
-
5
-
6
-
7
-
8
-
9
-
10
-
11
-
12
-
13
-
14
-
15
-
 16
16 -
 17
17 -
 18
18 -
 19
19 -
 20
20 -
 21
21 -
 22
22 -
 23
23 -
 24
24 -
 25
25 -
 26
26 -
27
-
28
-
29
-
30
-
31
-
32
-
33
-
34
-
35
-
36
-
37
-
38
-
39
-
40
-
41
-
42
 |
 |