Electrolux EIED55HIW Complete Owner's Guide (English) - Page 9
Important - not drying
 |
UPC - 012505378614
View all Electrolux EIED55HIW manuals
Add to My Manuals
Save this manual to your list of manuals |
Page 9 highlights
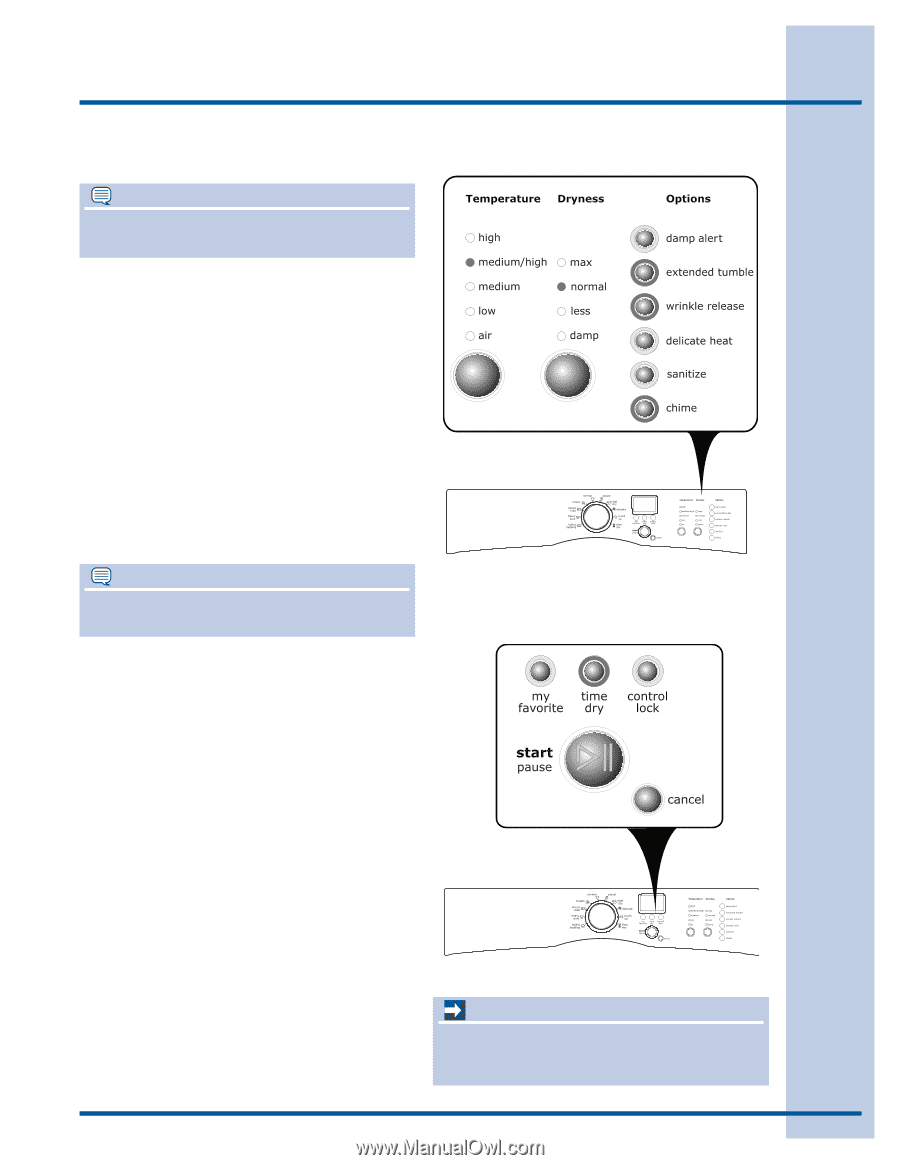
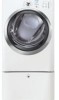
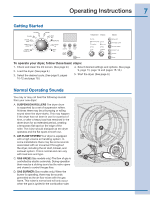
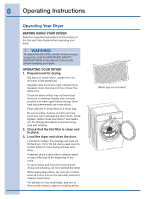
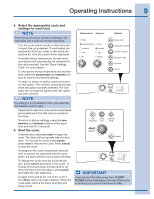
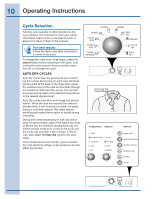
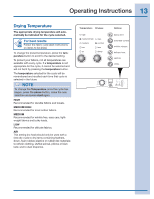
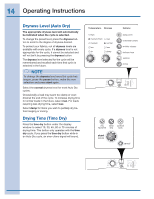
Operating Instructions 9 4. Select the appropriate cycle and settings for each load. NOTE Over-drying can cause wrinkles, shrinkage, lint, harshness and a build up of static electricity. Turn the cycle selector knob in either direction to select the cycle desired. The estimated drying time for Auto Dry cycles or the actual drying time for Time Dry cycles will be displayed. A suitable drying temperature, dryness level and options will automatically be indicated for the cycle selected. See the "Dryer Settings Chart" for more details. To change the drying temperature and dryness level, press the temperature and dryness buttons to scroll to the desired settings. To select or delete an option, press the button for that option. The indicator will be illuminated when the option has been selected. The indicator will no longer be lighted when the option has been deleted. NOTE If a setting is not available for the cycle selected, the indicator will not light. Adjustments made to a cycle will be remembered and recalled each time that cycle is selected in the future. To return to factory settings, press the temperature and dryness buttons at the same time and hold for 5 seconds. 5. Start the cycle. Close the door and press start to begin the cycle. The dryer will not operate with the door open. To interrupt the cycle, press pause; press start to resume the cycle. Press cancel to stop the cycle. If changes to the cycle, temperature, dryness level or options are attempted after the cycle starts, the lights will blink and a signal will beep. To change the cycle once the cycle has begun, press cancel and select a new cycle. To change the temperature, dryness level or options once the cycle has begun, press pause and make the new selections. A signal will sound at the end of the cycle if the chime option has been selected. When the cycle ends, remove the items promptly and hang or fold. IMPORTANT Clean the lint filter after every load. CLEAN FILTER will be displayed at the end of the cycle to remind you to remove lint from the filter.
-
 1
1 -
2
-
3
-
 4
4 -
 5
5 -
 6
6 -
 7
7 -
 8
8 -
 9
9 -
 10
10 -
 11
11 -
 12
12 -
 13
13 -
 14
14 -
15
-
16
-
17
-
18
-
19
-
20
-
21
-
22
-
23
-
24
 |
 |