Electrolux EIFLS55IIW Installation Instructions (All Languages) - Page 3
Installation Requirements - parts
 |
UPC - 012505381737
View all Electrolux EIFLS55IIW manuals
Add to My Manuals
Save this manual to your list of manuals |
Page 3 highlights
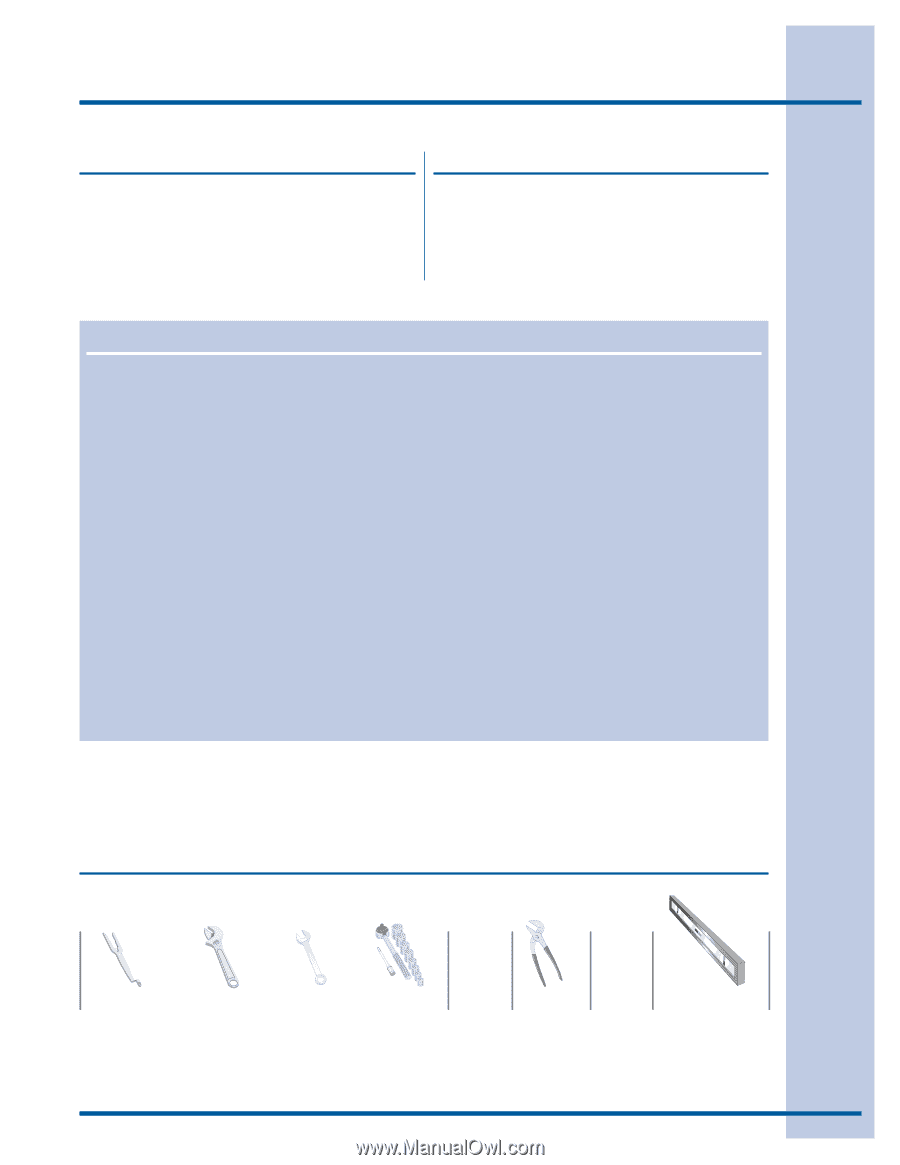
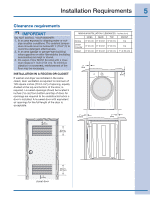
Installation Requirements 3 Please read and save this guide Questions? Thank you for choosing Electrolux, the new premium brand in home appliances. These Installation Instructions are part of our commitment to customer satisfaction and product quality throughout the life of your new appliance. For toll-free telephone support in the U.S. and Canada: 1-877-4ELECTROLUX (1-877-435-3287). For online support and product information visit http://www.electroluxappliances.com. Installation Checklist Shipping Hardware ‰ Foam shipping support (under wash tub) removed and stored ‰ Shipping bolts and spacers removed from rear of appliance and stored ‰ Hole plugs (shipped in bag in drum) installed in holes in backsheet Leveling ‰ Washer is level, side-to-side and front-toback ‰ Cabinet is setting solid on all corners Water Supply ‰ HOT supply is connected to HOT inlet and COLD supply is connected to COLD inlet ‰ HOT and COLD water supply turned on ‰ No leaks present at water supply connections or appliance inlet connections recheck in 24 hours Drain ‰ Stand pipe or wall drain height minimum 24" ‰ Drain hose snapped in "U" channel (shipped in drum) ‰ Drain hose secured in place with cable tie (shipped in drum) Door Reversal ‰ Follow detailed instructions in this guide ‰ Test hinge and latch for function Electrical Power ‰ House power turned on ‰ Washer plugged in Final Checks ‰ Installation Instructions and Use and Care Guide read thoroughly ‰ Door locks and water enters drum when cycle starts ‰ Registration card sent in Pre-installation requirements Tools and materials needed for installation: OR OR OR Universal wrench supplied with washer Adjustable wrench 3/8" or 10 mm box wrench Ratchet and socket set AND Adjustable pliers AND Carpenter's level
-
 1
1 -
 2
2 -
 3
3 -
 4
4 -
 5
5 -
 6
6 -
 7
7 -
 8
8 -
 9
9 -
10
-
11
-
12
-
13
-
14
-
15
-
16
-
17
-
18
-
19
-
20
-
21
-
22
-
23
-
24
-
25
-
26
-
27
-
28
-
29
-
30
-
31
-
32
-
33
-
34
-
35
-
36
-
37
-
38
-
39
-
40
-
41
-
42
-
43
-
44
-
45
-
46
-
47
-
48
-
49
-
50
-
51
-
52
-
53
-
54
-
55
-
56
 |
 |