Electrolux ELFW7537AT Complete Owners Guide English - Page 7
Pre-Installation Requirements, Tools and materials needed for installation, Shipping Hardware
 |
View all Electrolux ELFW7537AT manuals
Add to My Manuals
Save this manual to your list of manuals |
Page 7 highlights
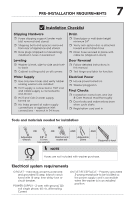
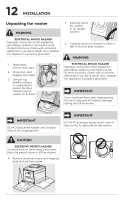
PRE-INSTALLATION REQUIREMENTS 7 Installation Checklist Shipping Hardware ˆ Foam shipping support (under wash tub) removed and stored ˆ Shipping bolts and spacers removed from rear of appliance and stored ˆ Hole plugs (shipped in manual bag) installed in holes in backsheet Drain ˆ Stand pipe or wall drain height minimum 24" ˆ Verify anti-siphon disc is attached toward end of drain hose ˆ Drain hose secured in place with cable tie (shipped in drum) Leveling ˆ Washer is level, side-to-side and frontto-back ˆ Cabinet is sitting solid on all corners Door Reversal ˆ Follow detailed instructions in this manual ˆ Test hinge and latch for function Water Supply ˆ Use only new hoses and verify rubber sealing washers are installed ˆ HOT supply is connected to HOT inlet and COLD supply is connected to COLD inlet ˆ HOT and COLD water supply turned on ˆ No leaks present at water supply connections or appliance inlet connections - recheck in 24 hours Electrical Power ˆ House power turned on ˆ Washer plugged in Final Checks ˆ Installation instructions and Use & Care Manual read thoroughly ˆ Door locks and water enters drum when cycle starts ˆ Registration card sent in Tools and materials needed for installation: OR OR AND AND Adjustable wrench 3/8" or 10 mm box wrench Ratchet and socket set NOTE Adjustable pliers Carpenter's level Inlet Hose (x2) Hoses are not included with washer purchase. Electrical system requirements CIRCUIT - Individual, properly polarized and grounded 15 amp. branch circuit fused with 15 amp. time delay fuse or circuit breaker. POWER SUPPLY - 2 wire, with ground, 120 volt single phase, 60 Hz, Alternating Current. OUTLET RECEPTACLE - Properly grounded 3-prong receptacle to be located so the power supply cord is accessible when the washer is in an installed position.
-
 1
1 -
 2
2 -
 3
3 -
 4
4 -
 5
5 -
 6
6 -
 7
7 -
 8
8 -
 9
9 -
 10
10 -
 11
11 -
 12
12 -
13
-
14
-
15
-
16
-
17
-
18
-
19
-
20
-
21
-
22
-
23
-
24
-
25
-
26
-
27
-
28
-
29
-
30
-
31
-
32
-
33
-
34
-
35
-
36
-
37
-
38
-
39
-
40
-
41
-
42
-
43
-
44
-
45
-
46
-
47
-
48
-
49
-
50
-
51
-
52
 |
 |
