Electrolux EWED65HIW Use and Care Guide - Page 9
Select the appropriate cycle and, settings for each load., OPERATING YOUR DRYER, con't
 |
UPC - 012505378621
View all Electrolux EWED65HIW manuals
Add to My Manuals
Save this manual to your list of manuals |
Page 9 highlights
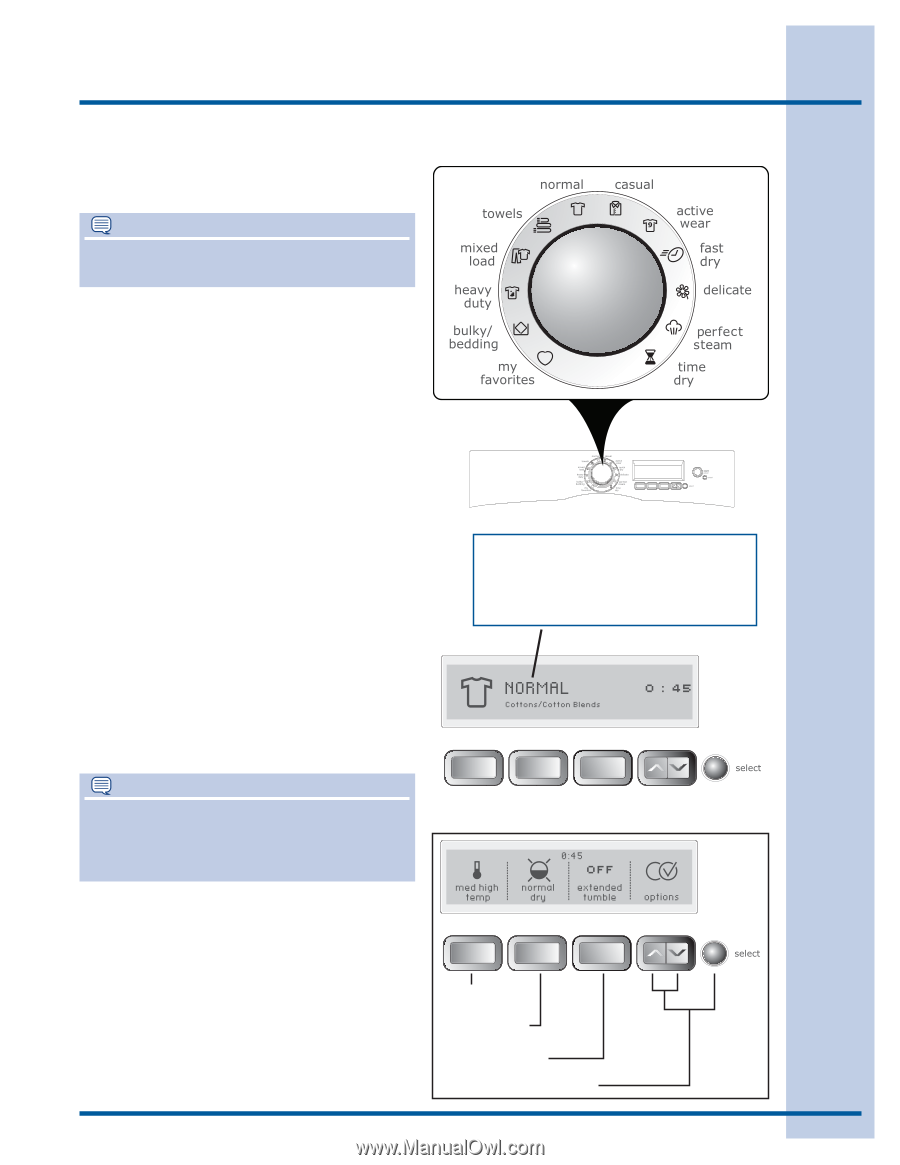
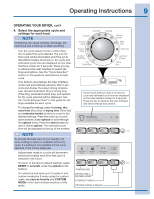
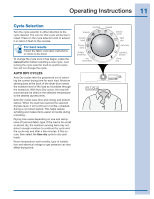
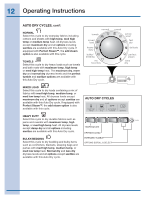
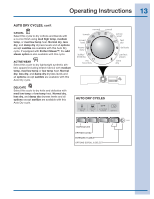
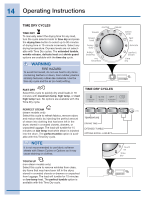
Operating Instructions 9 OPERATING YOUR DRYER, con't 4. Select the appropriate cycle and settings for each load. NOTE Overdrying can cause wrinkles, shrinkage, lint, harshness and a build up of static electricity. Turn the cycle selector knob in either direction to select the cycle desired. The icon for that cycle will be illuminated and if the cycle description feature is turned on, the cycle and estimated cycle time are displayed on the User Interface screen for 5 seconds. Press any key to advance the User Interface to select settings and options. See the "Cycle Selection" section in this guide for descriptions of each cycle. If no buttons are pressed, the User Interface screen will automatically advance after 5 seconds and display the preset drying temperature, dryness level (Auto Dry) or drying time (Time Dry), extended tumble time, and options for the cycle selected will be displayed. See the "Cycle Settings Chart" in this guide for settings available for each cycle. To change the settings, press the temp, dryness level (Auto Dry) or drying time (Time Dry) and extended tumble buttons to scroll to the desired settings. Press the scroll up or scroll down buttons under options to scroll through the options menu. Press the select button to add or delete options. The estimated cycle time will be displayed at the top of the screens. NOTE To provide the best care of your laundry, not every setting or option is available with every cycle. If a setting is not available for the cycle selected, it will not be displayed. Adjustments made to a cycle will be remembered and recalled each time that cycle is selected in the future. To return to the factory default settings, select RESET in set prefs under the options scroll buttons. To customize and save up to 3 cycles in noncustom mode plus 9 more cycles for custom users, see save as favorite and CUSTOM MODE in the User Interface sections of this guide. As the Cycle Selector knob is turned, the cycle and estimated cycle time are displayed on the User Interface screen for 5 seconds. Press any key to advance the User Interface and select settings and options. TEMPERATURE DRYING TIME or DRYNESS LEVEL EXTENDED TUMBLE OPTIONS SCROLL & SELECT
-
 1
1 -
2
-
3
-
 4
4 -
 5
5 -
 6
6 -
 7
7 -
 8
8 -
 9
9 -
 10
10 -
 11
11 -
 12
12 -
 13
13 -
 14
14 -
15
-
16
-
17
-
18
-
19
-
20
-
21
-
22
-
23
-
24
-
25
-
26
-
27
-
28
-
29
-
30
-
31
-
32
-
33
-
34
-
35
-
36
 |
 |