Emerson ER100104 User Manual - Page 2
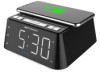
Sensing Room Temperature, Qi Wireless Charging
 |
View all Emerson ER100104 manuals
Add to My Manuals
Save this manual to your list of manuals |
Page 2 highlights
8 Fahrenheit Celsius 15 AL1 AL2 AM 1 Press the "TEMP."button to sense indoor temperature in Fahrenheit (F) or Celsius (C). 2 The temperature can be converted between Fahrenheit and Celsius by pressing and holding the "TEMP." button while in temperature mode. Press the button indicated to turn On the LED for decorations.To turn it Off, press the same button once. 9 hold the 2 Press the "AL1" ("AL2") button again, the Minutes will flash. Press the "▼" or "▲" button to adjust the Minutes. AM 3 Press the AL1 AL2 DIMMER LIGHT TEMP. AL1 AL2 AM 12 4- Press the "DIMMER" button to set the clock display at one of the 4 brightness levels. default 1.5d 6.7d 4 Press the . 5 Press the AL1 (AL2) button again to save the Alarm settings and resume clock mode. Setting the Alarm(AL1 or AL2) On or Off. Press the When the AL1 (AL2) indicator lights On, Wake to Buzzer Alarm for AL1 (AL2) will be On. repeatedly Alarm is Off. press the the indicator for the AL1 (AL2) Wake to Buzzer 13 AL1 AL2 DIMMER LIGHT TEMP. AL1 AL2 AM polarity facing downward The lithium backup battery needs replacement when the LOW BATTERY indicator flashes, otherwise, the time and alarm settings will be lost/reset after a power outage. Leave the AC adapter connected to your AC outlet to retain memory while the original battery is removed. Unscrew the battery holder from the cabinet with a small screwdriver and insert a new battery with the same CR2032 or equivalent type into the holder the same way, observing the positive (+) polarity before sliding the holder back into the slot. The LOW BATTERY indicator should then be Off. 16 17 When the Alarm comes ON, press "SNOOZE" button to pause it for 9 minutes. Alarm indicator will flash during Snooze Alarm mode. Snooze Alarm will only be active for one hour. To turn off Snooze Alarm mode, press the "AL1" ("AL2") button once.The Alarm indicator will then become solid (to be On again same time next day). AL1 AL2 DIMMER LIGHT TEMP. AL1 AL2 AM 10 Sensing Room Temperature AL1 AL2 DIMMER LIGHT TEMP. AL1 AL2 AM 14 Qi Wireless Charging Smartphone/mobile device Qi-enabled Receiver (if your smartphone AL1 AL2 itself is not Qi-compatible) AM Wireless Charging Pad An 5W Qi Wireless Charging Pad is built on top of this unit for wireless power transfer to any Qi-compatible Smartphones or Qi-enabled Receivers over a vertical distance of not more than 0.2 inches (5 mm). 1 Place your Qi-compatible Smartphone or Receiver (only one set at a time) on top of the Wireless Charging Pad. The center of your Smartphone or Receiver must be positioned properly right at the middle of this charging pad in order to maximize the charging efficiency. 2 While wireless charging started or detected, the Qi indicator will be flashing Red slowly. 3 While wireless charging error occurred (if metal sheet/substance placed on top of the charging pad), the Qi indicator will be flashing Red rapidly to alert user to get the erroneous receiver removed. When your Smartphone is fully charged, the Qi indicator will turn solid 4 Green (except for iPhones). ER100104 ER100104-20180917-00
-
 1
1 -
 2
2
 |
 |
