Epson 1400 Managing Color Guide - Page 7
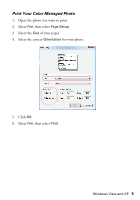
Select, as the, setting., Click the, button., Make sure, is selected, then click - photo printer
 |
UPC - 010343859937
View all Epson 1400 manuals
Add to My Manuals
Save this manual to your list of manuals |
Page 7 highlights
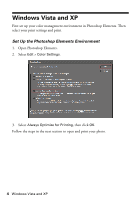
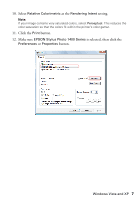
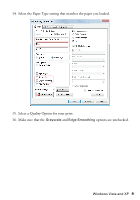
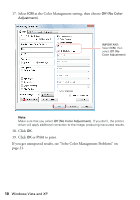
10. Select Relative Colorimetric as the Rendering Intent setting. Note: If your image contains very saturated colors, select Perceptual. This reduces the color saturation so that the colors fit within the printer's color gamut. 11. Click the Print button. 12. Make sure EPSON Stylus Photo 1400 Series is selected, then click the Preferences or Properties button. Windows Vista and XP 7
-
 1
1 -
 2
2 -
 3
3 -
 4
4 -
 5
5 -
 6
6 -
 7
7 -
 8
8 -
 9
9 -
 10
10 -
 11
11 -
 12
12 -
13
-
14
-
15
-
16
-
17
-
18
-
19
-
20
-
21
 |
 |

Windows Vista and XP
7
10. Select
Relative Colorimetric
as the
Rendering Intent
setting.
Note:
If your image contains very saturated colors, select
Perceptual
. This reduces the
color saturation so that the colors fit within the printer’s color gamut.
11.
Click the
Print
button.
12.
Make sure
EPSON Stylus Photo 1400 Series
is selected, then click the
Preferences
or
Properties
button.