Epson 1400 Product Information Guide - Page 10
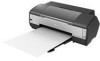
Aligning the Print Head, Windows, Macintosh - photo printer
 |
UPC - 010343859937
View all Epson 1400 manuals
Add to My Manuals
Save this manual to your list of manuals |
Page 10 highlights
Epson Stylus Photo 1400 4. When the green P power light stops flashing, make sure paper is loaded in the printer, click Print Nozzle Check Pattern and click Print. The nozzle check pattern prints: Print head does not need to be cleaned: 5. Click Next, then click Print to print an alignment sheet. You see a window like this one: Print head needs to be cleaned: 5. If there are no gaps in the pattern, click Finish. If there are still gaps, or the test patterns are faint, click Clean to clean the print head again. If you don't see any improvement after cleaning four times, turn the printer off and wait at least 6 hours. This allows any dried ink to soften. Then, try cleaning the print head again. Aligning the Print Head If your printouts look grainy or blurry, or you see light or dark lines, you may need to align the print head. Note: You may also see lines in your printouts if your cartridges are low on ink or you need to clean the print head. Before you align the print head, make sure the CD/DVD tray is not inserted in the printer. 1. Turn on the printer. 2. Load several sheets of paper, preferably Epson Presentation Paper Matte. 3. Make sure the ) paper and H ink lights are not flashing or on. 4. Windows: Right-click the printer icon on your taskbar (in the lower right corner of your screen). Select Print Head Alignment. Macintosh: Open the Applications folder and select EPSON Printer Utility2. Select SP 1400 Series in the printer list, click OK, and select Print Head Alignment. Note: Do not cancel printing while the alignment sheet is printing. 6. Look at the three sets of patterns in your printout. For each set, if you see a pattern with no streaks or lines, enter its number in the corresponding box on the screen. If every pattern in a set contains lines or streaks, select the pattern that looks best. Click Realignment, then click Print to print another alignment sheet and repeat this step. 7. Click Finish to exit the Print Head Alignment utility. 10 - Epson Stylus Photo 1400 1/07
-
 1
1 -
2
-
3
-
4
-
 5
5 -
 6
6 -
 7
7 -
 8
8 -
 9
9 -
 10
10 -
 11
11 -
 12
12 -
 13
13 -
 14
14
 |
 |
