Epson 1660 Start Here Card - Page 2
Scanner, Basics - perfection photo driver
 |
UPC - 010343842472
View all Epson 1660 manuals
Add to My Manuals
Save this manual to your list of manuals |
Page 2 highlights
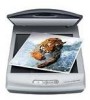
ScanneBrasics Your First Scan 1 Raise the scanner lid and place your photo face down on the glass. Then close the lid. Place top of photo in the upper right corner 2 Press the Start button on the scanner. EPSON Smart Panel opens on your computer. Start button NOTE: In Windows XP, you may see a message the first time you press any of the scanner buttons. Select EPSON SMART PANEL, click Always use this program for this action, then click OK. 3 Click the Scan for Creativity icon. A progress meter appears on your screen and your photo is scanned. After your photo is scanned, you see a window like the one below: Click on a file name if you want to change it Click Finish when you're done scanning Click here for help 4 If you want to scan another photo, place it on the scanner, close the cover, and click Scan More. Otherwise, click Finish. ArcSoft™ PhotoImpression™ opens and your scanned image appears on screen. You can edit your image, use it in a calendar or greeting card, save it, or print it. Click here for help Selected image Editing tools NOTE: For help with PhotoImpression, click the ? question mark in the upper right corner of the screen. Using the Scanner Buttons The buttons make scanning easy. Just place your photo or document face down on the scanner and follow the steps for the type of scan you want. Start Copy Scan to E-mail Scan to Web (EPSON PhotoCenter) Copy: Scan and automatically print a document- just like a copier. 1 Make sure your printer is turned on. 2 Press the button on the scanner. 3 Wait while your scanner and printer do their work. You can watch the copy process on your computer screen. Scan to E-mail: Attach your photo to an e-mail. 1 Press the button on the scanner. Your photo is scanned, and you see it on your screen. 2 Click Finish. You see the Launch Assistant. 3 Select your e-mail program and click Launch. An e-mail window opens on your screen, with your photo attached. 4 Enter the address where you want to send the photo, type in a message, and click Send. Scan to Web: Scan your photos to the EPSON PhotoCenter, a free photo-sharing website. Before you start, click the Epson PhotoCenterSM icon on your desktop (or go to http://photo.epson.com) and register. You also need to log on to AOL®, if you use it for the Internet. 1 Press the button on the scanner. Your photo is scanned and the Scan to Web window opens on your screen. 2 Select USA under Site Name, and enter the same User ID (e-mail address) and Connection Password you used when you registered at the EPSON PhotoCenter. 3 Click Upload. 4 When you see a confirmation message, click OK to connect to the PhotoCenter. Your Internet browser opens and you see the EPSON PhotoCenter. 5 Under Member Sign In, enter your e-mail address and password, and then click go. You see a message that you have a new photo in your Photo Inbox. 6 Click Photo Inbox to view your photo. You can move your photo to an album, where you can view it any time you want. Your friends and family can go to the EPSON PhotoCenter to see your pictures too. Click the HELP button on the PhotoCenter screen for more information. Recommended Settings When you use the scanner buttons and EPSON Smart Panel, the software automatically selects the best settings for your scan. If you want to select settings yourself, see your on-screen Scanner Reference Guide for instructions. For the best scans, select a resolution setting (dpi) that balances quality with file size. The ideal resolution also depends on how you plan to use your scanned image. To scan an image for: viewing on the Web, select 72 to 96 dpi. sending by e-mail, select 96 to 150 dpi. printing, select a higher resolution based on the image type, such as the following: Image type Scanning resolution for printing Photograph or magazine 300 dpi Small photograph to be enlarged 300 dpi to 3200 dpi Newspaper text only, text for OCR, text with images 400 dpi Line drawings or artwork 300 to 3200 dpi Slides or negatives 300 to 3200 dpi NOTE: If you use the scan to P.I.M. feature, make sure you TM print with PhotoImpression or another P.I.M.- enabled program that came with your P.I.M.- enabled printer. Got Questions? Here's where to look for answers: On-screen Scanner Reference Guide Double-click the Scanner Reference Guide icon on your desktop. On-screen Help for Smart Panel, PhotoImpression, and EPSON TWAIN Click the Help button or question mark that appears on the screen when you're using any of these programs. EPSON Technical Support EPSON provides technical assistance 24 hours a day through the electronic support services and automated telephone services described below: World Wide Web From the Internet, you can reach EPSON Support at http://support.epson.com. At this site, you can download drivers and other files, look at product documentation, access troubleshooting information, and receive technical advice through e-mail. Automated Telephone Services A variety of automated help services are available 24 hours a day, seven days a week. To use these services, you must have a touch tone telephone and call (800) 922-8911. Your EPSON SoundAdviceSM Express Code is 70390. Use this code to quickly select your scanner in SoundAdvice. To Speak to a Technical Support Representative Dial (562) 276-4382 (U.S.) or (905) 709-3839 (Canada), 6 AM to 6 PM, Pacific Time, Monday through Friday. Toll or long distance charges may apply. To Purchase an Optional Film Adapter or Other Accessories Call the EPSON StoreSM at (800) 873-7766 or visit our web site at www.epsonstore.com (U.S. sales only). In Canada, please call (800) 873-7766 for dealer referral. Software Technical Support Software Telephone Fax Internet and E-mail EPSON TWAIN U.S. (562) 276-4382 Canada (905) 709-3839 (800) 922-8911 support.epson.com fax-on-demand system EPSON Smart Panel (510) 445-8616 (510) 445-8601 [email protected] ArcSoft PhotoImpression (510) 440-9901 8:30 AM to 5:30 PM, PST Monday-Friday (510) 440-1270 www.arcsoft.com [email protected] Problems? First, check the light on the scanner. Flashing green Warming up or scanning. Green Ready to scan. Flashing red Make sure the transportation lock is pushed all the way to the right. Try restarting your computer. If the red light is still flashing, contact your dealer or EPSON. Off Make sure your scanner is connected to your computer and plugged into a power source. If your problem is listed here, try these suggestions. For more information, see your software Help or your on-screen Scanner Reference Guide. The Found New Hardware Click Cancel and follow the steps on the other Wizard appears on side of this sheet. Disconnect the scanner before your screen. installing the software. You see an error message Make sure your scanner is connected to your when you try to scan. computer and plugged into a power source. The scanner doesn't scan. Make sure you're using the USB cable that came with your scanner. If you're using a USB hub, try connecting the scanner directly to one of the USB ports on your computer. If you see your scanner in the Windows Control Panel but you can't scan, uninstall and reinstall EPSON TWAIN. See your on-screen Scanner Reference Guide for more information. If you're trying to scan slides or negatives, you need to remove the document mat from the inside of the scanner lid. See your on-screen Scanner Reference Guide for instructions. The scanner software doesn't work. Make sure your computer has at least 128MB of memory (RAM). 256MB or more is even better, especially if you're scanning a large image or scanning at a high resolution. If you're running software that didn't come with the scanner, check the Help or documentation to make sure your computer has enough memory. Try closing any programs that you don't need for scanning. The printed image doesn't look the same as the original. Check your software settings and make sure they are correct for the type of photo or document you're scanning. Make sure the scanner glass and the inside of the lid are clean. If not, unplug the power cord and clean them with a soft, dry cloth. Because your monitor and printer use different color technologies, your printed colors cannot exactly match the colors you see on the screen. The printed image is larger or smaller than the original. You may have changed the resolution or image size in your software. The size on your screen doesn't indicate the size of the printed image. You can't select your e-mail program when you use Scan to E-Mail. For Scan to E-Mail, you must use a MAPIcompliant program, such as Microsoft® Exchange or Outlook®. If you use AOL, you need to use Scan to File and then send the file as an e-mail attachment. EPSON is a registered trademark and EPSON Smart Panel and PRINT Image matching are trademarks of SEIKO EPSON CORPORATION. EPSON Perfection is a registered trademark and EPSON PhotoCenter, EPSON Store, and SoundAdvice are service marks of Epson America, Inc. General Notice: Other product names are for identification purposes only and may be trademarks of their respective owners. EPSON disclaims any and all rights in those marks. Copyright © 2002 by Epson America, Inc. Printed on recycled paper. 4/02 Printed in Singapore CPD-13982R1 4025693-01
-
 1
1 -
 2
2
 |
 |
