Epson 570e Product Information Guide - Page 11
Using the Push Tractor, User's Guide - lq paper tension unit
 |
UPC - 010343813854
View all Epson 570e manuals
Add to My Manuals
Save this manual to your list of manuals |
Page 11 highlights
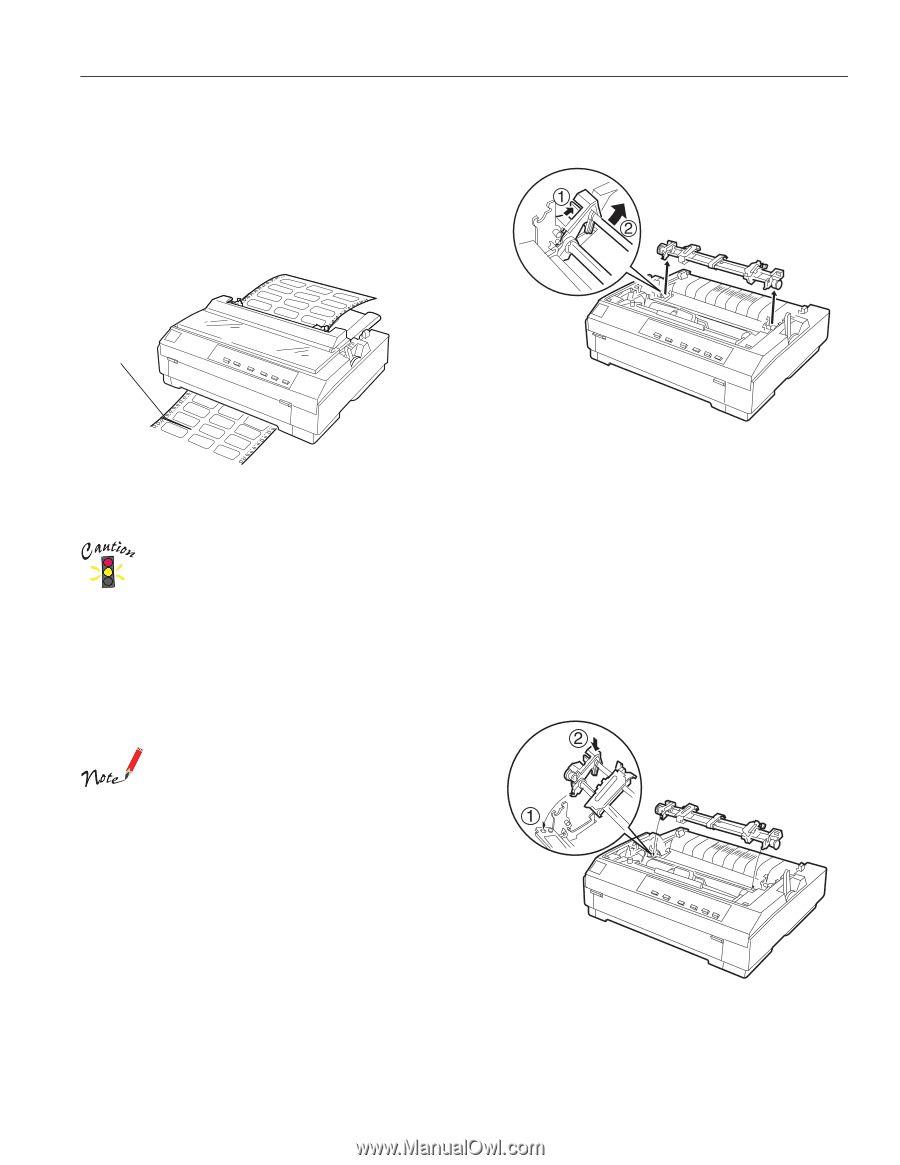
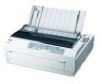
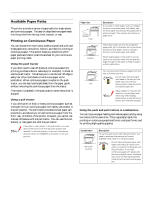
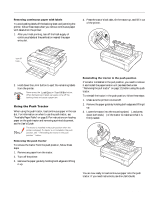
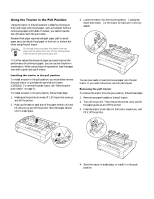
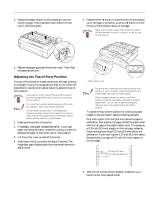
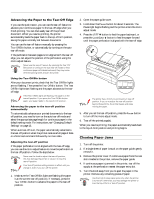
EPSON LQ-570e Removing continuous paper with labels To avoid peeling labels off the backing sheet and jamming the printer, follow these steps when you remove continuous paper with labels from the printer: 1. After you finish printing, tear off the fresh supply of continuous labels at the perforation nearest the paper entry slot. 4. Press the tractor's lock tabs, tilt the tractor up, and lift it out of the printer. tear off here 2. Hold down the LF/FF button to eject the remaining labels from the printer. Never press the Load/Eject or Tear Off/Bin button. When fed backward, labels can easily come off the backing sheet and cause a paper jam. Using the Push Tractor When using the push tractor, load continuous paper in the rear slot. For information on when to use the push tractor, see "Available Paper Paths" on page 8. For instructions on loading paper on the push tractor and removing a printed document, see the User's Guide. The tractor is installed in the push position when the printer is shipped. If a tractor is not installed in the push position, see “ Reinstalling the tractor in the push position ” below. Removing the push tractor To remove the tractor from the push position, follow these steps: 1. Remove any paper from the tractor. 2. Turn off the printer. 3. Remove the paper guide by holding both edges and lifting it up. Reinstalling the tractor in the push position If a tractor is installed in the pull position, you need to remove it and install the paper tension unit (as described under "Removing the pull tractor" on page 12) before using the push tractor. To reinstall the tractor in the push position, follow these steps: 1. Make sure the printer is turned off. 2. Remove the paper guide by holding both edges and lifting it up. 3. Lower the tractor into the mounting slots (Œ), and press down both ends () of the tractor to make sure that it is firmly seated. You are now ready to load continuous paper onto the push tractor. If you need instructions, see the User's Guide. 4/00 EPSON LQ-570e - 11
-
 1
1 -
2
-
3
-
4
-
5
-
 6
6 -
 7
7 -
 8
8 -
 9
9 -
 10
10 -
 11
11 -
 12
12 -
 13
13 -
 14
14 -
 15
15 -
 16
16 -
17
-
18
 |
 |