Epson AcuLaser CX11N Start Here Card - Page 3
Install Photoconductor, Set Fax/Printer Information, CX11NF, CX11N - photoconductor unit
 |
View all Epson AcuLaser CX11N manuals
Add to My Manuals
Save this manual to your list of manuals |
Page 3 highlights
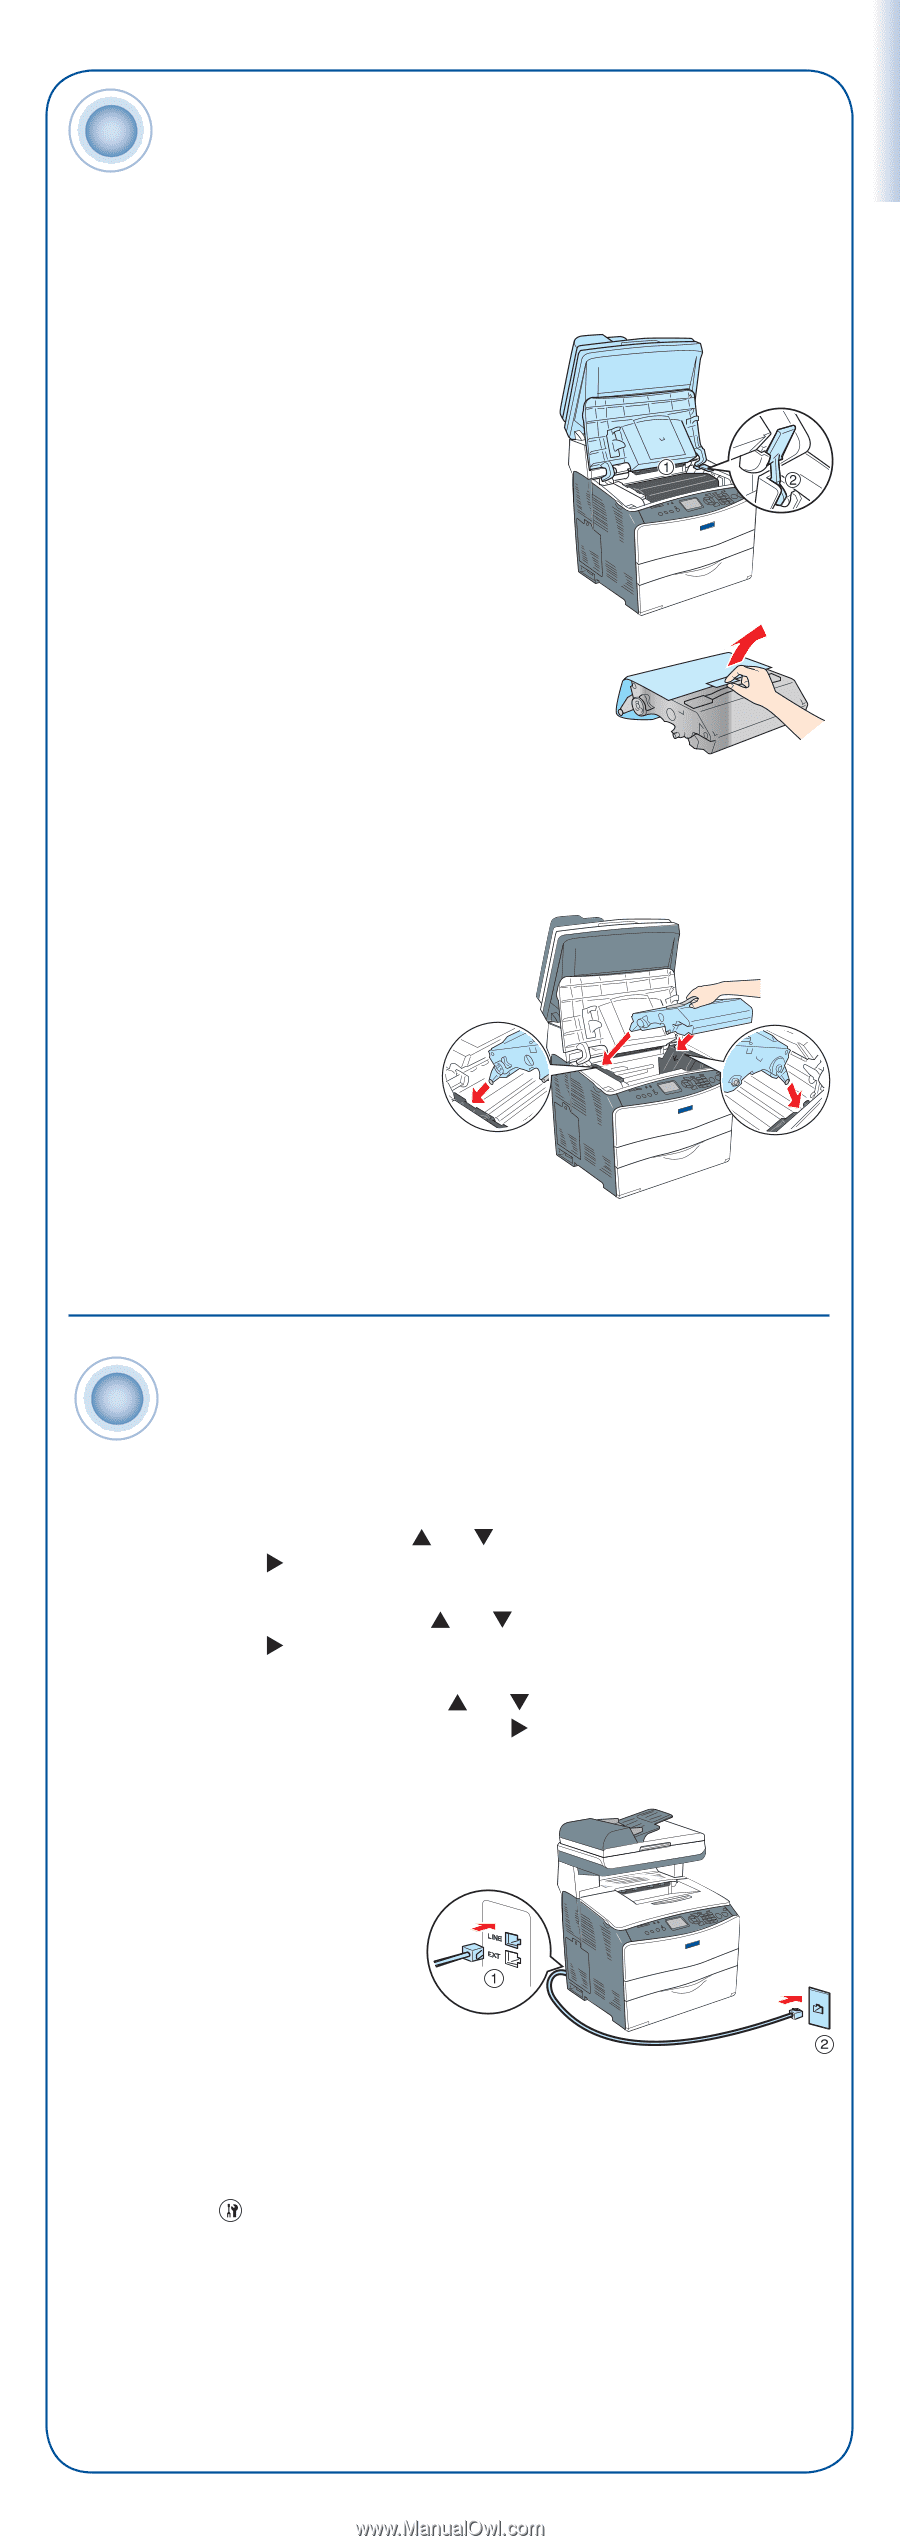
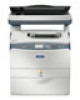
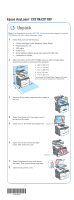
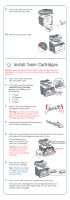
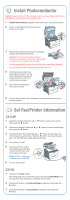
3 Install Photoconductor Caution: Make sure the CX11N is turned on and you have installed all the toner cartridges, as described in the previous section. 1 Install Photoconductor appears in the LCD screen. Lift up the scanner. 2 Lift up cover B and raise the orange lever inside, on the right. 3 Remove the photoconductor from its package and pull off the protective sheet. Caution: Do not touch the belt on the top of the photoconductor or the blue roller beneath it; otherwise, print quality may decrease. Avoid exposing the photoconductor to light any longer than necessary. Do not touch any other components inside the CX11N. 4 Hold the photoconductor by its handle and insert it into the slots marked with blue arrows inside the CX11N. Push it in until it clicks into place. 5 Flip down the orange lever, then close cover B. 6 Pull out the extension tray if necessary. Lower the scanner unit to its original position. 4 Set Fax/Printer Information CX11NF 1 Select the Country: Press the or button to select the country, then press the button. 2 Select the Language: Press the or button to select the language, then press the button. 3 Set the Date and Time: Press the or button to select the year, month, day, hour, and minute. Press the button after selecting each item. The CX11NF then resets itself and reboots. 4 Turn off the CX11NF. 5 Connect an RJ-11 cord to the telephone line interface on the CX11NF and to the RJ-11 jack on the wall. Note: An RJ-11 cord is not included with the CX11NF. 6 Turn on the CX11NF. CX11N 1 Press the Setup button. The Setup light turns on and the LCD screen shows Setup Mode for a few seconds, then changes to the Setup menu screen. 2 Press the ▼ button until Printer Settings is selected, then press the button. 3 Press the ▼ button until Setup Menu is selected, then press the button. ▲ ▲
-
 1
1 -
 2
2 -
 3
3 -
 4
4 -
 5
5 -
 6
6 -
 7
7 -
 8
8
 |
 |