Epson C11C294131BZ Product Information Guide - Page 5
Changing the default settings
 |
View all Epson C11C294131BZ manuals
Add to My Manuals
Save this manual to your list of manuals |
Page 5 highlights
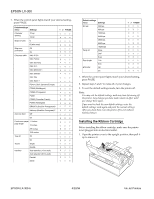
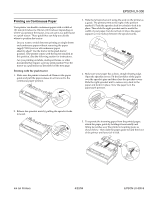
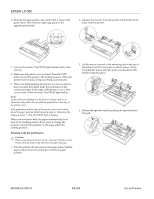
(3621ý/;ðêíí Auto line feed When the auto line feed feature is on, each carriage return (CR) code is accompanied by a line feed (LF) code. If your printed text is unexpectedly double-spaced, set this feature to off. If text lines print on top of each other, set it to on. Page length This option is available only when you use continuous paper with the tractor. You can set the page length to 8.5, 11, 12, or 70/6 inches (the length of A4 paper). Auto tear off When you use continuous paper with the push tractor, this feature advances the paper perforation to the tear-off position when you can easily tear off the printed pages. When the printer receives data, it automatically reverses the paper to the top-of-form position and starts printing, so you can use all of the next sheet. When you use the tractor to print on labels, set this feature to off. Tractor When you use the tractor as a pull or push tractor, leave this option set to Single. If you install an optional tractor and use both tractors as push-pull tractor, set it to Double. Interface When this feature is set to Auto, the printer determines which interface receives data and then switches to that interface until the end of the print job (when no data is received from the selected interface for the amount of time specified by the Auto interface wait time). Set this option to Parallel only if you want the printer to ignore data from the serial interface. Set it to Serial if you want the printer to ignore data from the parallel interface. Bit rate, parity bit, data length, and ETX/ACK These options are available only when the interface is set to Serial. Changing the default settings Because software settings always override the printer's default settings, use your software program to control the printer, if possible. See your software manual for more information. To change the printer's default settings, follow the steps below: 1. Make sure the printer is turned off and paper is loaded in the paper feeder. 2. Hold down the FONT button and turn on the printer to enter the default-settings mode. The printer loads a sheet of paper and prints a brief summary and instructions. It instructs you to select the language that you want messages printed in (English, French, German, Italian, or Spanish). 3. Press the FONT button until the FONT lights indicate the language of your choice; then press the LF/FF button to make your selection. )217ý/LJKWV DQJXDJH 2 # # 1 (QJOLVK 2 # # ) )UHQFK 1 # # 2 *HUPDQ 1 # # 1 ,WDOLDQ 1 # # ) 6SDQLVK ) ýý ýIODVKLQJñý1 ý ýRQñý2 ý ýRII After you press the LF/FF button, the printer prints the current default settings and the next instruction in the language you selected. Wait until printing is finished, then go to the next step. 4. Press the FONT button now to print help text that guides you through the operations. (Once you are experienced with the Printer Setting mode, you can skip this step by pressing LF/FF instead.) The printed instructions include submenu tables that list all of the settings you can change and show you how the control panel lights appear for each selection. 5. At this point you are in the table shown below. To move to the feature you want to change, press the FONT button until the lights indicate the appropriate selection. )217 )217 3$86( ìýOLJKW ëýOLJKW OLJKW 6HWWLQJ ) 2 2 &KDUDFWHUýVSDFLQJ ) 1 2 6KDSHýRIý]HUR 2 ) 2 6NLSðRYHUðSHUIRUDWLRQ 1 ) 2 &KDUDFWHUýWDEOH ) ) 2 $XWRýOLQHýIHHG ) 2 1 3DJHýOHQJWK ) 1 1 $XWRýWHDUýRII 2 ) 1 7UDFWRU 1 ) 1 ,QWHUIDFH ) ) 1 %LWýUDWH 2 2 ) 3DULW\ýELW ) 2 ) 'DWDýOHQJWK 1 2 ) (7;î$&. IODVKLQJñý1 ý ýRQñý2 ý ýRII For example, if you want to change the interface setting, press the FONT button until FONT 1 is on, FONT 2 is flashing, and the PAUSE light is on. 6. Next, press the PAUSE button to change the setting. The printer automatically enters a submenu for that setting. As you move from setting to setting, the FONT lights turn on (1 ), off (2 ), and flash () ) to show your selection, as indicated in the following table. ,QNý-HWý3ULQWHUV (3621
-
 1
1 -
 2
2 -
 3
3 -
 4
4 -
 5
5 -
 6
6 -
 7
7 -
 8
8 -
 9
9 -
 10
10 -
 11
11 -
12
 |
 |
