Epson C11C294131BZ Product Information Guide - Page 9
Ulqwlqj Rq &rqwlqxrxv 3dshu
 |
View all Epson C11C294131BZ manuals
Add to My Manuals
Save this manual to your list of manuals |
Page 9 highlights
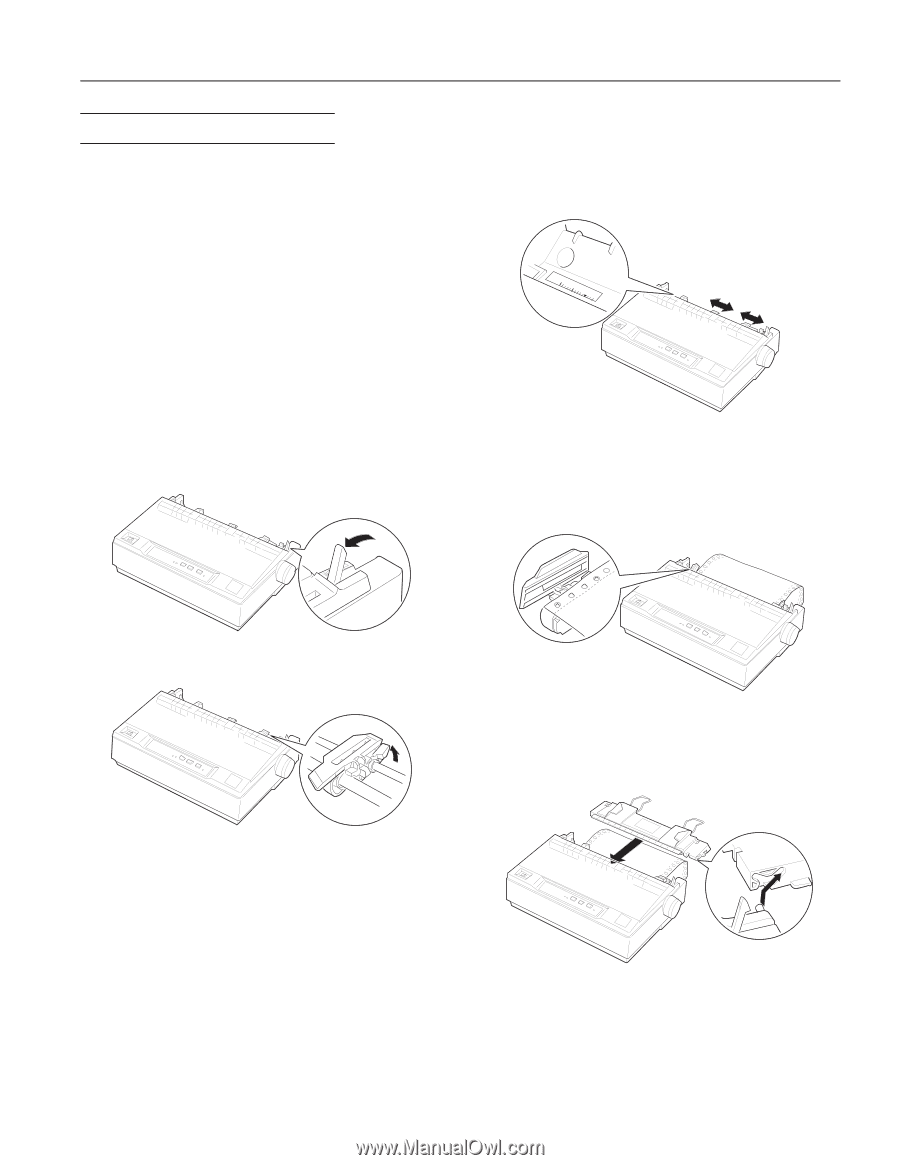
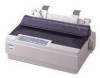
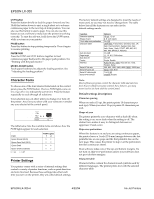
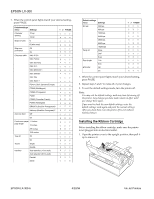
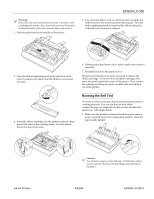
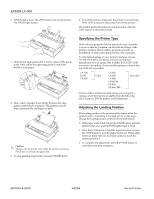
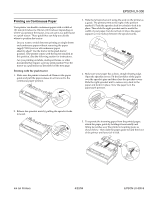
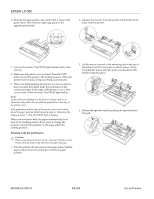
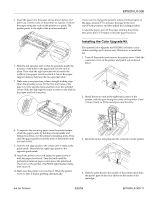
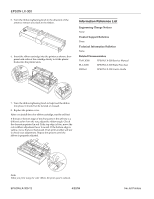
(3621ý/;ðêíí 3ULQWLQJýRQý&RQWLQXRXVý3DSHUý Your printer can handle continuous paper with a width of 101 mm (4.0 inches) to 254 mm (10.0 inches). Depending on where you position the tractor, you can use it as a pull tractor or a push tractor. These guidelines can help you decide where to position the tractor: t Do you want to switch between printing on single sheets and continuous paper without removing the paper supply? Will you tear off continuous paper sheet-by-sheet? Use the tractor in the push tractor position. (The printer comes with the tractor installed in this position.) See the following section for instructions. t Are you printing on labels, multi-part forms, or other documents that require a precise print position? Use the tractor as a pull tractor as described on the next page. Printing with the push tractor 1. Make sure the printer is turned off. Remove the paper guide and pull the paper-release lever forward to the continuous paper position. 3. Slide the left sprocket unit using the scale on the printer as a guide. The printer prints to the right of the position marked 0. Push the sprocket lock lever back to lock it in place. Then slide the right sprocket unit to match the width of your paper, but do not lock it. Move the paper support so it is midway between the sprocket units. 10 5 0 4. Make sure your paper has a clean, straight leading edge. Open the sprocket covers. Fit the first holes of the paper over the sprocket pins and then close the sprocket covers. Slide the right sprocket unit to remove any slack in the paper and lock it in place. Now the paper is in the paper-park position. 2. Release the sprocket units by pulling the sprocket locks forward. 5. To separate the incoming paper from the printed paper, attach the paper guide by holding it horizontally and fitting its notches over the printer's mounting posts as shown below. Then slide the paper guide toward the front of the printer until you feel it click. ,QNý-HWý3ULQWHUV (3621
-
 1
1 -
2
-
3
-
 4
4 -
 5
5 -
 6
6 -
 7
7 -
 8
8 -
 9
9 -
 10
10 -
 11
11 -
 12
12
 |
 |