Epson C11CA73201 Quick Guide - Page 30
Scanning a Document or Photo, Quick Scanning With the Scan Button
 |
View all Epson C11CA73201 manuals
Add to My Manuals
Save this manual to your list of manuals |
Page 30 highlights
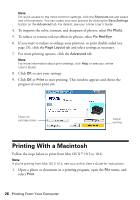
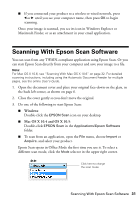
Scanning a Document or Photo You can use your product to scan original documents and photos and save them on your computer. Quick Scanning With the Scan Button Use the touch screen to quickly scan a photo or document and save it on your computer. You can even scan a photo and have it automatically included in an email message. Note: For Mac OS X 10.6, see "Scanning With Mac OS X 10.6" on page 32. 1. Open the document cover and place your original face-down on the glass, in the back left corner, as shown on page 6. 2. Close the cover gently so you don't move the original. 3. Press Home if necessary and select u Scan. 4. Press l or r to select one of the following options: ■ Scan to Memory Card automatically scans a photo or document and saves it on a memory card or USB storage device in JPEG or PDF format ■ Scan to PC automatically creates a JPG image and saves it to your computer; ideal for scanning photos ■ Scan to PC (PDF) automatically creates a PDF file and saves it to your computer; ideal for scanning documents ■ Scan to PC (Email) automatically scans a photo, resizes it, launches your email application, and attaches a JPG image to a new outgoing message 5. Do one of the following: ■ If you connected the product to your computer with a USB cable, press OK to select USB Connection and begin scanning. 30 Scanning a Document or Photo
-
 1
1 -
2
-
3
-
4
-
5
-
6
-
7
-
8
-
9
-
10
-
11
-
12
-
13
-
14
-
15
-
16
-
17
-
18
-
19
-
20
-
21
-
22
-
23
-
24
-
 25
25 -
 26
26 -
 27
27 -
 28
28 -
 29
29 -
 30
30 -
 31
31 -
 32
32 -
 33
33 -
 34
34 -
 35
35 -
36
-
37
-
38
-
39
-
40
-
41
-
42
-
43
-
44
-
45
-
46
-
47
-
48
-
49
-
50
-
51
-
52
-
53
-
54
-
55
-
56
-
57
-
58
-
59
-
60
-
61
-
62
-
63
-
64
-
65
-
66
-
67
-
68
 |
 |
