Epson C130001 Product Information Guide - Page 12
Qirupdwlrq 5hihuhqfh /lvw - lx 300
 |
UPC - 010343810808
View all Epson C130001 manuals
Add to My Manuals
Save this manual to your list of manuals |
Page 12 highlights
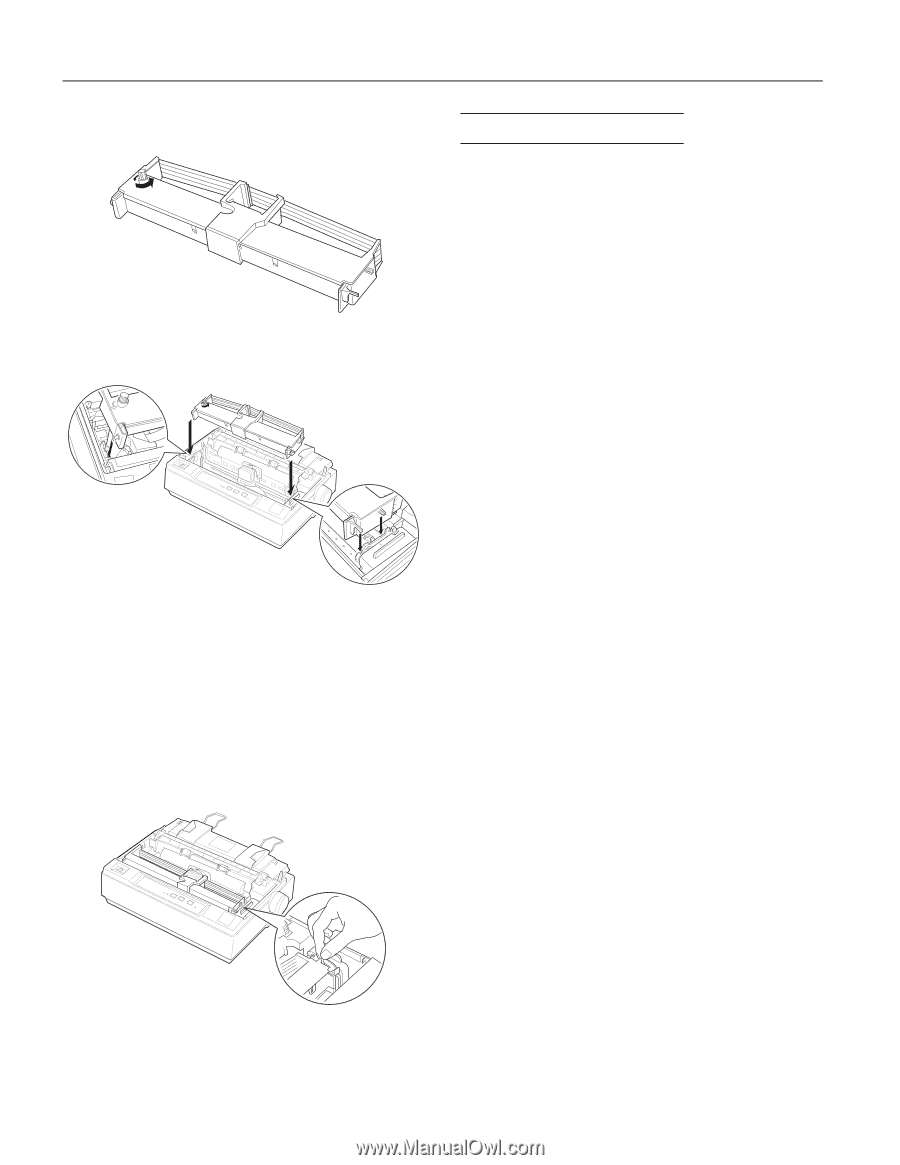
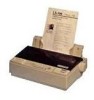
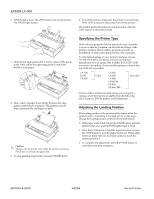
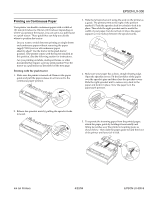
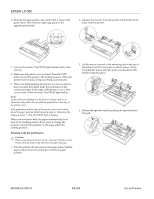
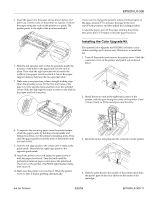
(3621ý/;ðêíí 5. Turn the ribbon-tightening knob in the direction of the arrow to remove any slack in the ribbon. 6. Insert the ribbon cartridge into the printer as shown; then press both sides of the cartridge firmly to fit the plastic hooks into the printer slots. ,QIRUPDWLRQý5HIHUHQFHý/LVW Engineering Change Notices None Product Support Bulletins None Technical Information Bulletins None Related Documentation TM-LX300 EPSON LX-300 Service Manual PL-LX300 EPSON LX-300 Parts Price List 4002661 EPSON LX-300 User's Guide 7. Turn the ribbon-tightening knob to help feed the ribbon into place; it should not be twisted or creased. 8. Replace the printer cover. After you install the color ribbon cartridge, run the self test. If the top or bottom edge of the characters in the self test is a different color from the rest, adjust the ribbon angle. Check the characters printed in red. If the top edge is blue, move the color ribbon adjustment lever forward. If the bottom edge is yellow, move the lever backward. Then print another self test to check your adjustment. Repeat this process until the ribbon is properly adjusted. Note: When you print using the color ribbon, the print speed is reduced. (3621 ,QNý-HWý3ULQWHUV
-
 1
1 -
2
-
3
-
4
-
5
-
6
-
 7
7 -
 8
8 -
 9
9 -
 10
10 -
 11
11 -
 12
12
 |
 |