Epson C130001 Product Information Guide - Page 8
Shfli\lqj Wkh 3ulqwhu 7\sh, Gmxvwlqj Wkh /rdglqj 3rvlwlrq - lx 300 printer
 |
UPC - 010343810808
View all Epson C130001 manuals
Add to My Manuals
Save this manual to your list of manuals |
Page 8 highlights
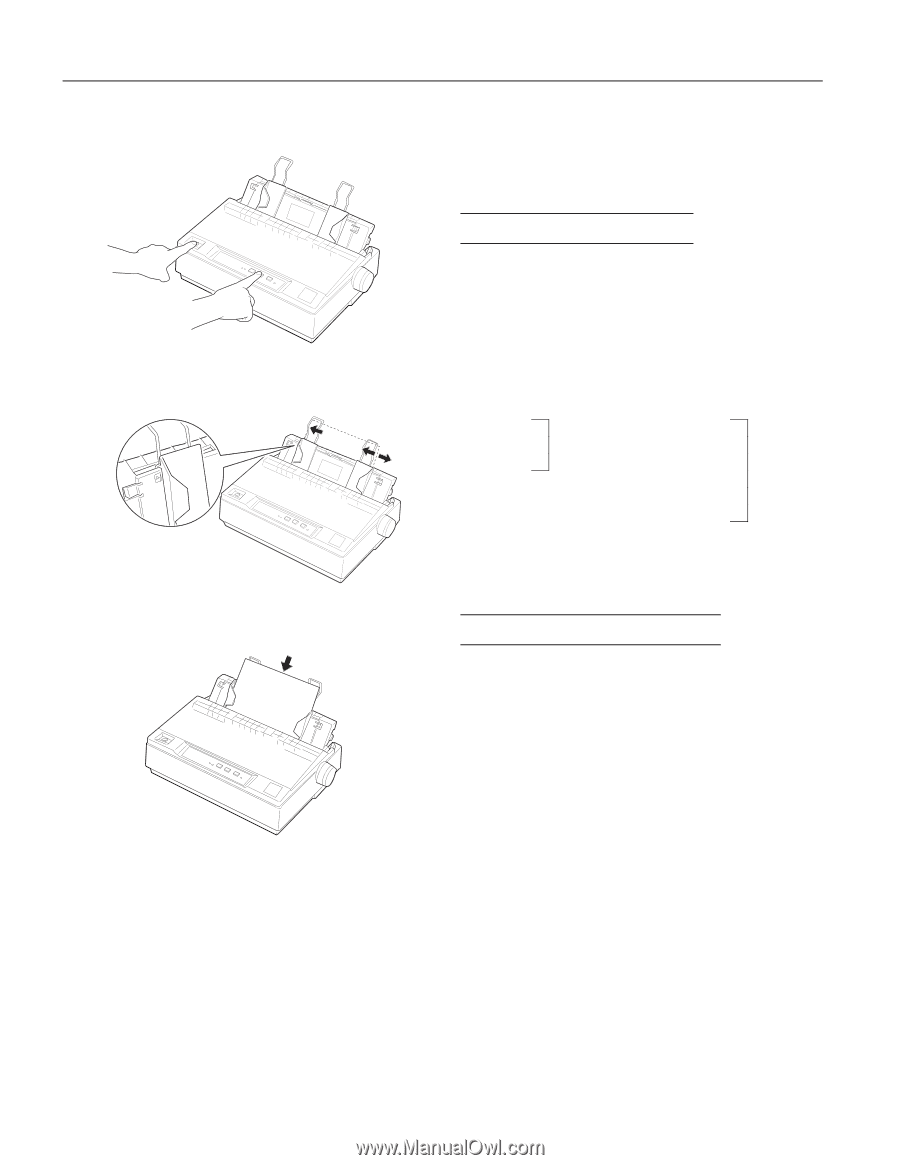
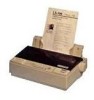
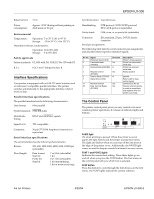
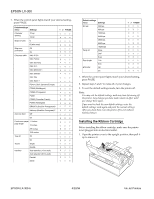
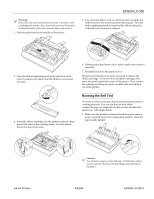
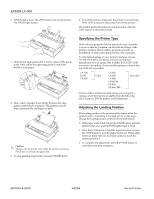
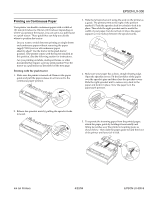
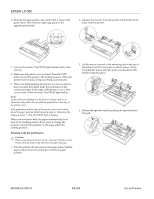
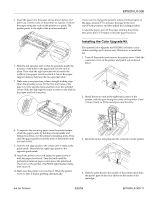
(3621ý/;ðêíí 2. While holding down the LF/FF button, turn on the printer. The PAUSE light flashes. 3. Slide the left edge guide until it locks in place at the guide mark. Next, adjust the right edge guide to match the width of your paper. 4. Slide a sheet of paper down firmly between the edge guides until it meets resistance. The printer loads the sheet automatically and begins to print. F Caution: Always close the printer cover while the printer is printing. The printer cover helps the paper feed. 5. To stop printing temporarily, press the PAUSE button. 6. To end the self test, make sure the printer is not printing. Press LF/FF to eject the sheet; then turn off the printer. The printer prints characters in each font in the order the fonts appear on the control panel 6SHFLI\LQJýWKHý3ULQWHUý7\SHý Most software programs let you specify the type of printer you use so that the program can take full advantage of the printer's features. Many of these programs provide an installation or setup menu that presents a list of printers. To take full advantage of your printer's features, choose LX-300. If LX-300 is not listed, contact your software manufacturer for an update that includes the LX-300. Until you receive an update, choose another printer as close to the top of the list as possible. LX-300 JX-80 EX-800 Color LX-810 LX-850 LX-800 LX-80/86 FX-850 FX-86e/800 Not color If none of these printers is listed among your program's options, select the first one available from the following: any FX printer, EPSON printer, and Draft printer. $GMXVWLQJýWKHý/RDGLQJý3RVLWLRQ The loading position is the position of the paper when the printer loads it. If printing is too high or low on the page, change the loading position with the micro-feed feature. 1. With paper loaded, hold down the PAUSE button until the printer beeps once and the FONT lights begin to flash. 2. Press the LF/FF button to feed the paper forward, or press the FONT button to feed the paper backward. (Press either button as many times as necessary until you reach the desired position.) 3. To complete the adjustment, press the PAUSE button or send data from your computer. (3621 ,QNý-HWý3ULQWHUV
-
 1
1 -
2
-
 3
3 -
 4
4 -
 5
5 -
 6
6 -
 7
7 -
 8
8 -
 9
9 -
 10
10 -
 11
11 -
 12
12
 |
 |