Epson CX4400 Quick Reference Guide
Epson CX4400 - Stylus Color Inkjet Manual
 |
UPC - 010343865310
View all Epson CX4400 manuals
Add to My Manuals
Save this manual to your list of manuals |
Epson CX4400 manual content summary:
- Epson CX4400 | Quick Reference Guide - Page 1
Epson Stylus® CX4400 Series Quick Guide Basic Copying, Printing, and Scanning Maintaining Your Epson Stylus CX4400 Series All-in-One Solving Problems - Epson CX4400 | Quick Reference Guide - Page 2
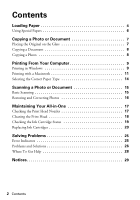
15 Restoring and Correcting Photos 16 Maintaining Your All-in-One 17 Checking the Print Head Nozzles 17 Cleaning the Print Head 18 Checking the Ink Cartridge Status 19 Replacing Ink Cartridges 20 Solving Problems 25 Error Indicators 25 Problems and Solutions 26 Where To Get Help 28 Notices - Epson CX4400 | Quick Reference Guide - Page 3
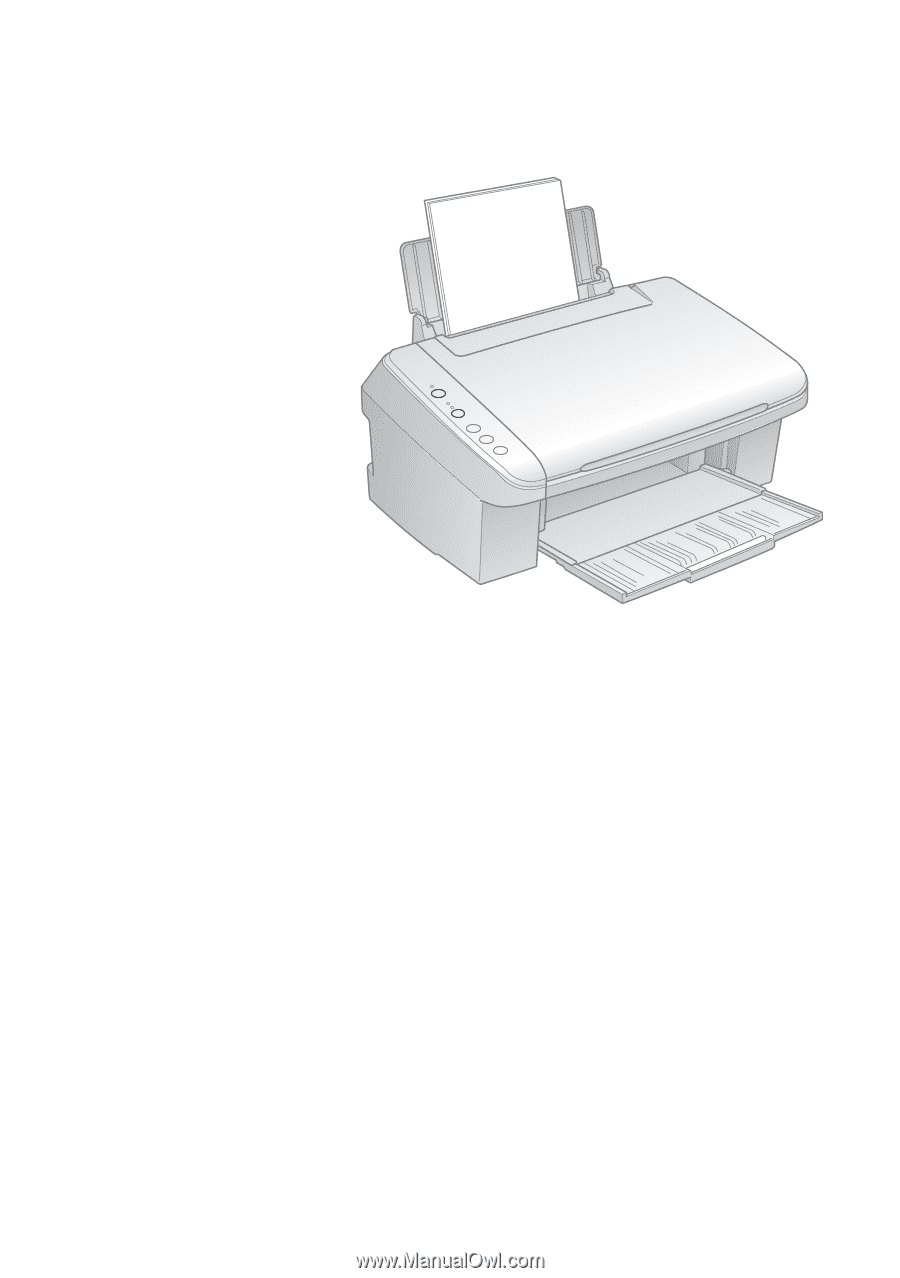
have set up your Epson Stylus® CX4400 Series all-in-one as described on the Start Here sheet, turn here to: ■ Load paper ■ Make a quick copy of a document or photo ■ Get the basic steps for printing from your computer ■ Scan a document or photo and restore or correct the color if necessary ■ Perform - Epson CX4400 | Quick Reference Guide - Page 4
Loading Paper Follow these steps to load paper. 1. Open the paper support. Then open the output tray and pull out the extension. 2. Flip the feeder guard forward. 3. Press in the tab on the edge guide and slide it left. 4 Loading Paper - Epson CX4400 | Quick Reference Guide - Page 5
to use one of Epson's special ink jet papers designed for your printer. For example, your photos will look great printed on Epson Premium Photo Paper Glossy (see page 6 for more information). 5. Flip the feeder guard back. Note: For instructions on loading envelopes, see your on-screen User's Guide - Epson CX4400 | Quick Reference Guide - Page 6
it easy to maximize the impact of your photos, presentations, and creative projects. You can purchase genuine Epson ink and paper from an Epson authorized reseller. To find the nearest reseller, call 800-GO-EPSON (800-463-7766). Or you can purchase online at www.epsonstore.com (U.S. sales) or www - Epson CX4400 | Quick Reference Guide - Page 7
Copying a Photo or Document Follow the instructions in this section to position your originals correctly on the glass and make color or black and white copies. Placing the Original on the Glass 1. Open the document cover and place your original face-down on the glass, in - Epson CX4400 | Quick Reference Guide - Page 8
sheets of letter-size plain paper or Epson Bright White Paper (see page 4 if you need instructions). 2. Place the document on the glass as described on page 7. Be sure to close the document cover. 3. Do one of the following: ■ To make a color copy, press the x Color Text button. To make a black and - Epson CX4400 | Quick Reference Guide - Page 9
at epson.com/support for free updates to your Epson Stylus CX4400 Series printer and scanner software. Download instructions are posted for your convenience. With Windows, you can also click Start or , select Programs or All Programs, select EPSON, and click EPSON Stylus CX4400 Series Driver Update - Epson CX4400 | Quick Reference Guide - Page 10
sure Epson Stylus CX4400 Series is selected, then click the Preferences or Properties button. (If you see a Setup, Printer, or Options button, click it. Then click Preferences or Properties on the next screen.) Your printer setting window opens. 5. On the Main tab, select the basic print settings - Epson CX4400 | Quick Reference Guide - Page 11
of your print job. Check ink cartridge status Pause or resume printing Cancel printing Printing with a Macintosh 1. Load paper (see page 4). 2. Open a photo or document in a printing program. 3. Select Page Setup from the File menu. Make the following settings: Select Stylus CX4400 Select your - Epson CX4400 | Quick Reference Guide - Page 12
menu. You see a window like this one: Select Stylus CX4400 Select Print Settings 6. Choose Print Settings from the pop-up menu and select the following settings as necessary: Select your Media Type (see page 14) Select Color or Black ink Select higher quality or faster printing (if available) Select - Epson CX4400 | Quick Reference Guide - Page 13
OS X 10.2.x, click the Print Center icon instead, then double-click Stylus CX4400 in the Printer List window. You see a screen like this: Pause or resume printing Cancel printing Select the print job 11. When you're finished, close the printer window or Print Center. Printing with a Macintosh 13 - Epson CX4400 | Quick Reference Guide - Page 14
12) setting in your printer software. This tells the CX4400 Series what kind of paper you're using, so the ink coverage can be adjusted accordingly. For this paper Plain paper Epson Bright White Paper Epson Presentation Paper Matte Epson Ultra Premium Photo Paper Glossy Epson Premium Photo Paper - Epson CX4400 | Quick Reference Guide - Page 15
start Epson Scan: ■ Windows: Double-click the EPSON Scan icon on your desktop. ■ Macintosh: Double-click EPSON Scan in the Applications folder. ■ If you are scanning from an application, start your application. Then open the File menu, choose Import or Acquire, and select Epson Stylus CX4400 Series - Epson CX4400 | Quick Reference Guide - Page 16
Home or Professional Mode, you see a different Epson Scan settings window. (You can change the mode using the Mode selector in the upper right corner.) 5. If you want to restore faded color in a photo or change settings, click Customize. Then follow the instructions below. 6. Click OK. The image is - Epson CX4400 | Quick Reference Guide - Page 17
Your All-in-One Follow the instructions in this chapter for checking and cleaning the print head nozzles and replacing ink cartridges. Checking the Print Head Nozzles If your printouts are faint or have gaps in them, some of the nozzles in the print head may be clogged or ink may be running - Epson CX4400 | Quick Reference Guide - Page 18
cartridge first (see page 20). 1. Make sure the all-in-one is on and the B ink light is off. 2. Hold down the y Stop button for at least 3 seconds until the P On light starts flashing. The all-in-one runs a head cleaning cycle, which takes about one minute. Caution: Never turn off the CX4400 Series - Epson CX4400 | Quick Reference Guide - Page 19
low. Click Accept or Decline to continue. Note: To disable checking for ink offers or updates from Epson, see the instructions in your on-screen User's Guide. If a cartridge is more than six months old, print quality may decline. If necessary, try cleaning the print head (see page 18). If printouts - Epson CX4400 | Quick Reference Guide - Page 20
removing the old ones. Caution: Do not open ink cartridge packages until you are ready to install the ink. Cartridges are vacuum packed to maintain reliability. 1. Make sure the all-in-one is on and the red B ink light is on but not flashing. 2. Open the scanner and make sure its support locks in - Epson CX4400 | Quick Reference Guide - Page 21
moves to the _ position to indicate which cartridge is low or expended. Caution: Do not move the print head by hand; this may damage your all-in-one. Always press and release the y Stop button to move it. 4. Press the y Stop button again. ■ If another cartridge is low or expended, it moves to the - Epson CX4400 | Quick Reference Guide - Page 22
cartridge apart or try to refill it. Warning: If ink gets on your hands, wash them thoroughly with soap and water. If ink gets into your eyes, flush them immediately with water. Keep ink cartridges cartridge. This can damage the ink cartridge. Note: For best printing results, use up a cartridge - Epson CX4400 | Quick Reference Guide - Page 23
. Caution: Do not remove any other labels or seals, or ink will leak. 9. Insert the new ink cartridge into the holder and push it down until it clicks into place. 10. Once you replace all the cartridges that need replacing, close the cartridge cover and push it down until it clicks into place - Epson CX4400 | Quick Reference Guide - Page 24
11. Hold the scanner while you release the support. Then close the scanner. Caution: Do not try to close the scanner without releasing the support, or you might damage the CX4400 Series. 12. Press the y Stop button to begin charging the ink. This takes about one and a half minutes. When it's - Epson CX4400 | Quick Reference Guide - Page 25
on One or more ink cartridges are expended or not installed correctly. Replace the cartridge(s) as described on page 20. All lights are on A part needs to be replaced. Contact Epson for help; see page 28. All lights are flashing There is a problem with your all-in-one. Turn your all-in-one off - Epson CX4400 | Quick Reference Guide - Page 26
and Solutions Check the solutions below if you're having trouble using your Epson Stylus CX4400 Series all-in-one. Printing and Copying Problems ■ If one of the Copy buttons don't work, your all-in-one may be in sleep mode. Press the button again to copy. ■ Make sure your original is positioned - Epson CX4400 | Quick Reference Guide - Page 27
vertical lines, you may need to align the print head. See your User's Guide for instructions. ■ The ink cartridges may be low on ink (see page 20 for instructions on replacing an ink cartridge). ■ If a dotted line appears in the image, clean the scanner glass with a soft, dry, lint-free cloth (paper - Epson CX4400 | Quick Reference Guide - Page 28
to common problems. You can download drivers and documentation, get FAQs and troubleshooting advice, or e-mail Epson with your questions. Speak to a Support Representative Before you call Epson for support, please have the following information ready: ■ Product name (Epson Stylus CX4400 Series - Epson CX4400 | Quick Reference Guide - Page 29
your Epson Stylus CX4400 Series all-in-one, read and follow these safety instructions: ■ Be sure to follow all warnings and instructions marked on the CX4400 Series. ■ Use only the type of power source indicated on the CX4400 Series label. ■ Use only the power cord that comes with the CX4400 Series - Epson CX4400 | Quick Reference Guide - Page 30
hand inside the CX4400 Series or touch any cartridges during printing. ■ Install a new ink cartridge immediately after removing an expended one. Leaving cartridges uninstalled can dry out the print head and may prevent the CX4400 Series from printing. ■ If you remove an ink cartridge for later use - Epson CX4400 | Quick Reference Guide - Page 31
installation. This equipment generates, uses, and can radiate radio frequency energy and, if not installed and used in accordance with the instructions interface cable with this device. If this equipment has more than one interface connector, do not leave cables connected to unused interfaces. - Epson CX4400 | Quick Reference Guide - Page 32
unit tested and found to be compliant with the standards. Records maintained continue to reflect the equipment being produced can be expected to be within the interference that may cause undesired operation. Trade Name: Epson Type of Product: Multifunction printer Model: C331A 32 Notices - Epson CX4400 | Quick Reference Guide - Page 33
any color change or fading of prints or reimbursement of materials or services required for reprinting. This warranty does not cover damage to the Epson product caused by parts or supplies not manufactured, distributed or certified by Epson. This warranty does not cover ribbons, ink cartridges or - Epson CX4400 | Quick Reference Guide - Page 34
of misuse, abuse, improper installation, neglect, improper shipping, damage caused by disasters such as fire, flood, and lightning, improper electrical current, software problems, interaction with nonEpson products, or service other than by an Epson Authorized Servicer. If a claimed defect cannot - Epson CX4400 | Quick Reference Guide - Page 35
Seiko Epson Corporation's operating and maintenance instructions. Seiko Epson Corporation shall not be liable for any damages or problems Epson and Epson Stylus are registered trademarks and Exceed Your Vision is a trademark of Seiko Epson Corporation. Epson Connection is a service mark of Epson - Epson CX4400 | Quick Reference Guide - Page 36
CPD-23606R1 Printed in XXXXXX XX.XX-XX XXX
-
 1
1 -
 2
2 -
 3
3 -
 4
4 -
 5
5 -
 6
6 -
 7
7 -
8
-
9
-
10
-
11
-
12
-
13
-
14
-
15
-
16
-
17
-
18
-
19
-
20
-
21
-
22
-
23
-
24
-
25
-
26
-
27
-
28
-
29
-
30
-
31
-
32
-
33
-
34
-
35
-
36
 |
 |
Epson Stylus
CX4400 Series
Quick Guide
Basic Copying, Printing, and Scanning
Maintaining Your Epson Stylus CX4400 Series All-in-One
Solving Problems
®