Epson DM-D500 Users Manual - Page 7
Changing the Orientation of the Display Unit
 |
View all Epson DM-D500 manuals
Add to My Manuals
Save this manual to your list of manuals |
Page 7 highlights
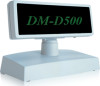
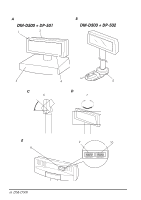
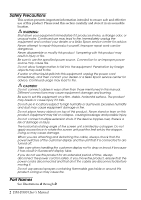
English Options Each of the options are used depending on the way the product is installed. ❏ Illustration A ❏ Illustration B DM-D500+DP-501 (Stand) DM-D500+DP-502 (TM Printer Connection Option) Unpacking The following items are included with the standard specification Customer Display. If any item is damaged, contact your dealer. ❏ Customer Display DM-D500 ❏ User's Manual (this manual) Downloading Drivers, Utilities, and Manuals Drivers, utilities, and manuals can be downloaded from one of the following URLs. For customers in North America, go to the following web site: http://www.epsonexpert.com/ and follow the on-screen instructions. For customers in other countries, go to the following web site: http://download.epson-biz.com/?service=pos Select the product name from the "Select any product" pulldown menu. Precautions on Installation ❏ Ensure that the power switches of the customer display and the device that it is connected to are turned off before connecting the cable. ❏ See the DM-D500 Installation Guide for information on how to install the device. Precautions on Power-on Turn on the power to the customer display before turning on the power of the computer, printer or other host devices. Note: If you are connecting to the USB model of the EPSON TM printer, always ensure that you turn on the power to the customer display first. If you turn on the power to the customer display too late, the system may not be able to detect the customer display. Changing the Orientation of the Display Unit The angle and direction of the display unit can be changed by pressing on the struts with your hand while moving the display unit. The display unit will move with only light pressure, so do not apply more pressure once the unit stops moving. Applying excess force to move the display unit may cause damage. When installed in the IR-700 or TM printer, there may be situations where the display unit cannot be turned to the desired direction. In these situations, remove the customer display and base unit, then adjust the position of the lug in the base unit before reattaching. See Illustration C and Illustration D for the maximum angle of the display. DM-D500 User's Manual 3
-
 1
1 -
 2
2 -
 3
3 -
 4
4 -
 5
5 -
 6
6 -
 7
7 -
 8
8 -
 9
9 -
 10
10 -
 11
11 -
 12
12 -
13
-
14
-
15
-
16
-
17
-
18
-
19
-
20
 |
 |
