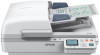
Epson DS-6500 User Manual
Epson DS-6500 Manual
 |
View all Epson DS-6500 manuals
Add to My Manuals
Save this manual to your list of manuals |
Epson DS-6500 manual content summary:
- Epson DS-6500 | User Manual - Page 1
Guide Guide to the Product Parts Check this section to identify the parts of your product. How to Scan Follow the step-by-step instructions here to scan your originals using any of the available scanning methods. Software Information Follow the introductions here for driver and application software - Epson DS-6500 | User Manual - Page 2
Home > Guide to the Product Parts Guide to the Product Parts Product Parts Lights Buttons - Epson DS-6500 | User Manual - Page 3
Home > Placing Originals on the Product Placing Originals on the Product Loading Documents in the Automatic Document Feeder (ADF) Placing Documents on the Scanner Glass Placing Large or Thick Documents on the Scanner Glass - Epson DS-6500 | User Manual - Page 4
> How to Scan How to Scan Basic Scanning Scanning from the Scan Button Scanning Using Document Capture Pro (for Windows) Scanning Using EPSON Scan Various Types of Scanning Scanning to a SharePoint or a Cloud Service (for Windows) Scanning Multiple Documents to Separate Files (for Windows) Assigning - Epson DS-6500 | User Manual - Page 5
Home > Using the Network Interface Panel Using the Network Interface Panel Network Interface Panel Parts Installing the Network Interface Panel Setting Up Client Computers with EPSON Scan Settings Scanning Over a Network Scanning from the Network Interface Panel - Epson DS-6500 | User Manual - Page 6
Home > Software Information Software Information Document Capture Pro (for Windows) EPSON Scan Other Scanning Software Checking and Installing Your Software Uninstalling Your Software - Epson DS-6500 | User Manual - Page 7
Home > Maintenance Maintenance Cleaning the Product Replacing the Roller Assembly Kit Power Off Timer Setting Transporting the Product Updating the Firmware - Epson DS-6500 | User Manual - Page 8
Troubleshooting Problems Indicated by Messages on the Network Interface Panel LCD/Status Lights Problems When Starting a Scan Problems When Feeding Paper Problems With Scanning Time Problems With Scanned Images Problems Remain After Trying All Solutions Where To Get Help Epson Technical Support - Epson DS-6500 | User Manual - Page 9
Home > Technical Specifications Technical Specifications System Requirements Product Specifications - Epson DS-6500 | User Manual - Page 10
instructions marked on the product. Place the product on a flat, stable surface that extends beyond the base of the product in all directions. If you place the product by the wall, leave more than 3.94 in (10 or humidity, direct sunlight, strong light sources, or rapid changes in temperature - Epson DS-6500 | User Manual - Page 11
specifically explained in the product's guides. Do not insert objects into any opening, as they may touch dangerous voltage points or short out parts and refer servicing to qualified service personnel under the covered by the operating instructions.) Unplug the product and Passports, driver's licenses - Epson DS-6500 | User Manual - Page 12
Default Delay Times for Power Management for EPSON Products This product will enter sleep mode after a period of nonuse. The time interval has been set and decompiling You may not disassemble, decompile or otherwise attempt to derive the source code of any software included with this product. Top - Epson DS-6500 | User Manual - Page 13
International Business Machines Corporation. EPSON Scan Software is based in part on the work of the the software without the specific, prior written permission of Sam Leffler and Silicon Graphics. THE SOFTWARE IS Guide, and contact the customer support of your region. You shall comply with the - Epson DS-6500 | User Manual - Page 14
4) The license terms of each open source software program are described on \English\Guide\OSS.pdf in the Software CD-ROM. General Notice: Other product names used herein are for identification purposes only and may be trademarks of their respective owners. EPson disclaims any and all rights in those - Epson DS-6500 | User Manual - Page 15
System Versions In this manual, the following abbreviations are used. Windows refers to Windows 7, Vista, XP, and XP x64. Windows 7 refers to Windows 7 Home Basic, Windows 7 Home Premium, Windows 7 Professional, and Windows 7 Ultimate. Windows Vista refers to Windows Vista Home Basic Edition - Epson DS-6500 | User Manual - Page 16
Home > Guide to the Product Parts Product Parts a. power button b. Wake Up/Sleep button c. Ready light d. Error light e. scan button f. Stop button a. Automatic Document Feeder (ADF) b. ADF cover c. Edge guides - Epson DS-6500 | User Manual - Page 17
d. ADF input tray e. ADF output tray f. Control panel a. Document cover b. Scanner glass c. Carriage (under the scanner glass) a. USB port b. DC inlet c. Transportation lock lever a. AC adapter b. AC power cord c. USB cable - Epson DS-6500 | User Manual - Page 18
Status On Flashing Flashing On Flashing On Off Ready to scan images. Initializing or scanning. Updating firmware. Meaning An error has occurred. Problems Indicated by Messages on the Network Interface Panel LCD/ Status Lights Recovering firmware. The product is in sleep mode. Press the button to - Epson DS-6500 | User Manual - Page 19
off. Changes to sleep mode. Press again to return the scanner to ready status. Starts a scan. Cancels scanning. You can customize the Mac OS X). scan button in Document Capture Pro (for Windows) and EPSON Event Manager (for Document Capture Pro (for Windows) EPSON Event Manager (for Mac OS X) - Epson DS-6500 | User Manual - Page 20
in the ADF to scan multiple pages quickly. Document specifications Only load documents that meet the following specifications into the product. Paper stuck together. The document has cut-out areas. The document is a multi-part form or bound. The document has rear carbon coating. The document is not - Epson DS-6500 | User Manual - Page 21
may wrinkle or damage the original. Scan these documents on the scanner glass instead. Remove any documents from the scanner glass. Make sure there is no dust on the glass before loading documents in the ADF. Slide the edge guides on the ADF - Epson DS-6500 | User Manual - Page 22
guides. When loading a stack of paper, fan the paper to remove any paper powder, tap the edges of the paper on a flat surface to align the sheets, and then load it correctly. Do not load additional documents while the current document is being scanned. Document Capture Pro (for Windows) EPSON Scan - Epson DS-6500 | User Manual - Page 23
Home > Placing Originals on the Product Placing Documents on the Scanner Glass Important: Do not place heavy objects on the scanner glass and do not press the glass with too much force. Open the document cover. Place your document facedown on the scanner glass. Make sure the top of the document is - Epson DS-6500 | User Manual - Page 24
or closing the document cover. Note: Do not leave photos on the scanner glass for an extended period of time as they may stick to the glass. Always keep the scanner glass clean. You can place documents up to 0.6 inch (15 mm) thick. Document Capture Pro (for Windows) Epson Scan Driver (for Mac OS X) - Epson DS-6500 | User Manual - Page 25
and do not press the glass with too much force. Follow these steps to scan a large or thick document on the scanner glass: Place a large or thick document facedown on the scanner glass. Make sure the top of the document is against the left edge and centered on the arrow mark. Close the - Epson DS-6500 | User Manual - Page 26
at the edges, cover the edges with paper to block external light as you scan. You can place documents up to 0.6 inch (15 mm) thick. When scanning a book, you can perform Book Spine Correction using EPSON Scan. For more information, see EPSON Scan help. Document Capture Pro (for Windows) EPSON Scan - Epson DS-6500 | User Manual - Page 27
Automatic Document Feeder (ADF) Placing Documents on the Scanner Glass Placing Large or Thick Documents on the Scanner Glass Press the scan button. The scanned image is saved to the location you specified in Document Capture Pro (for Windows) or EPSON Scan (for Mac OS X). Assigning a Function to the - Epson DS-6500 | User Manual - Page 28
the Scanner Glass Start Document Capture Pro. Document Capture Pro (for Windows) Click Scan. Adjust settings in the Main Settings window as necessary, and then click Scan. Click Detailed Settings if you want to make more detailed adjustments using the EPSON Scan window. The document is scanned and - Epson DS-6500 | User Manual - Page 29
in the Save As window or the Print Settings window as necessary, and then click OK. Note: Selecting Apply job separation on the Save As window activates the function to sort the documents into separate files by detecting blank pages or barcodes in your scanned images. The scanned image is saved or - Epson DS-6500 | User Manual - Page 30
. Place your original(s). Loading Documents in the Automatic Document Feeder (ADF) Placing Documents on the Scanner Glass Placing Large or Thick Documents on the Scanner Glass Start EPSON Scan. How to start Select Office Mode in the Mode list. Select the Image Type setting. Select the Document - Epson DS-6500 | User Manual - Page 31
up to 100 pages in the ADF. For more details, see Product Specificiations. Adjust brightness, and other image quality settings. See help for details on EPSON Scan. Click Scan. In File Save Settings window, select the Type setting and click OK. Note: If the Show this dialog box before next - Epson DS-6500 | User Manual - Page 32
Home > How to Scan Scanning to SharePoint or a Cloud Service (for Windows) You can upload scanned images to a SharePoint server or a cloud service. Start Document Capture Pro and scan your document. Scanning Using Document Capture Pro (for Windows) steps 1 to 5 In the Main window of Document Capture - Epson DS-6500 | User Manual - Page 33
the pages where you want to separate the data. Start Document Capture Pro and scan your document. Scanning Using Document Capture Pro (for Windows) steps 2 to 6 Select Apply job separation in the Save As window, and then click Separation Settings. Select the separation method and the method for - Epson DS-6500 | User Manual - Page 34
Scan Assigning a Function to the Scan Button For Windows For Mac OS X By registering a specific scanning operation to the pressing the scan button. scan button, you can perform that operation by simply In Windows Job List window. Scanning from the Scan Button Top In EPSON Event Manager (Mac - Epson DS-6500 | User Manual - Page 35
In the window displayed, select the scanner you want to use. Click the arrow in the list next to the action name, then select the action you want to assign. Click Close. Note: Frequently used actions are registered in advance in EPSON Event Manager. You can also customize the action by clicking Make - Epson DS-6500 | User Manual - Page 36
Home > How to Scan Adjusting the Scanned Image Epson Scan offers a variety of settings for improving color, sharpness, contrast, and other aspects affecting image quality. Histogram Provides a graphical interface for adjusting highlight, shadow, and gamma - Epson DS-6500 | User Manual - Page 37
. Backlight Correction Removes shadows from photos that have too much background light. Dust Removal Removes dust marks from your originals automatically. Text Enhancement Enhances text recognition when scanning text documents. Auto Area Segmentation Makes Black&White images clearer and - Epson DS-6500 | User Manual - Page 38
Color Enhance Enhance a certain color. You can select from red, blue, or green. See Epson Scan Help for details. - Epson DS-6500 | User Manual - Page 39
scanning. d OK/arrow button Use the arrow buttons to select an item, and then press OK to confirm the selection. e scan button Starts scanning. In a network environment, the scan button on the scanner works the same way as clicking Scan in the Document Capture Pro or EPSON Scan window - Epson DS-6500 | User Manual - Page 40
direct control of all of the features of your scanner in a network environment. You can download the User's Guide for the Network Interface Panel from the following website. support.epson.net/netscan/ After setting up the Network Interface Panel. Setting Up Client Computers with EPSON Scan Settings - Epson DS-6500 | User Manual - Page 41
of the Network Interface Panel from your network administrator. Start EPSON Scan Settings. Windows: Start > All Programs or Programs > EPSON > EPSON Scan > EPSON Scan Settings Mac OS X: Select Applications > EPSON Software > EPSON Scan Settings. Select your scanner from the Select Scanner drop-down - Epson DS-6500 | User Manual - Page 42
In the Add window, choose the Network Interface Panel's IP address under Search for addresses, or select Enter address and type in the address. Then click OK. In the EPSON Scan Settings window, click Test to check the connection. If everything works properly, you see a successful connection message - Epson DS-6500 | User Manual - Page 43
For Mac OS X Note: You must set the IP address for your Network Interface Panel before you can scan using it. Setting Up Client Computers with EPSON Scan Settings For Windows Turn on your scanner and the client computer. Place your original(s) on the document glass or in the ADF. Start Document - Epson DS-6500 | User Manual - Page 44
EPSON Scan Select your desired mode. In the EPSON Scan window, adjust settings as necessary. Click Scan. Top - Epson DS-6500 | User Manual - Page 45
Home > Using the Network Interface Panel Scanning from the Panel Follow these steps to setup a scan job from the panel. Assigning a Function to the Scan Button Turn on your scanner and the client computer. Place your original(s) on the document glass or in the ADF. Press the OK button on the panel. - Epson DS-6500 | User Manual - Page 46
program. You can also save frequently used scanning settings. How to start Select the start button icon or Start > All Programs or Programs > EPSON Software > Document Capture Pro. Top How to access the help Select Help from the menu at the top right of the main window, and then click Help. Top - Epson DS-6500 | User Manual - Page 47
How to start How to access the help EPSON Scan allows you to control all aspects of scanning. You can use this as a standalone scanning program or use it with another TWAIN-compliant scanning program. How to start Select Applications > EPSON Software > EPSON Scan. Top How to access the help Click - Epson DS-6500 | User Manual - Page 48
, and then click EPSON Event Manager Help. Top ABBYY FineReader This Optical Character Recognition (OCR) software allows you to scan a document and convert folds or wrinkles Follow ABBYY FineReader help for detailed instructions. How to start Windows: Select the start button or Start > All Programs - Epson DS-6500 | User Manual - Page 49
Select Applications and double-click ABBYY FineReader. Top - Epson DS-6500 | User Manual - Page 50
User's Guide, you need to install the following software. EPSON Driver and Utilities Document Capture Pro (for Windows) EPSON Event Manager (for Mac OS X) Follow the steps below to check that the software is installed on your computer. For Windows Do one of the following: Windows 7 and Windows Vista - Epson DS-6500 | User Manual - Page 51
displayed. Uninstall the software. Windows 7: Click Uninstall/Change. Windows Vista: Click Uninstall/Change, and then click Continue in the User Account Control window. Windows XP: Click Change/Remove. When the confirmation window appears, click Yes. Follow the on-screen instructions. In some cases - Epson DS-6500 | User Manual - Page 52
For Mac OS X Note: To uninstall applications you must log on to a Computer Administrator account. You cannot uninstall programs if you log on as a Limited account user. Double-click the Applications folder in your Mac OS X hard drive, select the application you want to uninstall, and then drag it to - Epson DS-6500 | User Manual - Page 53
glass with any force. Be careful not to scratch or damage the scanner glass, and do not use a hard or abrasive brush to clean it. A damaged glass surface can decrease the scan quality. Never use alcohol, thinner, or corrosive solvent to clean the product. These chemicals can damage the product - Epson DS-6500 | User Manual - Page 54
Do not spray glass cleaner directly on the glass surface. Clean the document cover if it gets dirty. Open the ADF cover and use a soft, dry, clean cloth to clean the roller and the interior of the ADF. Important: Do not touch the separation pad. - Epson DS-6500 | User Manual - Page 55
Replacing the Roller Assembly Kit You need to replace the parts on the Roller Assembly Kit after scanning every 100,000 times. Removal part Roller Assembly Kit Part number B12B813481 To replace the Roller Assembly Kit, follow the steps below. Turn off the scanner. Number of scanning 100,000 - Epson DS-6500 | User Manual - Page 56
Slide and remove the installed pickup roller. Attach the new pickup roller in the correct position. - Epson DS-6500 | User Manual - Page 57
Important: Do not touch the surface of the pickup roller. Close the pickup roller cover. Press the hook on both sides of the separation pad. - Epson DS-6500 | User Manual - Page 58
Press the hook on both sides of the separation pad and remove. Attach the new separation pad to the correct position. Insert firmly until you hear it click into place. Important: Do not touch the surface of the separation pad. Attach the pre-separation pad as shown in the illustration. - Epson DS-6500 | User Manual - Page 59
Settings. Windows: Start > All Programs or Programs > EPSON > EPSON Scan > EPSON Scan Settings Mac OS X: Select Applications > EPSON Software > EPSON Scan Settings. Click Maintenance. Click Reset, and then click OK. Important: Make sure you reset the counter after replacing the Roller Assembly Kit. - Epson DS-6500 | User Manual - Page 60
any change. Follow the steps below to adjust the time. Start EPSON Scan Settings. Windows: Start > All Programs or Programs > EPSON > EPSON Scan > EPSON Scan Settings Mac OS X: Select Applications > EPSON Software > EPSON Scan Settings. Click Power Off Timer. Adjust the Power Off Timer Setting - Epson DS-6500 | User Manual - Page 61
the AC adapter cord. Disconnect the USB cable from the product. Slide the transportation lock lever on the left of the scanner to the locked position to secure the scanner carriage. Attach the packing materials that came with the product, then repack the product in its original box or a similar box - Epson DS-6500 | User Manual - Page 62
Home > Maintenance Updating the Firmware Check the Epson home page for the latest firmware update releases. If there is no firmware information on the home page, you are already using the latest firmware. www.epson.com Important: Do not turn off the scanner while the firmware is updating. Otherwise, - Epson DS-6500 | User Manual - Page 63
update the firmware again. 1. Connect the computer and the scanner with a USB cable. You cannot perform an update in recovery mode over a network connection. 2. Download the latest firmware version from the Epson home page, and then start the update. Contact your Epson if you cannot clear the error. - Epson DS-6500 | User Manual - Page 64
. Uninstalling Your Software If the Network Interface Panel is installed, you cannot scan from a computer connected by a USB cable. If the light source has reached the end of its service life, it must be replaced by a professional. For details, contact Epson. Epson Technical Support Mac OS X For - Epson DS-6500 | User Manual - Page 65
installed the scanning software. Other users must first start EPSON Scanner Monitor in the Applications folder and then press a button to scan. Top Using the Network Interface Panel Check that the Network Interface Panel is installed correctly. See the Network Interface Panel User's Guide for more - Epson DS-6500 | User Manual - Page 66
the Programs and Services list. Click OK. Top Using other scanning software If you are using any TWAIN-compliant programs, such as Adobe Photoshop Elements, make sure that the correct product is selected as the Scanner or Source setting. If you cannot scan using any TWAIN-compliant scanning programs - Epson DS-6500 | User Manual - Page 67
Home > Solving Problems Problems When Feeding Paper The paper specifications Clean the product. Cleaning the Product Replacing the Roller Assembly Kit Top The paper jams in the Automatic Document Feeder (ADF) If paper jams inside the ADF, open the document cover and remove any paper from the scanner - Epson DS-6500 | User Manual - Page 68
Open the ADF cover. Open the ADF input tray, and then slowly turn the dial to remove the jammed paper. If most of the paper has been ejected to the ADF input tray, remove the jammed paper while turning the dial. - Epson DS-6500 | User Manual - Page 69
the paper, close the ADF cover. Note: If you load unsupported papers, the product may feed more than one sheet of paper at a time. Document specifications You may need to clean the interior of the product. Cleaning the Product Top - Epson DS-6500 | User Manual - Page 70
When using security software, exclude the TWAIN.log file from monitoring, or set the TWAIN.log as a readonly file. For more information on your security software's functions, see the help supplied with the software. The TWAIN.log file is saved in the following locations. Windows XP: C:\Documents and - Epson DS-6500 | User Manual - Page 71
&White, select Threshold setting as the image quality setting from the scanning software. Increase the resolution setting. Characters are not recognized when converted into editable text (OCR) Place the document so that it is straight on the scanner glass. If the document is skewed, it may not be - Epson DS-6500 | User Manual - Page 72
color, smears, dots, or straight lines appear in your image Clean the product. Cleaning the Product Top The scanning area or direction is unsatisfactory The edges of your original are not scanned Move the document or photo about 0.12 inch (3 mm) or more away from the horizontal and vertical edges - Epson DS-6500 | User Manual - Page 73
Home > Solving Problems Problems Remain After Trying All Solutions If you have tried all the solutions and have not solved the problem, open EPSON Scan settings. Click Configuration, select the Other tab, and then click Reset All. - Epson DS-6500 | User Manual - Page 74
Problems Epson Technical Support Internet Support Visit Epson's support website at www.epson.com/support (U.S.) or www.epson.ca/support (Canada) and select your product for solutions to common problems. You can download drivers and documentation, get FAQs and troubleshooting advice, or e-mail Epson - Epson DS-6500 | User Manual - Page 75
Home > Solving Problems Other Software Technical Support ABBYY FineReader (408) 457-9777 www.abbyy.com [email protected] Top - Epson DS-6500 | User Manual - Page 76
display capability of your computer system, including the video card, display monitor, and software. See your system documentation for details.) EPSON Scan does not support the UNIX File System (UFS) for Mac OS X. You must install EPSON Scan on a disk or in a partition that does not use UFS. Top - Epson DS-6500 | User Manual - Page 77
and approvals Note: Specifications are subject to change without notice. General Scanner type Photoelectric device Effective pixels (flatbed) Document size ADF paper input ADF paper output ADF paper capacity Scanning resolution Output resolution Image data Interface Light source Note: Flatbed - Epson DS-6500 | User Manual - Page 78
Mechanical Dimensions Weight Width: 19.5 inches (495.0 mm) Depth: 14.2 inches (360.0 mm) Height: 8.6 inches (217 mm) Approx. 21.6 lb (9.8 kg) Top Electrical Note: Check the label on the AC adapter or on the back of the product for voltage information. Product Rated voltage Rated input current - Epson DS-6500 | User Manual - Page 79
operating the product in direct sunlight, near a strong light source, or in extremely dusty conditions. Top Interfaces USB Interface Interface type Electrical standard Connector type Universal Serial Bus Specification Revision 2.0; Optional Network Panel adds an Ethernet/RJ-45 port Full Speed - Epson DS-6500 | User Manual - Page 80
EMC European model: Low Voltage Directive 2006/95/EC EMC Directive 2004/108/EC Australian model: Safety EMC FCC Part 15 Subpart B Class B CAN/CSA-CEI/IEC CISPR22 Class B EN 60950-1 EN 55022 Class B EN 55024 EN 61000-3-2 EN 61000-3-3 AS/NZS 60950.1 AS/NZS CISPR22 Class B Top
-
 1
1 -
 2
2 -
 3
3 -
 4
4 -
 5
5 -
 6
6 -
 7
7 -
8
-
9
-
10
-
11
-
12
-
13
-
14
-
15
-
16
-
17
-
18
-
19
-
20
-
21
-
22
-
23
-
24
-
25
-
26
-
27
-
28
-
29
-
30
-
31
-
32
-
33
-
34
-
35
-
36
-
37
-
38
-
39
-
40
-
41
-
42
-
43
-
44
-
45
-
46
-
47
-
48
-
49
-
50
-
51
-
52
-
53
-
54
-
55
-
56
-
57
-
58
-
59
-
60
-
61
-
62
-
63
-
64
-
65
-
66
-
67
-
68
-
69
-
70
-
71
-
72
-
73
-
74
-
75
-
76
-
77
-
78
-
79
-
80
 |
 |

User’s Guide
Guide to the Product Parts
Check this section to identify the parts of your
product.
Placing Originals on the Product
Follow the steps here to place your originals
on the product.
How to Scan
Follow the step-by-step instructions here to
scan your originals using any of the available
scanning methods.
Using the Network Interface Panel
Explains network settings and how to scan.
Software Information
Follow the introductions here for driver and
application software that comes with your
product.
Maintenance
Follow the guidelines here to maintain and
transport your product.
Solving Problems
If you have a problem using your product or
its software, check here for solutions.
Technical Specifications
Check here for technical details about your
product and its accessories.
Safety
Copyright and Trademarks
Operating System Versions