Epson EMP-5500 Owners Manual - Page 61
Video Menu (Image source = Computer), the right or left sides of the pointer button remote
 |
View all Epson EMP-5500 manuals
Add to My Manuals
Save this manual to your list of manuals |
Page 61 highlights
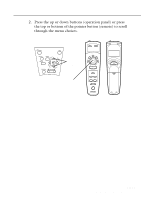
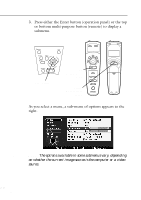
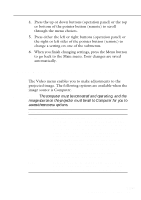
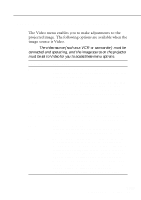
4. Press the up or down buttons (operation panel) or the top or bottom of the pointer button (remote) to scroll through the menu choices. 5. Press either the left or right buttons (operation panel) or the right or left sides of the pointer button (remote) to change a setting on one of the submenus. 6. When you finish changing settings, press the Menu button to go back to the Main menu. Your changes are saved automatically. Video Menu (Image source = Computer) The Video menu enables you to make adjustments to the projected image. The following options are available when the image source is Computer. ♦ Note: The computer must be connected and operating, and the image source on the projector must be set to Computer for you to access these menu options. Menu item Description Position Select this item and then press either multi-purpose button(remote) or the button(operation panel) to enter the screen position adjustment mode. While in the screen position adjustment mode, use the pointer button or the , , and buttons to move the screen position in the corresponding direction. After you finish, press the button to return to the Computer Menu. Tracking Sync Matches the projector's internal clock to various computer graphic signals. Adjust this setting to remove vertical lines from the image. Synchronizes with the tracking signal sent from the computer. Adjust this setting whenever the overall image is fuzzy or to remove streaks from the image. s s s s s s Changing a Menu Setting 39
-
 1
1 -
2
-
3
-
4
-
5
-
6
-
7
-
8
-
9
-
10
-
11
-
12
-
13
-
14
-
15
-
16
-
17
-
18
-
19
-
20
-
21
-
22
-
23
-
24
-
25
-
26
-
27
-
28
-
29
-
30
-
31
-
32
-
33
-
34
-
35
-
36
-
37
-
38
-
39
-
40
-
41
-
42
-
43
-
44
-
45
-
46
-
47
-
48
-
49
-
50
-
51
-
52
-
53
-
54
-
55
-
 56
56 -
 57
57 -
 58
58 -
 59
59 -
 60
60 -
 61
61 -
 62
62 -
 63
63 -
 64
64 -
 65
65 -
 66
66 -
67
-
68
-
69
-
70
-
71
-
72
-
73
-
74
-
75
-
76
-
77
-
78
-
79
-
80
-
81
-
82
-
83
-
84
-
85
-
86
-
87
-
88
-
89
-
90
-
91
-
92
-
93
-
94
-
95
-
96
-
97
-
98
-
99
-
100
 |
 |
