Epson Expression 1680 Professional Product Information Guide - Page 5
Transporting the Transparency Unit, Scanning with EPSON TWAIN Pro - driver
 |
View all Epson Expression 1680 Professional manuals
Add to My Manuals
Save this manual to your list of manuals |
Page 5 highlights
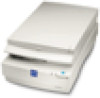
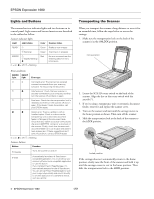
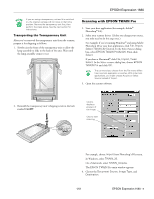
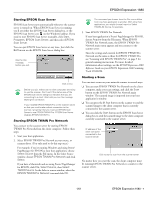
EPSON Expression 1680 If you are using a transparency unit and it is switched on, the scanner carriage will not move to the home position. Remove the transparency unit first, then perform the steps above. See the next section for instructions. Transporting the Transparency Unit After you've removed the transparency unit from the scanner, prepare it for shipping as follows: 1. Slowly raise the front of the transparency unit to allow the lamp assembly to slide to the back of the unit. Wait until the lamp assembly comes to rest. Scanning with EPSON TWAIN Pro 1. Start your host application (for example, Adobe® Photoshop® LE). 2. Select your scanner driver. (Unless you change your source, you only need to do this step once.) For example, if you're running Windows® and using Adobe Photoshop LE as your host application, click File, Import, Select TWAIN_32 Source. In the Select Source dialog box, select EPSON TWAIN Pro(32-bit). Then click Select. If you have a Macintosh®, click File, Import, Twain Select. In the Select a source dialog box, choose EPSON TWAIN Pro and click OK. The command you choose from the File menu differs from one host application to another. With other host applications, you might choose Acquire or Select Source instead of Import. 3. Open the scanner software. 2. Reinstall the transparency unit's shipping screw in the hole marked CLAMP. Click to display a preview of the image. Click to start scanning. For example, choose Import from Photoshop's File menu. In Windows, select TWAIN_32. On a Macintosh, select TWAIN_Acquire. The EPSON TWAIN Pro main window appears. 4. Choose the Document Source, Image Type, and Destination. 1/01 EPSON Expression 1680 - 5
-
 1
1 -
 2
2 -
 3
3 -
 4
4 -
 5
5 -
 6
6 -
 7
7 -
 8
8
 |
 |
