Epson G7905U Users Guide - Page 157
Viewing 3D Images, Saving Settings to Memory and Using Saved Settings, Enter, Type P, Parent topic
 |
View all Epson G7905U manuals
Add to My Manuals
Save this manual to your list of manuals |
Page 157 highlights
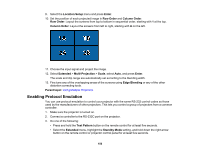
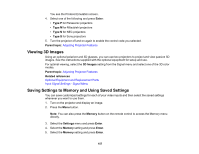
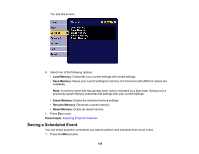
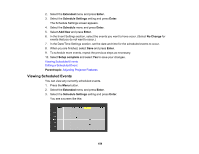
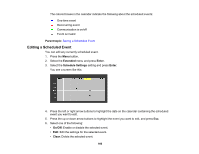
You see the Protocol Emulation screen. 4. Select one of the following and press Enter: • Type P for Panasonic projectors • Type M for Mitsubishi projectors • Type N for NEC projectors • Type S for Sony projectors 5. Turn the projector off and on again to enable the control code you selected. Parent topic: Adjusting Projector Features Viewing 3D Images Using an optional polarizer and 3D glasses, you can use two projectors to project and view passive 3D images. See the instructions supplied with the optional equipment for setup and use. For optimal viewing, select the 3D Images setting from the Signal menu and select one of the 3D color modes. Parent topic: Adjusting Projector Features Related references Optional Equipment and Replacement Parts Input Signal Settings - Signal Menu Saving Settings to Memory and Using Saved Settings You can save customized settings for each of your video inputs and then select the saved settings whenever you want to use them. 1. Turn on the projector and display an image. 2. Press the Menu button. Note: You can also press the Memory button on the remote control to access the Memory menu directly. 3. Select the Settings menu and press Enter. 4. Select the Memory setting and press Enter. 5. Select the Memory setting and press Enter. 157
-
 1
1 -
2
-
3
-
4
-
5
-
6
-
7
-
8
-
9
-
10
-
11
-
12
-
13
-
14
-
15
-
16
-
17
-
18
-
19
-
20
-
21
-
22
-
23
-
24
-
25
-
26
-
27
-
28
-
29
-
30
-
31
-
32
-
33
-
34
-
35
-
36
-
37
-
38
-
39
-
40
-
41
-
42
-
43
-
44
-
45
-
46
-
47
-
48
-
49
-
50
-
51
-
52
-
53
-
54
-
55
-
56
-
57
-
58
-
59
-
60
-
61
-
62
-
63
-
64
-
65
-
66
-
67
-
68
-
69
-
70
-
71
-
72
-
73
-
74
-
75
-
76
-
77
-
78
-
79
-
80
-
81
-
82
-
83
-
84
-
85
-
86
-
87
-
88
-
89
-
90
-
91
-
92
-
93
-
94
-
95
-
96
-
97
-
98
-
99
-
100
-
101
-
102
-
103
-
104
-
105
-
106
-
107
-
108
-
109
-
110
-
111
-
112
-
113
-
114
-
115
-
116
-
117
-
118
-
119
-
120
-
121
-
122
-
123
-
124
-
125
-
126
-
127
-
128
-
129
-
130
-
131
-
132
-
133
-
134
-
135
-
136
-
137
-
138
-
139
-
140
-
141
-
142
-
143
-
144
-
145
-
146
-
147
-
148
-
149
-
150
-
151
-
 152
152 -
 153
153 -
 154
154 -
 155
155 -
 156
156 -
 157
157 -
 158
158 -
 159
159 -
 160
160 -
 161
161 -
 162
162 -
163
-
164
-
165
-
166
-
167
-
168
-
169
-
170
-
171
-
172
-
173
-
174
-
175
-
176
-
177
-
178
-
179
-
180
-
181
-
182
-
183
-
184
-
185
-
186
-
187
-
188
-
189
-
190
-
191
-
192
-
193
-
194
-
195
-
196
-
197
-
198
-
199
-
200
-
201
-
202
-
203
-
204
-
205
-
206
-
207
-
208
-
209
-
210
-
211
-
212
-
213
-
214
-
215
-
216
-
217
-
218
-
219
-
220
-
221
-
222
-
223
-
224
-
225
-
226
-
227
-
228
-
229
-
230
-
231
-
232
-
233
-
234
-
235
-
236
-
237
-
238
-
239
-
240
-
241
-
242
-
243
-
244
-
245
-
246
-
247
-
248
-
249
-
250
-
251
-
252
-
253
-
254
-
255
-
256
-
257
-
258
-
259
-
260
-
261
-
262
-
263
-
264
-
265
-
266
-
267
-
268
-
269
-
270
-
271
-
272
-
273
-
274
-
275
-
276
-
277
-
278
-
279
-
280
-
281
-
282
-
283
-
284
-
285
-
286
-
287
-
288
-
289
-
290
-
291
-
292
-
293
-
294
-
295
-
296
-
297
-
298
-
299
 |
 |
