Epson H6000III Technical Reference - Page 57
Connection Form and Cables - tm opos driver
 |
View all Epson H6000III manuals
Add to My Manuals
Save this manual to your list of manuals |
Page 57 highlights
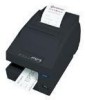
TM-H6000III Technical Reference Guide 2.2 Connection Form and Cables 2.2.1 USB The TM printer can be connected to the host PC via a USB connector, and other TM printers can be connected to the first printer via USB. (See "Changing the DIP Switch Settings" in Chapter 3 for DIP switch settings.) Modular Self-powered USB HUB Cash drawer (Photo-ID model Only) Note: The host PC needs to have an installed "USB device driver" for using USB model TM printer. See "Downloading Drivers, Utilities, and Manuals" on page 2-4. See the readme_e.txt of the driver for the procedure for installing. EPSON does not supply the port driver or similar program necessary to control the USB interface printer with the ESC/POS commands. Control it with the driver (APD, OPOS or JavaPOS). If you connect a Customer Display, set DIP switch settings as follows. For details, see the User's Manual packed with your Customer Display. Item Transmission setting Transmission speed Parity Data word length Selection 19200 bps None 8 bits Before turning on the printer, be sure to turn on the Customer Display. If you reverse the order, the Customer Display will not be recognized correctly. To satisfy the EMI standard, be sure to mount the ferrite core on the display module cable. To mount the ferrite core, put the display module cable into the ferrite core. See also "FAQ" on page C-1 for more details. Rev. E System Planning 2-5
-
 1
1 -
2
-
3
-
4
-
5
-
6
-
7
-
8
-
9
-
10
-
11
-
12
-
13
-
14
-
15
-
16
-
17
-
18
-
19
-
20
-
21
-
22
-
23
-
24
-
25
-
26
-
27
-
28
-
29
-
30
-
31
-
32
-
33
-
34
-
35
-
36
-
37
-
38
-
39
-
40
-
41
-
42
-
43
-
44
-
45
-
46
-
47
-
48
-
49
-
50
-
51
-
 52
52 -
 53
53 -
 54
54 -
 55
55 -
 56
56 -
 57
57 -
 58
58 -
 59
59 -
 60
60 -
 61
61 -
 62
62 -
63
-
64
-
65
-
66
-
67
-
68
-
69
-
70
-
71
-
72
-
73
-
74
-
75
-
76
-
77
-
78
-
79
-
80
-
81
-
82
-
83
-
84
-
85
-
86
-
87
-
88
-
89
-
90
-
91
-
92
-
93
-
94
-
95
-
96
-
97
-
98
-
99
-
100
-
101
-
102
-
103
-
104
-
105
-
106
-
107
-
108
-
109
-
110
-
111
-
112
-
113
-
114
-
115
-
116
-
117
-
118
-
119
-
120
-
121
-
122
-
123
-
124
-
125
-
126
-
127
-
128
-
129
-
130
-
131
-
132
-
133
-
134
-
135
-
136
-
137
-
138
-
139
-
140
 |
 |
