Epson L-1000 User Manual - Page 76
Troubleshooting and Maintenance 4-9, Note: Press lightly on both sides of the cartridge to be sure
 |
View all Epson L-1000 manuals
Add to My Manuals
Save this manual to your list of manuals |
Page 76 highlights
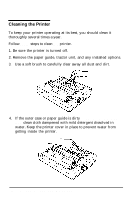
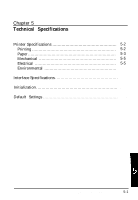
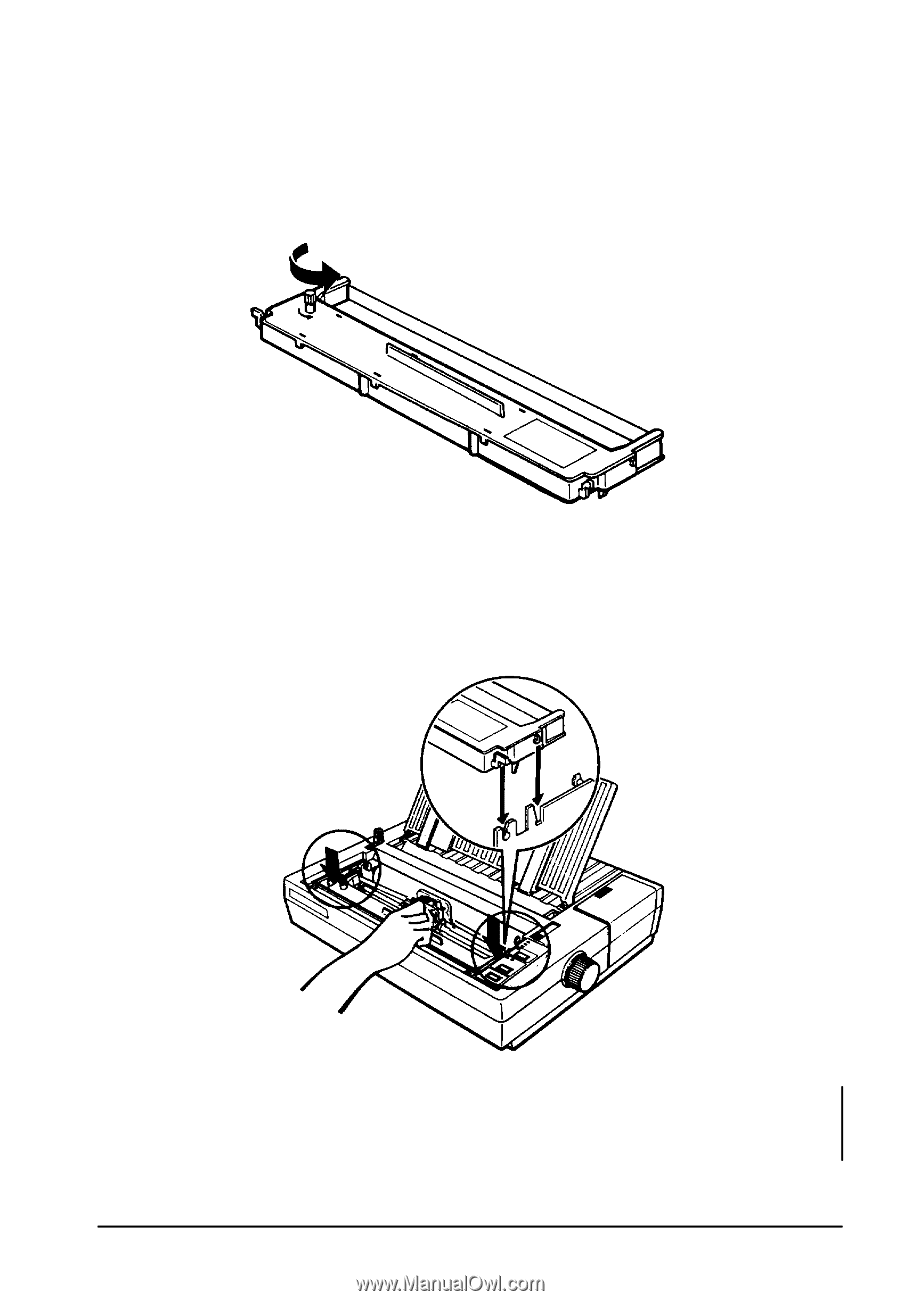
Replacing the Ribbon 4. To remove excess slack in the new ribbon, turn the ribbontightening knob in the direction of the arrow. 5. Push the new ribbon cartridge firmly into position, making sure the plastic hooks fit into the printer. Note: Press lightly on both sides of the cartridge to be sure the hooks are properly inserted. Troubleshooting and Maintenance 4-9
-
 1
1 -
2
-
3
-
4
-
5
-
6
-
7
-
8
-
9
-
10
-
11
-
12
-
13
-
14
-
15
-
16
-
17
-
18
-
19
-
20
-
21
-
22
-
23
-
24
-
25
-
26
-
27
-
28
-
29
-
30
-
31
-
32
-
33
-
34
-
35
-
36
-
37
-
38
-
39
-
40
-
41
-
42
-
43
-
44
-
45
-
46
-
47
-
48
-
49
-
50
-
51
-
52
-
53
-
54
-
55
-
56
-
57
-
58
-
59
-
60
-
61
-
62
-
63
-
64
-
65
-
66
-
67
-
68
-
69
-
70
-
 71
71 -
 72
72 -
 73
73 -
 74
74 -
 75
75 -
 76
76 -
 77
77 -
 78
78 -
 79
79 -
 80
80 -
 81
81 -
82
-
83
-
84
-
85
-
86
-
87
-
88
-
89
-
90
-
91
-
92
-
93
-
94
-
95
-
96
-
97
-
98
-
99
-
100
-
101
-
102
-
103
-
104
-
105
-
106
-
107
-
108
-
109
-
110
-
111
-
112
-
113
-
114
-
115
-
116
-
117
-
118
-
119
-
120
-
121
-
122
-
123
-
124
-
125
-
126
-
127
-
128
-
129
-
130
-
131
-
132
-
133
-
134
-
135
-
136
 |
 |
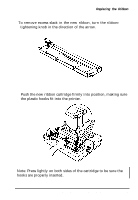
Replacing the Ribbon
4.
To remove excess slack in the new ribbon, turn the ribbon-
tightening knob in the direction of the arrow.
5.
Push the new ribbon cartridge firmly into position, making sure
the plastic hooks fit into the printer.
Note: Press lightly on both sides of the cartridge to be sure the
hooks are properly inserted.
Troubleshooting and Maintenance 4-9