Epson LQ-1500 User Manual - Page 15
Removing the Dust Cover, Paper
 |
View all Epson LQ-1500 manuals
Add to My Manuals
Save this manual to your list of manuals |
Page 15 highlights
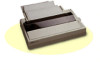
Figure 1-4. Paper feed knob Removing the dust cover The dust cover is the brown plastic cover which keeps dust out of the print mechanism and reduces the noise level when the printer is on. If you are using the optional tractor unit, you will not use the dust cover. Lift off the dust cover. It just sits in a recess on the top of the printer so removal is easy Set the dust cover aside if you will be needing it. Put it away in the printer box if you plan to use the optional tractor unit. Removing the front cover The next assembly step, installing the ribbon cartridge, first requires a bit of disassembly. You should remove the front cover to gain easier access to the print head when you install the ribbon. Open the front cover by tilting the back edge up and toward you. Push left and up. Gently lift off the cover and set it aside (see Figure 1-5). You'll see it's easier to do than it is to describe! 7
-
 1
1 -
2
-
3
-
4
-
5
-
6
-
7
-
8
-
9
-
 10
10 -
 11
11 -
 12
12 -
 13
13 -
 14
14 -
 15
15 -
 16
16 -
 17
17 -
 18
18 -
 19
19 -
 20
20 -
21
-
22
-
23
-
24
-
25
-
26
-
27
-
28
-
29
-
30
-
31
-
32
-
33
-
34
-
35
-
36
-
37
-
38
-
39
-
40
-
41
-
42
-
43
-
44
-
45
-
46
-
47
-
48
-
49
-
50
-
51
-
52
-
53
-
54
-
55
-
56
-
57
-
58
-
59
-
60
-
61
-
62
-
63
-
64
-
65
-
66
-
67
-
68
-
69
-
70
-
71
-
72
-
73
-
74
-
75
-
76
-
77
-
78
-
79
-
80
-
81
-
82
-
83
-
84
-
85
-
86
-
87
-
88
-
89
-
90
-
91
-
92
-
93
-
94
-
95
-
96
-
97
-
98
-
99
-
100
-
101
-
102
-
103
-
104
-
105
-
106
-
107
-
108
-
109
-
110
-
111
 |
 |
