Epson Moverio BT-300 Users Guide - Page 12
Getting Ready, Part Names and Functions
 |
View all Epson Moverio BT-300 manuals
Add to My Manuals
Save this manual to your list of manuals |
Page 12 highlights
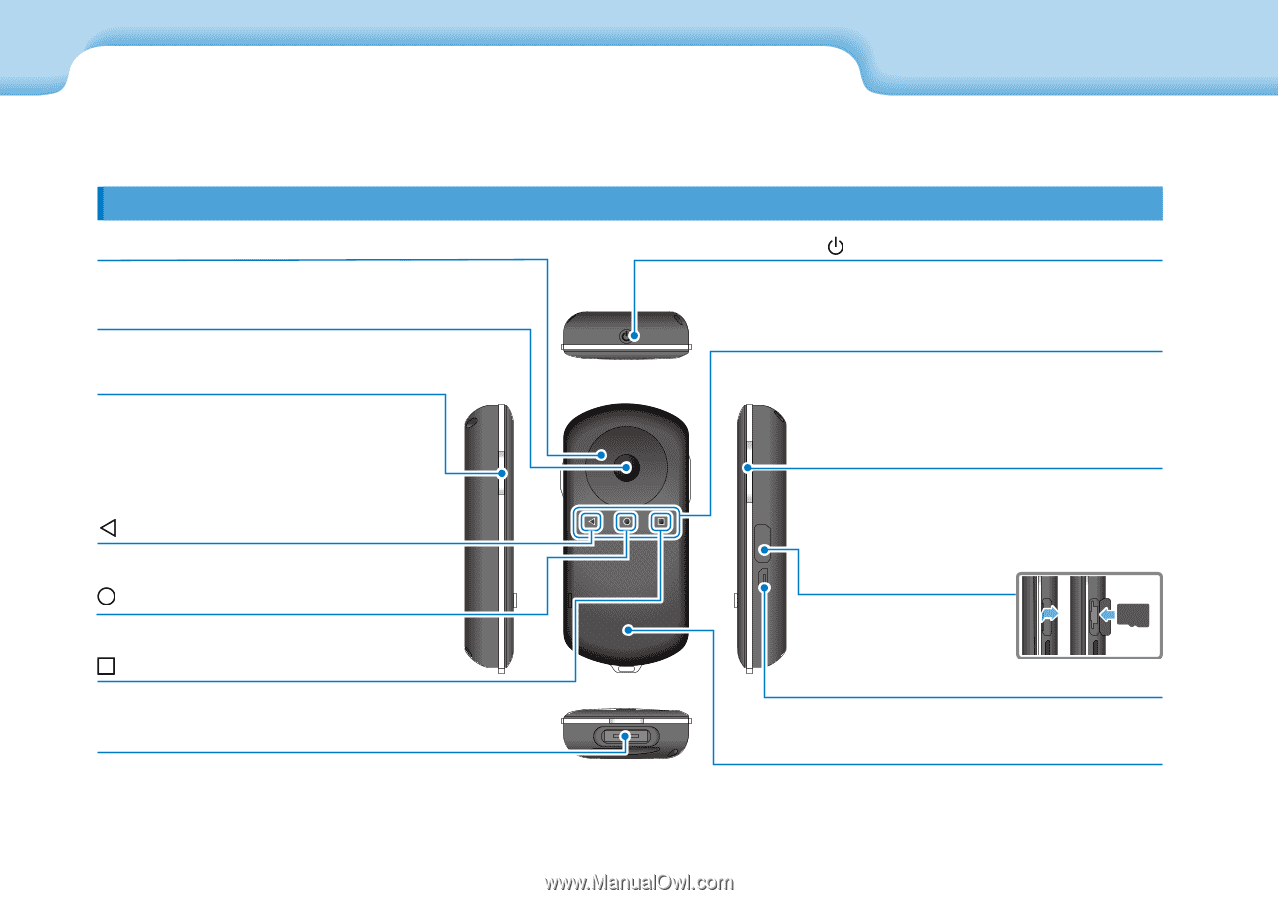
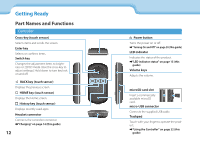
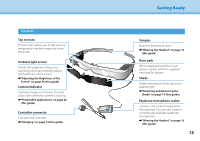
Getting Ready Part Names and Functions Controller Cross-key (touch sensor) Selects items and scrolls the screen. Enter key Selects or confirms items. Switch key Changes the adjustment items to brightness or 2D/3D mode. (Use the cross-key to adjust settings.) Hold down to turn key lock on and off. BACK key (touch sensor) Displays the previous screen. HOME key (touch sensor) Displays the Home screen. History key (touch sensor) Displays recently used apps. Headset connector Connects the controller connector. ➡"Charging" on page 14 (this guide) 12 Power button Turns the power on or off. ➡"Turning On and Off" on page 20 (this guide) LED indicator Indicates the status of the product. ➡"LED indicator status" on page 15 (this guide) Volume keys Adjusts the volume. microSD card slot Insert a commercially available microSD card. micro-USB connector Connects the supplied USB cable. Trackpad Touch with your finger to operate the product. ➡"Using the Controller" on page 22 (this guide)
-
 1
1 -
2
-
3
-
4
-
5
-
6
-
 7
7 -
 8
8 -
 9
9 -
 10
10 -
 11
11 -
 12
12 -
 13
13 -
 14
14 -
 15
15 -
 16
16 -
 17
17 -
18
-
19
-
20
-
21
-
22
-
23
-
24
-
25
-
26
-
27
-
28
-
29
-
30
-
31
-
32
-
33
-
34
-
35
-
36
-
37
-
38
-
39
-
40
-
41
-
42
-
43
-
44
-
45
-
46
-
47
-
48
-
49
-
50
-
51
-
52
-
53
-
54
-
55
-
56
-
57
-
58
-
59
-
60
-
61
-
62
-
63
-
64
-
65
-
66
-
67
 |
 |