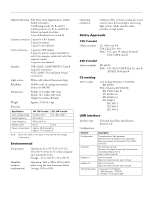
Epson Perfection 1200U Product Information Guide - Page 5
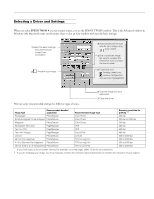
Selecting a Driver and Settings, EPSON Perfection 1200
 |
View all Epson Perfection 1200U manuals
Add to My Manuals
Save this manual to your list of manuals |
Page 5 highlights
EPSON Perfection 1200 Selecting a Driver and Settings When you select EPSON TWAIN 4 as your scanner source, you see the EPSON TWAIN window. This is the Advanced window in Windows (the Macintosh steps are the same); there is also an Easy window with just the basic settings. 1 Select the basic settings: Document Source Image Type Destination 2 Preview your image 3 Automatically set the scan area for your image using Auto Locate 4 Size or scale the image (be sure to increase the Resolution if you increase the size or scale) 5 Customize your Settings, select your preview Configuration, and use color management Here are some recommended settings for different types of scans. 6 Scan the image into your application 7 Close the driver Image type Recommended bundled application Recommended Image Type Scanning resolution for printing 1, 2 Photograph PhotoDeluxe Color Photo 300 dpi Small photograph to be enlarged PhotoDeluxe Color Photo 300 dpi to 2400 dpi Magazine PhotoDeluxe Color Photo 300 dpi Newspaper (text only) PageManager OCR 400 dpi Text for OCR PageManager OCR 400 dpi Text with images PageManager Copy & Fax 400 dpi Line art PhotoDeluxe Line Art 300 to 2400 dpi 35 mm film (negative) PhotoDeluxe TPU for neg.Film 300 to 2400 dpi 4 x 5 or Brownie film (negative) PhotoDeluxe TPU for neg.Film 300 to 2400 dpi 35 mm slide or 4 x 5 transparency PhotoDeluxe TPU for pos.Film 300 to 2400 dpi 1 If your final output is for on-screen viewing (for example, on a web page), select 72 dpi for your resolution. 2 If you are enlarging your image, you must manually increase the resolution (dpi) proportionally to maintain the resolution of your original. 8/99 EPSON Perfection 1200 - 5
-
 1
1 -
 2
2 -
 3
3 -
 4
4 -
 5
5 -
 6
6
 |
 |
