Epson PowerLite 430 User's Guide - Page 50
Using Quick Wireless Connection (Windows Only), Parent topic, TypeA, Run LaunchU3.exe, Allow
 |
View all Epson PowerLite 430 manuals
Add to My Manuals
Save this manual to your list of manuals |
Page 50 highlights
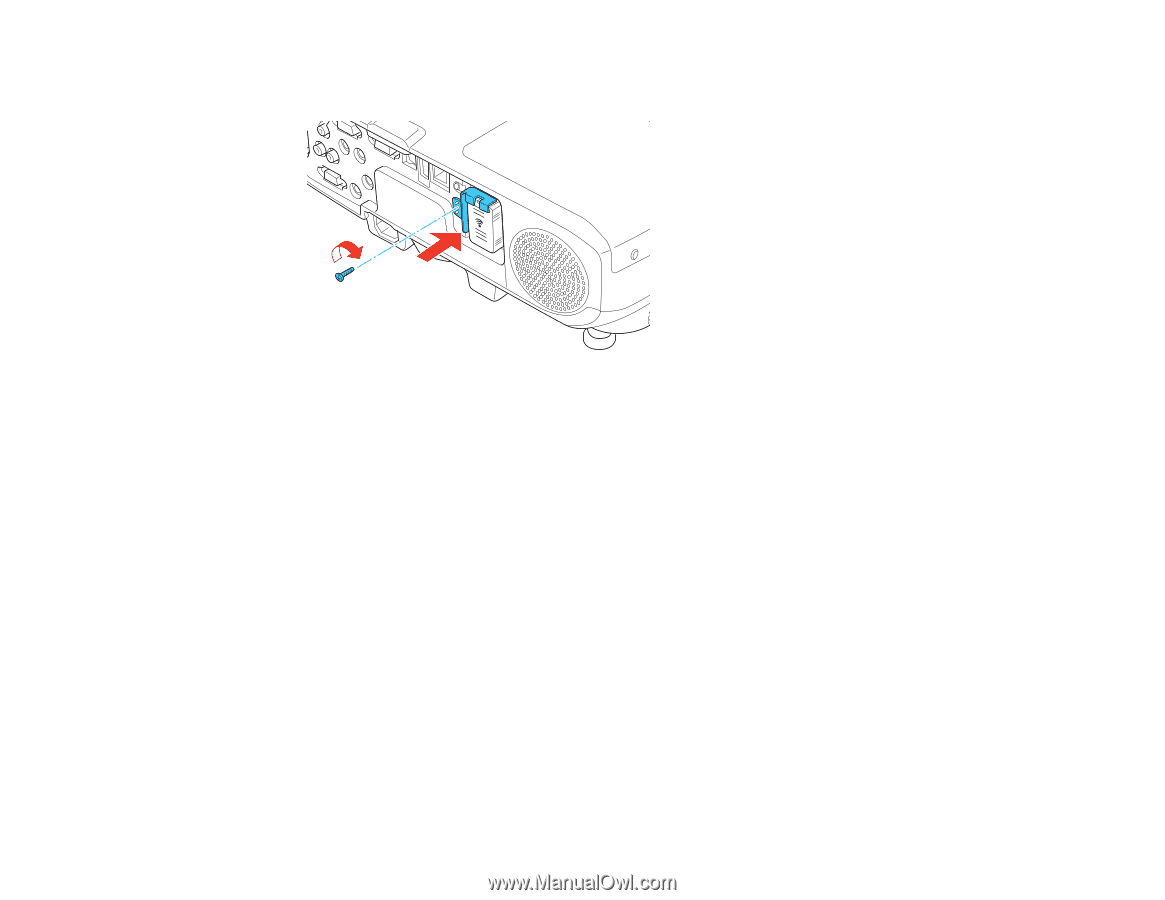
4. Replace the wireless LAN module stopper and secure it using the screw you removed. 5. Plug in and turn on the projector. Parent topic: Wireless Network Projection Using Quick Wireless Connection (Windows Only) You can use the optional Epson Quick Wireless Connection USB key to quickly connect the projector to a Windows computer wirelessly. Then you can project your presentation and remove the key when you are done. 1. Turn on the projector. 2. Connect the USB key to the projector's USB TypeA port. You see a projected message that the network information update is complete. 3. Remove the USB key. 4. Now connect the USB key to a USB port on your computer or notebook. Note: In Windows Vista, if you see the AutoPlay window, select Run LaunchU3.exe, then select Allow on the next screen. 5. Follow the on-screen instructions to install the Quick Wireless Connection driver. Note: If you see a Windows Firewall message, click Yes to disable the firewall. 50
-
 1
1 -
2
-
3
-
4
-
5
-
6
-
7
-
8
-
9
-
10
-
11
-
12
-
13
-
14
-
15
-
16
-
17
-
18
-
19
-
20
-
21
-
22
-
23
-
24
-
25
-
26
-
27
-
28
-
29
-
30
-
31
-
32
-
33
-
34
-
35
-
36
-
37
-
38
-
39
-
40
-
41
-
42
-
43
-
44
-
 45
45 -
 46
46 -
 47
47 -
 48
48 -
 49
49 -
 50
50 -
 51
51 -
 52
52 -
 53
53 -
 54
54 -
 55
55 -
56
-
57
-
58
-
59
-
60
-
61
-
62
-
63
-
64
-
65
-
66
-
67
-
68
-
69
-
70
-
71
-
72
-
73
-
74
-
75
-
76
-
77
-
78
-
79
-
80
-
81
-
82
-
83
-
84
-
85
-
86
-
87
-
88
-
89
-
90
-
91
-
92
-
93
-
94
-
95
-
96
-
97
-
98
-
99
-
100
-
101
-
102
-
103
-
104
-
105
-
106
-
107
-
108
-
109
-
110
-
111
-
112
-
113
-
114
-
115
-
116
-
117
-
118
-
119
-
120
-
121
-
122
-
123
-
124
-
125
-
126
-
127
-
128
-
129
-
130
-
131
-
132
-
133
-
134
-
135
-
136
-
137
-
138
-
139
-
140
-
141
-
142
-
143
-
144
-
145
-
146
-
147
-
148
-
149
-
150
-
151
-
152
-
153
-
154
-
155
-
156
-
157
-
158
-
159
-
160
-
161
-
162
-
163
-
164
-
165
-
166
-
167
-
168
-
169
-
170
-
171
-
172
-
173
-
174
-
175
-
176
-
177
-
178
-
179
-
180
-
181
-
182
-
183
-
184
-
185
-
186
-
187
-
188
-
189
-
190
-
191
-
192
-
193
-
194
-
195
-
196
-
197
-
198
-
199
-
200
-
201
-
202
-
203
-
204
-
205
 |
 |