Epson PowerLite 450W Quick Start - Page 1
Epson PowerLite 450W Manual
 |
View all Epson PowerLite 450W manuals
Add to My Manuals
Save this manual to your list of manuals |
Page 1 highlights
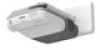
PowerLite® 450W/460 Quick Setup Before using the projector, make sure you read the safety instructions in the User's Guide on your projector CD. Connect the projector Before you can connect to the projector, you need to loosen the screws and remove the cable cover. Network (LAN) Connect the projector to your network using an Ethernet® cable. See "Project over the network" for more information. Microphone Connect a dynamic or condenser microphone to the Mic port, using a 3.5 mm mini-jack cable. Choose from the following connections: Computer Monitor Port Connect a computer using the VGA cable that came with the projector. Connect one end to the projector's Computer1 or Computer2 port, and the other end to your computer's monitor port. If you are using a laptop, switch it to external display. You can also connect an audio cable or microphone. Computer USB Port Connect a computer using a USB cable. Connect the square end of the USB cable to the projector's TypeB (square) USB port. Connect the flat end of the cable to any USB port on your computer. You can also connect an audio cable or microphone. Video Player Connect up to 4 video devices and use the remote control to switch between them. S-Video RCA video cable Component video cable (composite video) Audio cable to VGA cable (optional) (optional) (optional) (optional) Follow the on-screen instructions to install the Epson USB Display software. If you see warning messages, click OK or Continue. (Software is installed only the first time you connect the computer.) Press the USB button on the remote control if necessary. Interactive Whiteboard or Document Camera Connect an interactive whiteboard or document camera to the projector's TypeA (flat) USB port. *411850400* *411850400* For information on playing sound through the projector or connecting an external monitor, see the User's Guide on your projector CD.
-
 1
1 -
 2
2 -
 3
3 -
 4
4
 |
 |
