Epson PowerLite 450W Quick Start - Page 2
Using the remote control, Turn on your equipment, Project over the network - installation
 |
View all Epson PowerLite 450W manuals
Add to My Manuals
Save this manual to your list of manuals |
Page 2 highlights
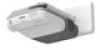
Using the remote control Make sure the batteries are installed as shown (two AA batteries). 5 If you need to focus the image, first slide the switch to open the air filter cover on the side of the projector. Then raise or lower the focus lever to sharpen the image. Air filter cover switch Turn projector on and off Turn off projector display and sound Change presentation slides (USB connection only) Navigate projector menus Choose which source to display Control projector volume You can use the remote control to operate the projector. With the USB cable, you can use the remote as a wireless mouse. For more information on using the remote control, see your User's Guide. Turn on your equipment 1 Turn on your computer or video source. 2 Make sure the power cord is connected and plugged into an electrical outlet. Focus lever Project over the network Install EasyMP® Network Projection on each computer that will project over the network. Use the CD labeled Epson Projector Software for Meeting & Monitoring to install EasyMP Network Projection. If you need to configure the projector for your network, see "Network Configuration" on the back of this sheet. 1 Press the LAN button on the remote control. 2 Start EasyMP Network Projection on your computer. Windows®: Select or Start > Programs or All Programs > EPSON Projector > EasyMP Network Projection. Mac OS® X: Double-click the EasyMP Network Projection icon in your Applications folder. 3 Select Advanced Connection Mode and click OK. 3 Press the power button on the projector or remote control. Power light Power button The power light flashes green, then stays on. NOTE: To shut down the projector, press the power button twice. 4 If you don't see an image, press the Source Search button on the remote control to select the image source. NOTE: If you still see a blank screen or have other display problems, see the troubleshooting tips on the back of this sheet. 4 Select the projector you want to connect to, then click Connect. If you don't see the projector you want, click the Automatic search button. 5 If you see a message asking for a keyword, enter the four digits that appear on the LAN standby screen and click OK. Your computer image is projected, with a floating toolbar: When you're done presenting, click Disconnect on the toolbar. NOTE: Using the optional Wireless LAN module, you can project wirelessly. To purchase the Wireless LAN module or other accessories, see "Optional Accessories" on the back of this sheet. For more information about using the projector on a network, see the User's Guide and EasyMP Network Projection Operation Guide on your projector CD.
-
 1
1 -
 2
2 -
 3
3 -
 4
4
 |
 |
