Epson PowerLite 62c Start Here Card - Page 5
Adjust the image, Install your User’s Guide and register your projector, User's Guide - remote control
 |
View all Epson PowerLite 62c manuals
Add to My Manuals
Save this manual to your list of manuals |
Page 5 highlights
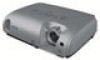
5 Adjust the image 1 To raise the image, press the foot adjust button and lift the front of the projector. Release the button to lock the foot in the position you want. 2 Rotate the focus ring to sharpen the image. Focus ring Zoom ring 3 Rotate the zoom ring to reduce or enlarge the image. (You can also move the projector closer to or farther from the screen.) 4 If your image looks like or , first make sure the projector is facing the screen squarely. Then, if necessary, press the and buttons on the projector's control panel until the image is corrected. 5 To select the best color mode, press the Color Mode button on the projector's remote control repeatedly to move through the options. See your User's Guide on the CD-ROM for more information about image adjustments. Color Mode button 6 Install your User's Guide and register your projector 1 Insert the CD-ROM in your drive. If the installer doesn't open automatically, double-click the Epson CD-ROM icon, then double-click the Epson installer icon. 2 Choose English, then follow the on-screen instructions to register your projector. NOTE You can also register at www.epson.com/webreg. 3 When you are done registering, click User's Guide to install it. If you don't already have Adobe Reader, click Adobe® Reader® and follow the on-screen instructions to install it. 4 When the guide is installed, double-click the User's Guide icon on your desktop to open your User's Guide. Register today to get product updates, special promotions, and customer-only offers.
-
 1
1 -
 2
2 -
 3
3 -
 4
4 -
 5
5 -
 6
6
 |
 |
