Epson PowerLite 84 Quick Setup - Page 2
Turn on your equipment, Adjust the image - problems
 |
View all Epson PowerLite 84 manuals
Add to My Manuals
Save this manual to your list of manuals |
Page 2 highlights
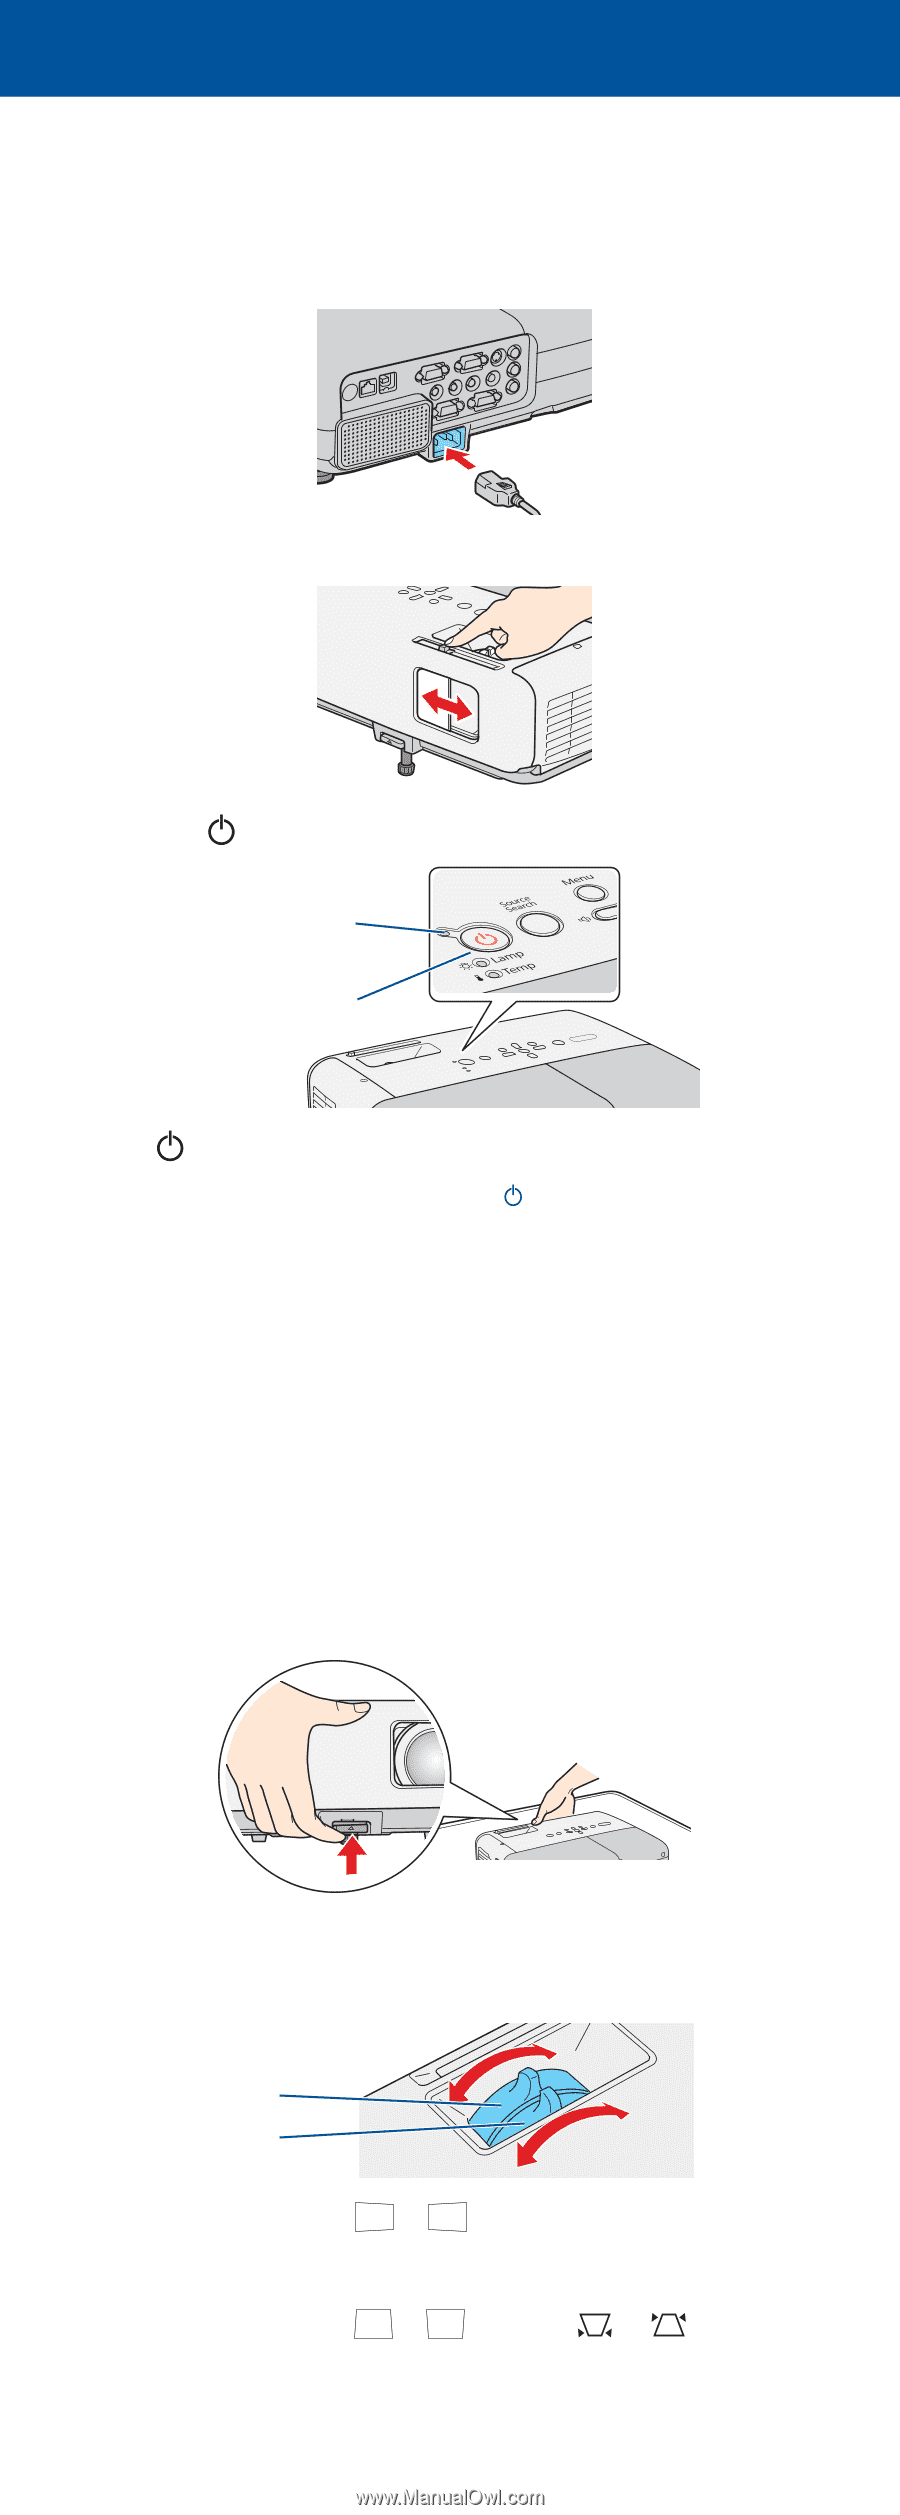
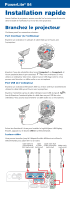
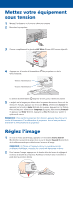
Turn on your equipment 1 Turn on your computer or video source. 2 Plug in the projector. 3 Open the A/V Mute slide all the way. 4 Press the power button on the projector or remote control. Power light Power button The power light flashes green, then stays on. NOTE: To shut down the projector, press the power button twice, then unplug it. You don't have to wait for the projector to cool down. Adjust the image 1 If you don't see an image, press the Source Search button on the projector or the Search button on the remote control to select the image source. NOTE: If you still see a blank screen or have other display problems, see the troubleshooting tips on the right. 2 To raise the image, press the blue foot release button and lift the front of the projector. Release the button to lock the foot in position. 3 Turn the focus ring to sharpen the image. Turn the zoom ring to reduce or enlarge the image. Focus Zoom 4 If your image looks like or , you've placed the projector off to one side of the screen at an angle. Place it directly in front of the center of the screen, facing the screen squarely. 5 If your image looks like or , press the or buttons on the projector to correct it.
-
 1
1 -
 2
2 -
 3
3 -
 4
4 -
 5
5 -
 6
6 -
 7
7 -
 8
8
 |
 |