Epson PowerLite Pro G6470WU User Manual - Page 103
Available Test Pattern Image Adjustments, Enter, Parent topic, Settings, Image, Color Mode
 |
View all Epson PowerLite Pro G6470WU manuals
Add to My Manuals
Save this manual to your list of manuals |
Page 103 highlights
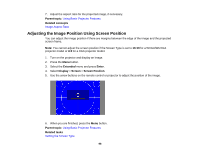
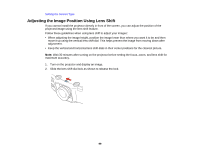
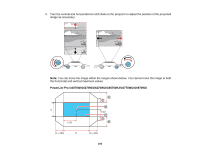
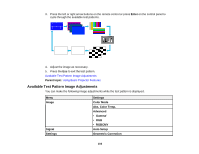
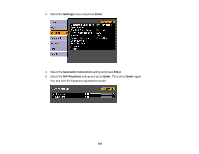
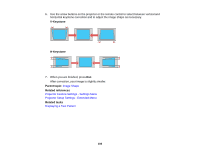
3. Press the left or right arrow buttons on the remote control or press Enter on the control panel to cycle through the available test patterns. 4. Adjust the image as necessary. 5. Press the Esc to exit the test pattern. Available Test Pattern Image Adjustments Parent topic: Using Basic Projector Features Available Test Pattern Image Adjustments You can make the following image adjustments while the test pattern is displayed. Menu Image Signal Settings Settings Color Mode Abs. Color Temp. Advanced • Gamma1 • RGB • RGBCMY Auto Setup Geometric Correction 103
-
 1
1 -
2
-
3
-
4
-
5
-
6
-
7
-
8
-
9
-
10
-
11
-
12
-
13
-
14
-
15
-
16
-
17
-
18
-
19
-
20
-
21
-
22
-
23
-
24
-
25
-
26
-
27
-
28
-
29
-
30
-
31
-
32
-
33
-
34
-
35
-
36
-
37
-
38
-
39
-
40
-
41
-
42
-
43
-
44
-
45
-
46
-
47
-
48
-
49
-
50
-
51
-
52
-
53
-
54
-
55
-
56
-
57
-
58
-
59
-
60
-
61
-
62
-
63
-
64
-
65
-
66
-
67
-
68
-
69
-
70
-
71
-
72
-
73
-
74
-
75
-
76
-
77
-
78
-
79
-
80
-
81
-
82
-
83
-
84
-
85
-
86
-
87
-
88
-
89
-
90
-
91
-
92
-
93
-
94
-
95
-
96
-
97
-
 98
98 -
 99
99 -
 100
100 -
 101
101 -
 102
102 -
 103
103 -
 104
104 -
 105
105 -
 106
106 -
 107
107 -
 108
108 -
109
-
110
-
111
-
112
-
113
-
114
-
115
-
116
-
117
-
118
-
119
-
120
-
121
-
122
-
123
-
124
-
125
-
126
-
127
-
128
-
129
-
130
-
131
-
132
-
133
-
134
-
135
-
136
-
137
-
138
-
139
-
140
-
141
-
142
-
143
-
144
-
145
-
146
-
147
-
148
-
149
-
150
-
151
-
152
-
153
-
154
-
155
-
156
-
157
-
158
-
159
-
160
-
161
-
162
-
163
-
164
-
165
-
166
-
167
-
168
-
169
-
170
-
171
-
172
-
173
-
174
-
175
-
176
-
177
-
178
-
179
-
180
-
181
-
182
-
183
-
184
-
185
-
186
-
187
-
188
-
189
-
190
-
191
-
192
-
193
-
194
-
195
-
196
-
197
-
198
-
199
-
200
-
201
-
202
-
203
-
204
-
205
-
206
-
207
-
208
-
209
-
210
-
211
-
212
-
213
-
214
-
215
-
216
-
217
-
218
-
219
-
220
-
221
-
222
-
223
-
224
-
225
-
226
-
227
-
228
-
229
-
230
-
231
-
232
-
233
-
234
-
235
-
236
-
237
-
238
-
239
-
240
-
241
-
242
-
243
-
244
-
245
-
246
-
247
-
248
-
249
-
250
-
251
-
252
-
253
-
254
-
255
-
256
-
257
-
258
-
259
-
260
-
261
-
262
-
263
-
264
-
265
-
266
-
267
-
268
-
269
-
270
-
271
-
272
-
273
-
274
-
275
-
276
-
277
-
278
-
279
-
280
-
281
-
282
-
283
-
284
-
285
-
286
-
287
-
288
-
289
-
290
-
291
-
292
-
293
-
294
 |
 |
3.
Press the left or right arrow buttons on the remote control or press
Enter
on the control panel to
cycle through the available test patterns.
4.
Adjust the image as necessary.
5.
Press the
Esc
to exit the test pattern.
Available Test Pattern Image Adjustments
Parent topic:
Using Basic Projector Features
Available Test Pattern Image Adjustments
You can make the following image adjustments while the test pattern is displayed.
Menu
Settings
Image
Color Mode
Abs. Color Temp.
Advanced
•
Gamma
1
•
RGB
•
RGBCMY
Signal
Auto Setup
Settings
Geometric Correction
103