Epson PowerLite Pro Z8255NL Operation Guide - EasyMP Network Projection - Page 25
Procedure Before Using the Multi-screen Display Function, Setting the Virtual Display
 |
View all Epson PowerLite Pro Z8255NL manuals
Add to My Manuals
Save this manual to your list of manuals |
Page 25 highlights
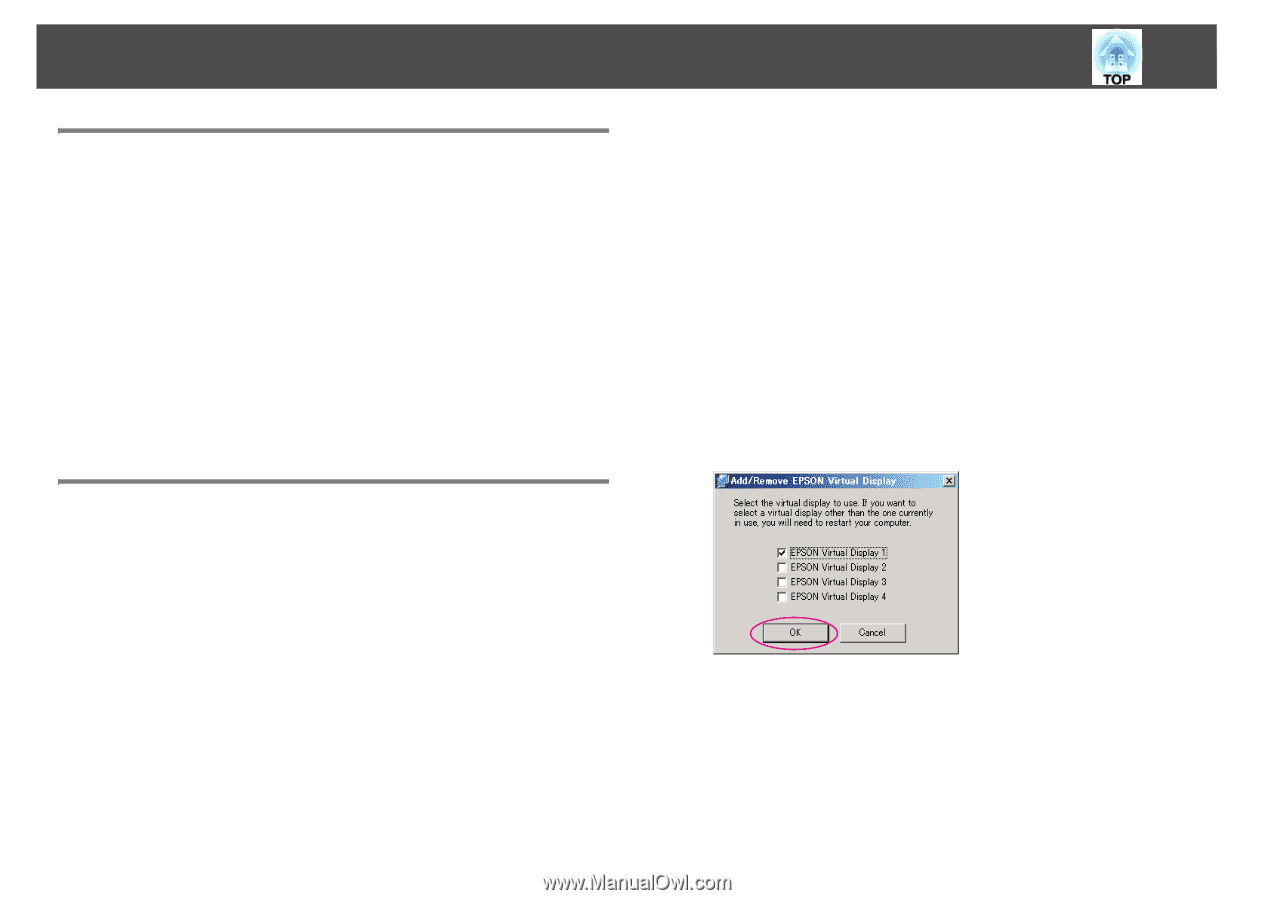
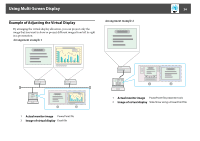
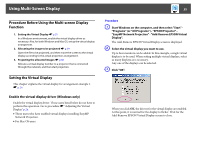
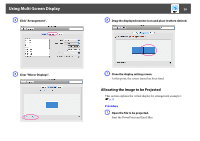
Using Multi-Screen Display 25 Procedure Before Using the Multi-screen Display Function 1. Setting the Virtual Display s p.25 In a Windows environment, enable the virtual display driver as necessary. Also, for both Windows and Mac OS, set up the virtual display arrangement. 2. Allocating the image to be projected s p.29 Open the file to be projected, and then move the screen to the virtual display according to the actual projection arrangement. 3. Projecting the allocated images s p.30 Allocate a virtual display number to a projector that is connected through the network, and then start projection. Setting the Virtual Display This chapter explains the virtual display for arrangement example 1. s p.24 Enable the virtual display driver (Windows only) Enable the virtual display driver. Those users listed below do not have to perform this operation. Go to procedure s "Adjusting the Virtual Display" p.26. • Those users who have enabled virtual displays installing EasyMP Network Projection. • For Mac OS users. Procedure A Start Windows on the computer, and then select "Start" "Programs" (or "All Programs") - "EPSON Projector" "EasyMP Network Projection" - "Add-Remove EPSON Virtual Display". The Add-Remove EPSON Virtual Display screen is displayed. B Select the virtual display you want to use. Up to four monitors can be added. In this example, a single virtual display is to be used. When setting multiple virtual displays, select as many displays as is necessary. Any one of the displays can be selected. C Click "OK". When you click OK, the drivers for the virtual display are enabled. At this point, it is normal for the display to flicker. Wait for the Add-Remove EPSON Virtual Display screen to close.
-
 1
1 -
2
-
3
-
4
-
5
-
6
-
7
-
8
-
9
-
10
-
11
-
12
-
13
-
14
-
15
-
16
-
17
-
18
-
19
-
 20
20 -
 21
21 -
 22
22 -
 23
23 -
 24
24 -
 25
25 -
 26
26 -
 27
27 -
 28
28 -
 29
29 -
 30
30 -
31
-
32
-
33
-
34
-
35
-
36
-
37
-
38
-
39
-
40
-
41
-
42
-
43
-
44
-
45
-
46
-
47
-
48
-
49
-
50
-
51
-
52
-
53
 |
 |